Edit a request or reconciliation in Concur
Travel and p-card
How to edit a request or reconciliation in Concur
Follow the full guide to learn how to edit each part of a request or reconciliation, or use the quick links at the top of the page to skip to a specific section.
As a reminder, travel requests are labeled "requests" in Concur. Select Requests to open a travel request.
Reimbursement requests and p-card reconciliations are labeled "reports" in Concur. Select Expense to open a reimbursement request or p-card reconciliation.
In this guide we’re editing a travel request, so all the images will show the word “request.” If you're editing a reimbursement request or p-card reconciliation, your screens will show "report" instead.
Open the request or reconciliation

Travel requests, reimbursement requests, and p-card reconciliations can be edited anytime before the final approval. For example, if a travel request is submitted and approved by the first approver, it can still be recalled and edited.
Once a request or reconciliation is approved by the final approver, it can’t be recalled and edited. If your request or reconciliation has already been approved, skip to the last section: edit an approved request.
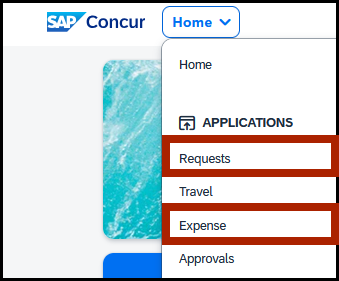
Click Home in the upper left.
To edit a travel request, select Requests from the drop-down menu.
To edit a reimbursement requests or p-card reconciliations, select Expense from the drop-down menu.
If you selected Requests, you’ll see the Manage Requests screen.
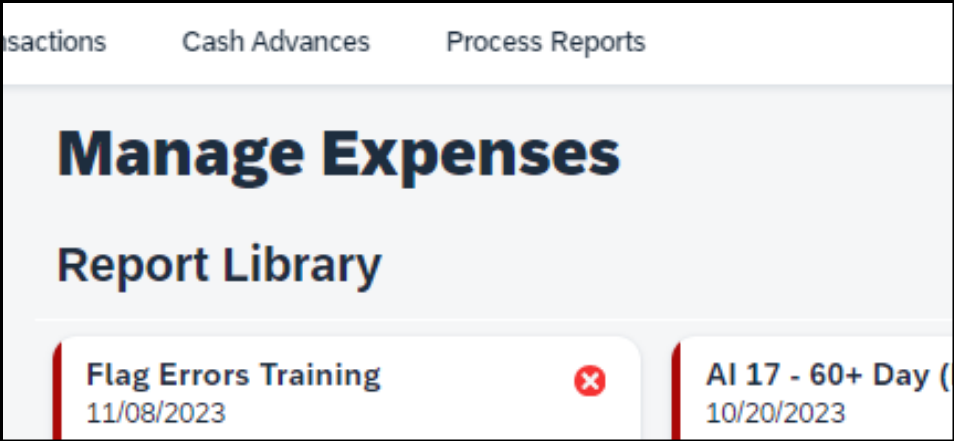
If you selected Expense, you’ll see the Manage Expenses screen.


Select which request or reconciliation you want to edit.
In this example, we’ll select a travel request that was already submitted.
If you’re editing a travel request, you’ll see the Expected Expenses screen.
If you’re editing a reimbursement request or p-card reconciliation, you’ll see the Add Expense screen.

If you’re editing a request that was already submitted, click the blue button Recall in the upper right.

Clicking Recall will un-submit the request so you can make changes. Once you make changes and submit it again, the approval process will start over and the request will be sent back to the first approver.
If you haven’t submitted your request yet, you won’t see a recall button because you only need to recall a request that was already submitted.
Edit the header
From the expense screen, click the blue text Request Details.
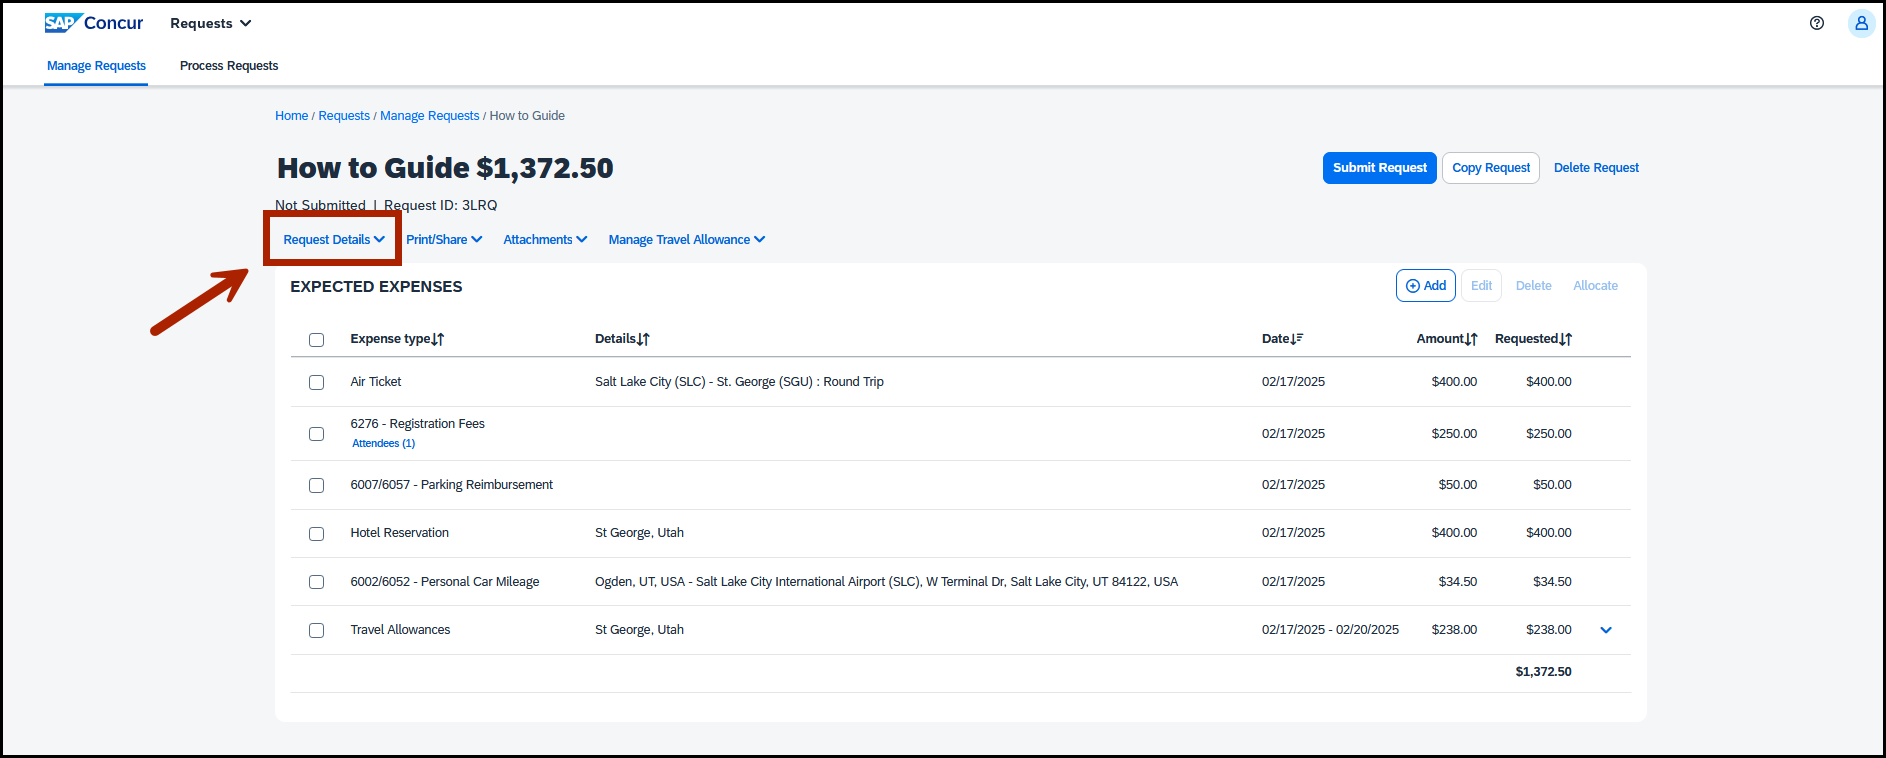

Select Edit Request Header from the drop-down menu.
You’re at the request header! You can now change information in the fields. When you’re done, click the blue button Save.
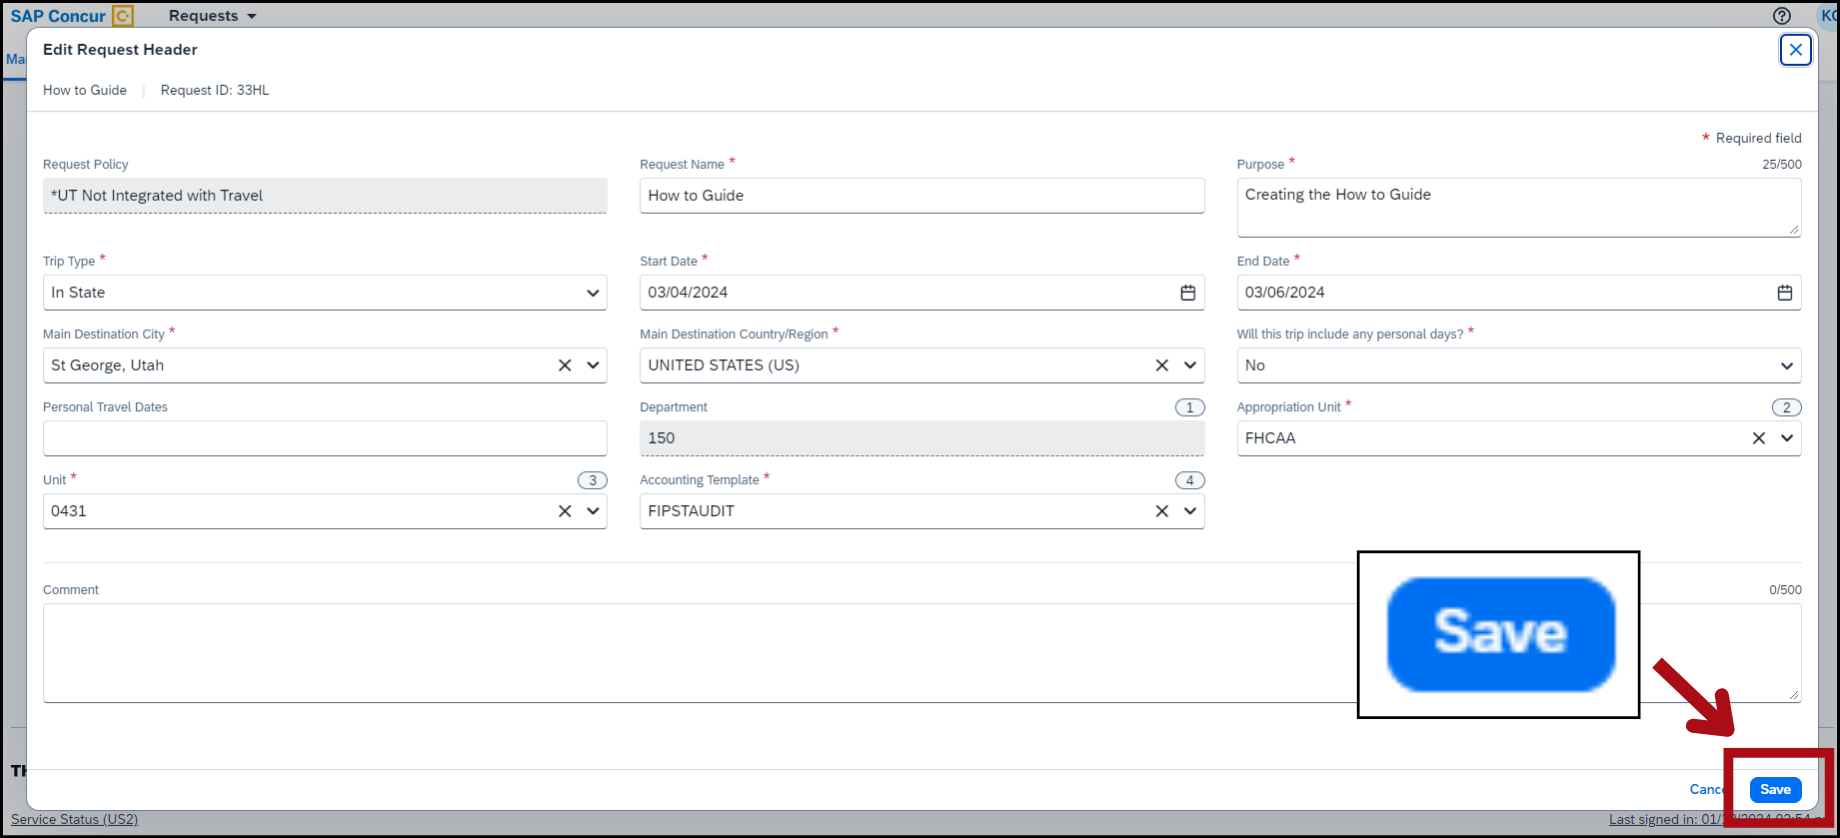
If you click the blue x in the upper-right corner, the request header will close without saving.

After saving the request header, you’re taken back to the expense screen.

Edit an expense
From the expense screen, click anywhere on the expense line to open the data entry screen. For this example, we’ll click on Hotel Reservation.

You’ll see the data entry screen for the expense. Change any information you need to. When you’re done, click Save in the upper-right corner or in the bottom-left corner.
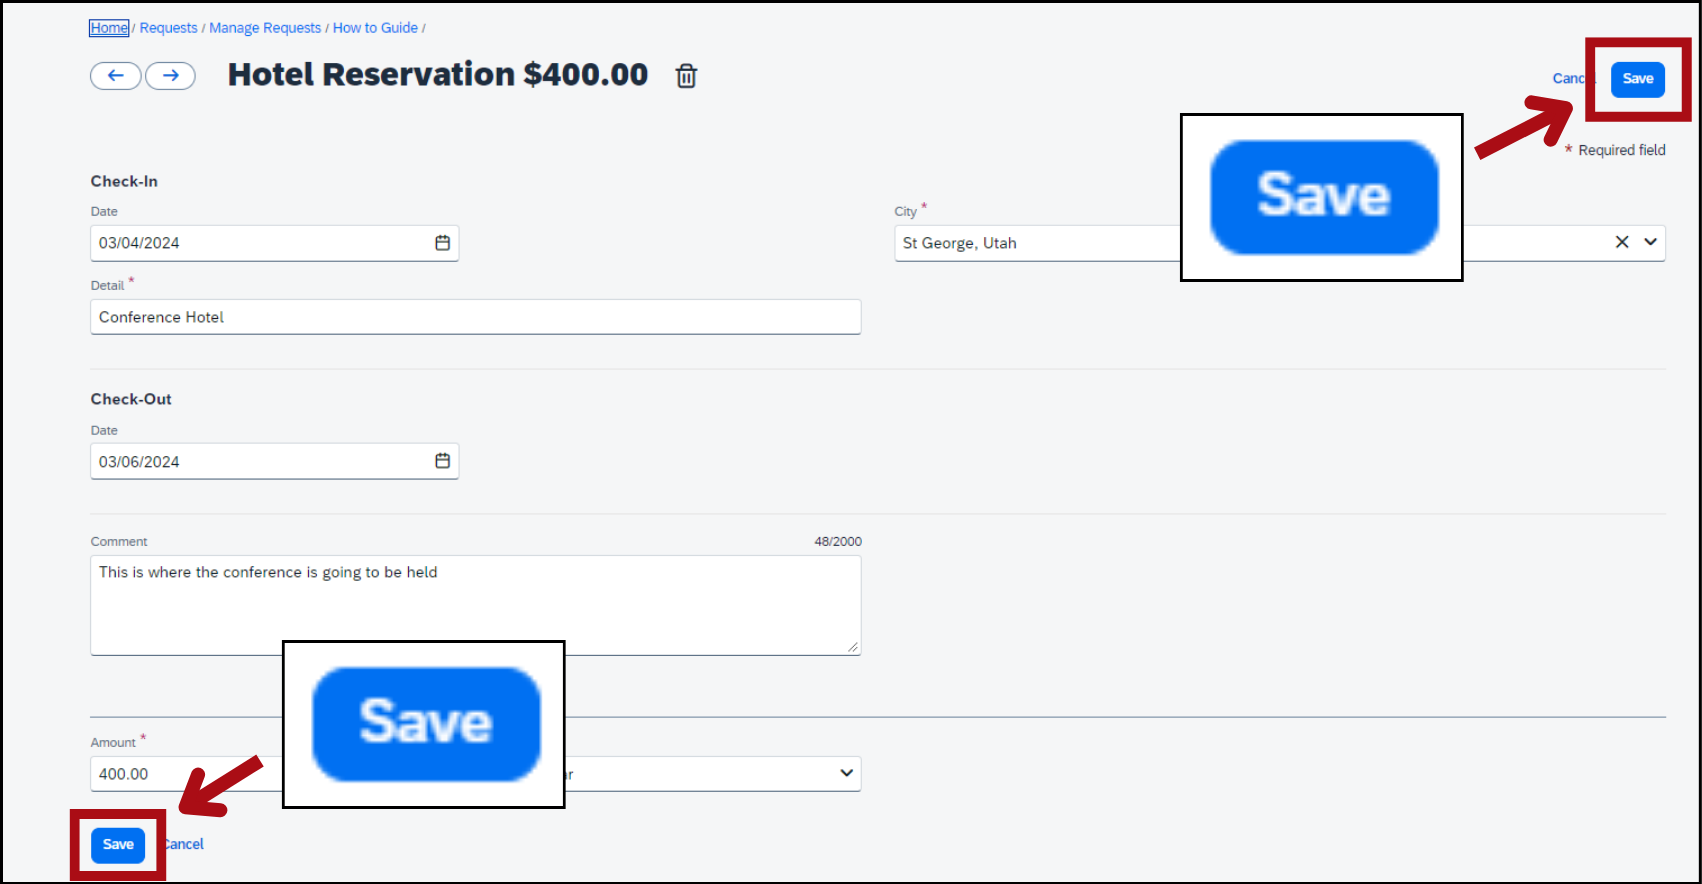
After saving the expense, you’re taken back to the expense screen.
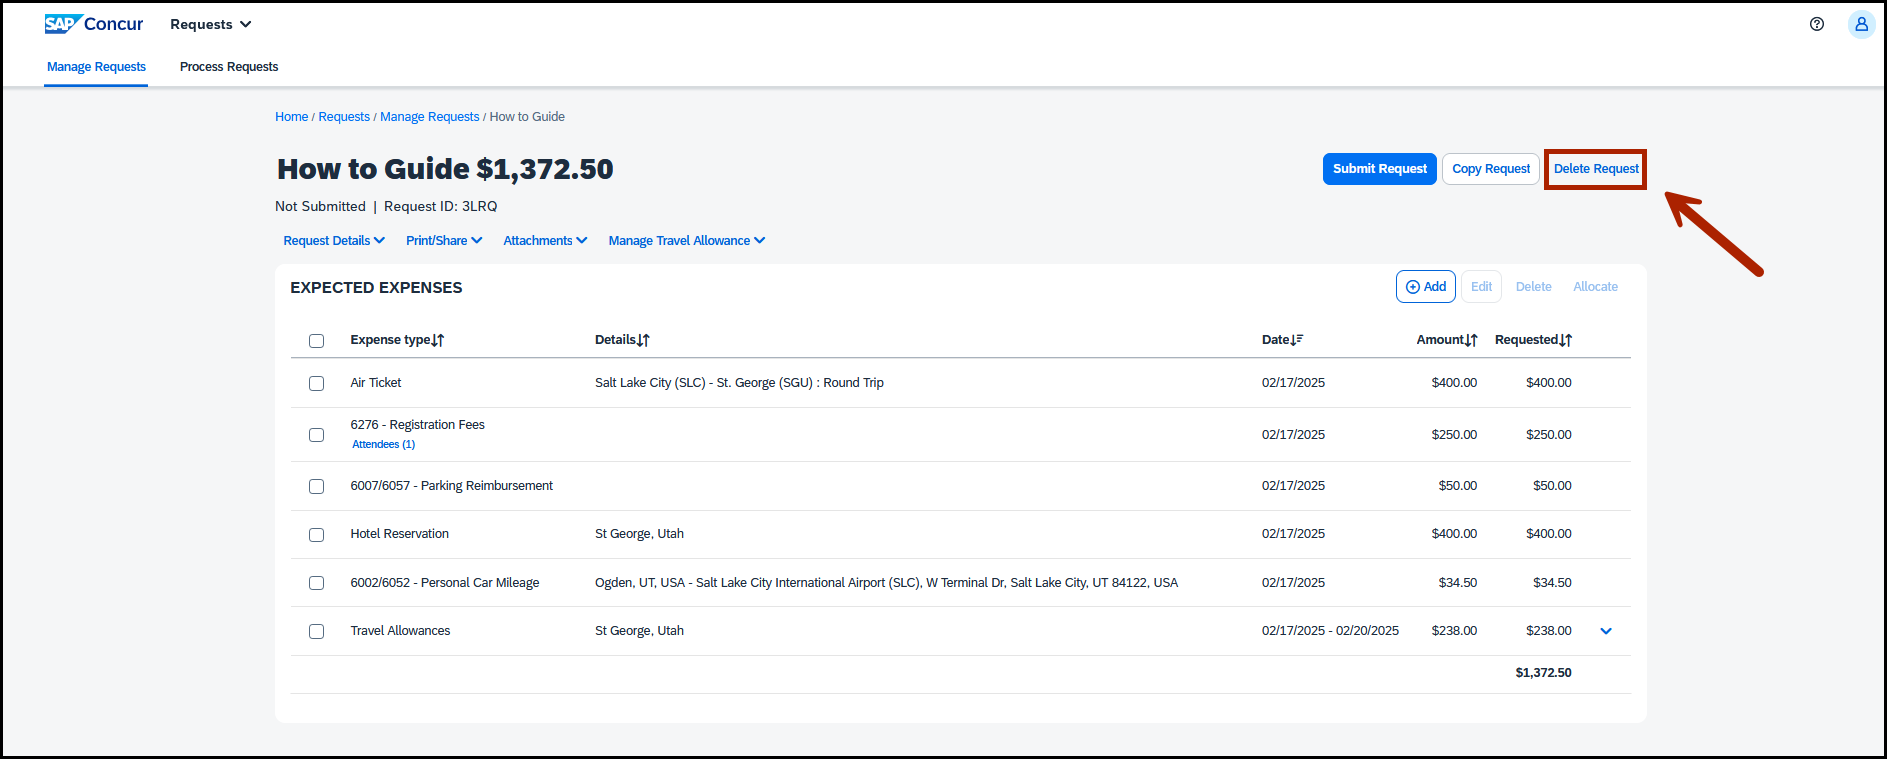
To delete an expense, select the box next to the expense and click Delete.
Edit the travel allowance
From the expense screen, click the blue text Manage Travel Allowance.
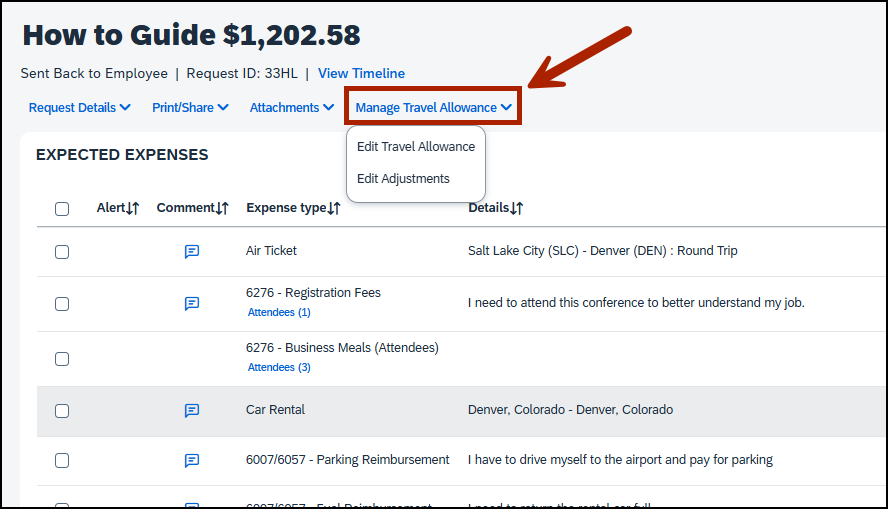
Select Edit Travel Allowance to edit your start location, destination, and dates.
Select Edit Adjustments to edit what days or meals need to be excluded from your request.
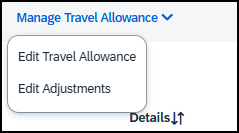
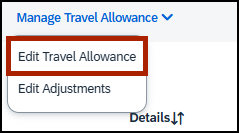
For this example, we’ll select Edit Travel Allowance.
You’re at the Travel Allowance window. Change any fields you need to and click Next in the bottom-right corner.

Next you're at the Adjustments screen. Check or uncheck any boxes you need to and click Save in the bottom-right corner.
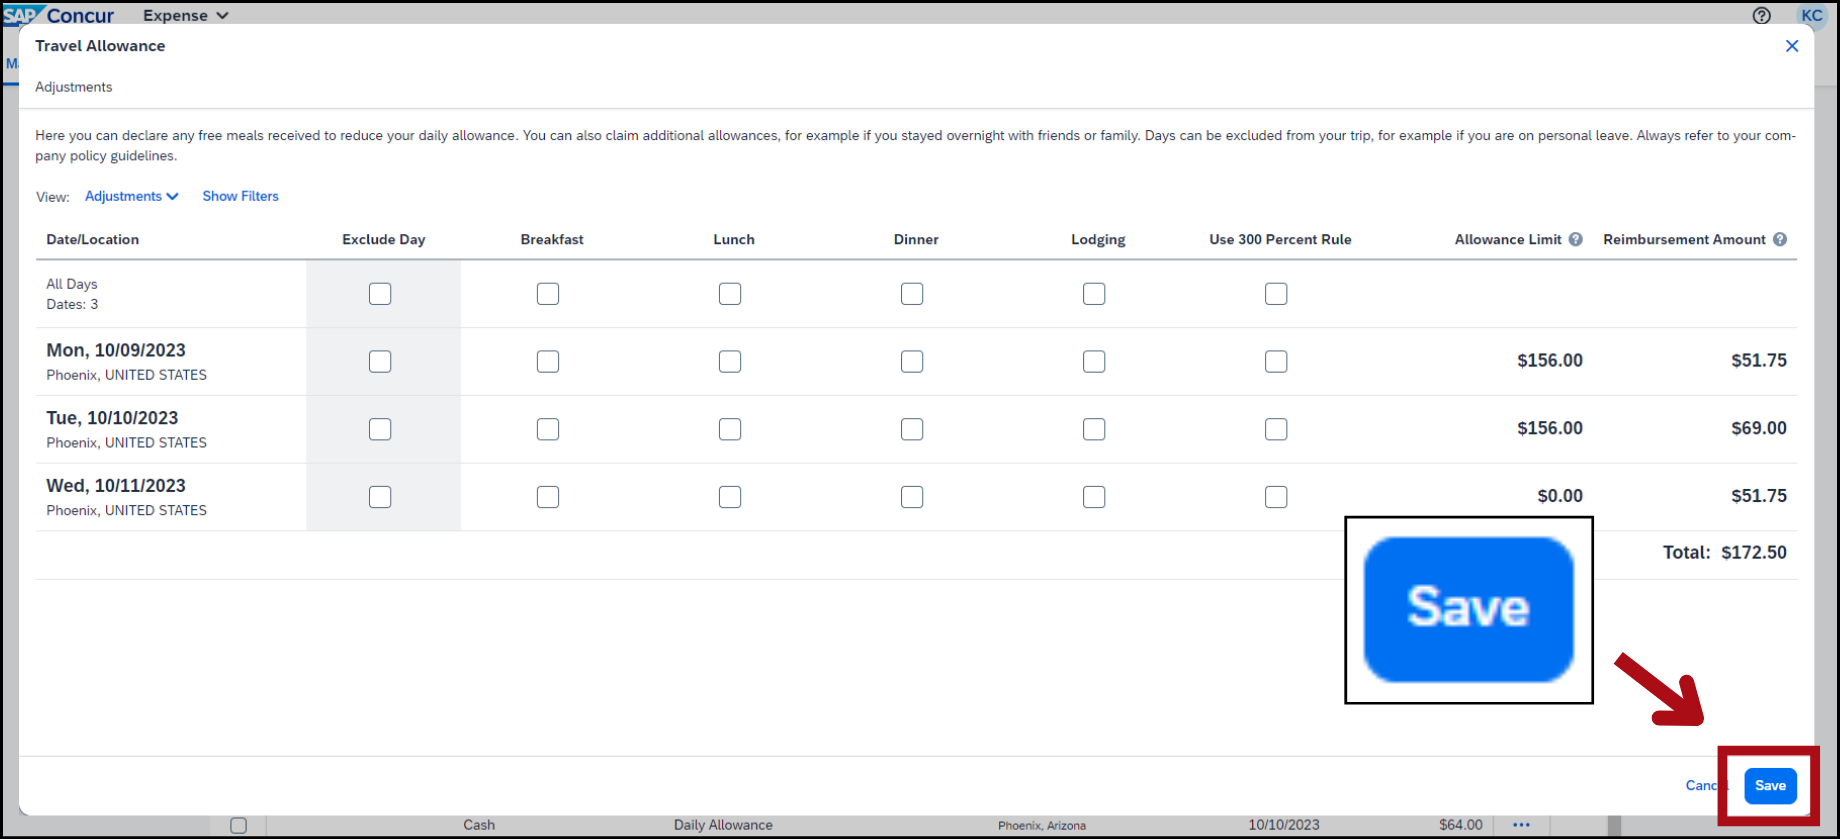
After saving the travel allowance, you’re taken back to the expense screen.

Submit the request or reconciliation
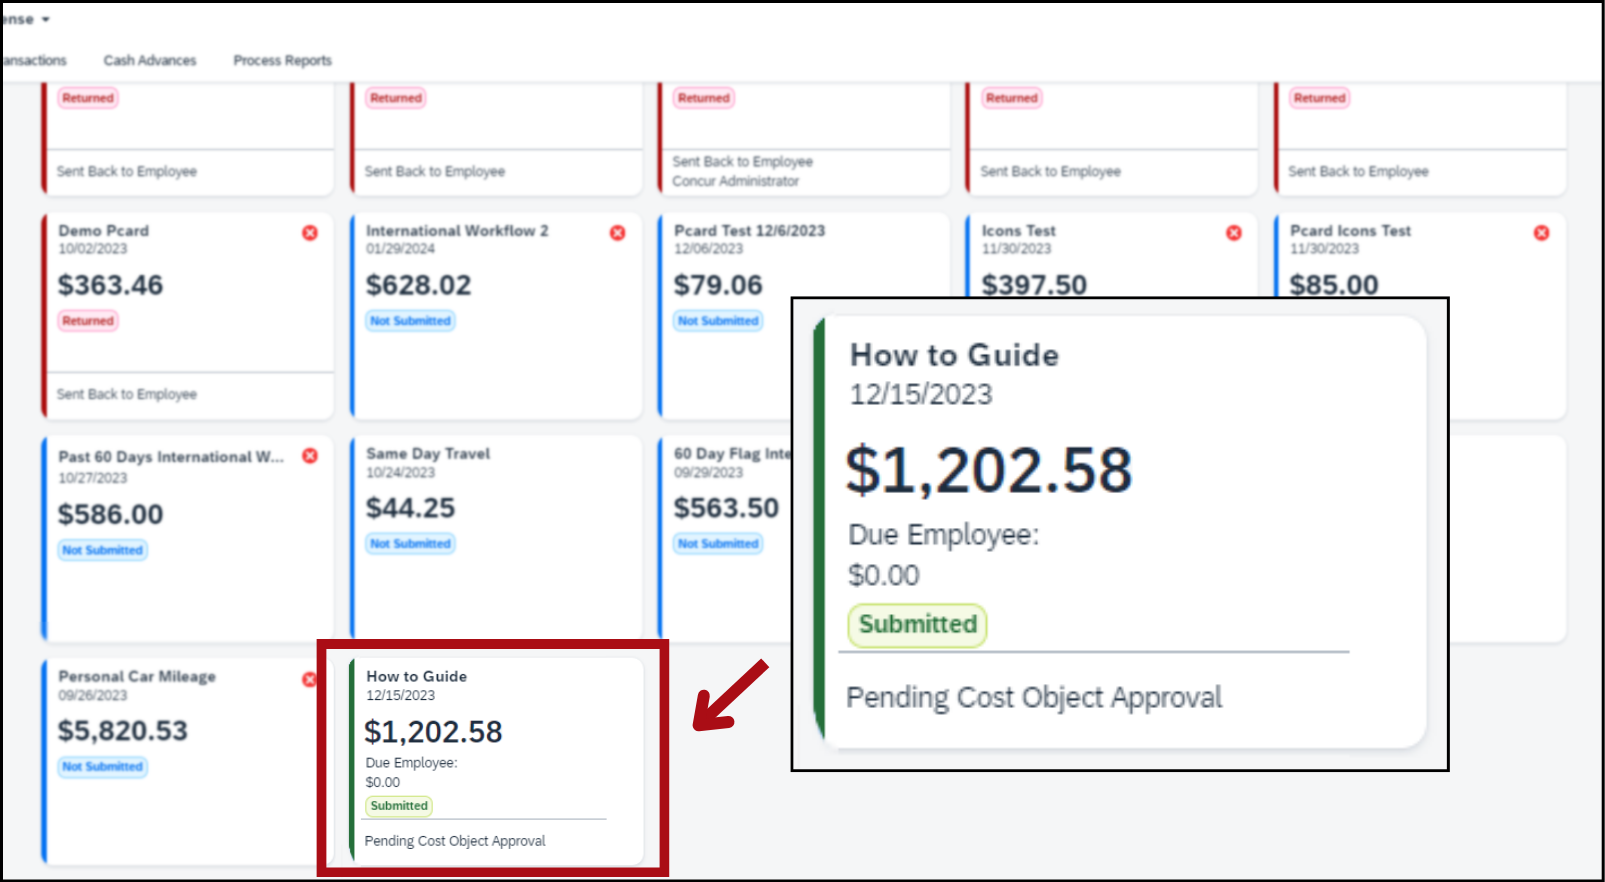
When you’ve changed everything you need to, click the blue button Submit Request from the expense screen.

The request now appears in the Manage Requests or Manage Expenses screen. It shows that it has been submitted and is pending cost object approval, which means it's been sent to the budget officer for approval.
Edit an approved request
Once a travel request has been approved, it can’t be edited. To make changes, you need to make a copy of your approved travel request. Then you can cancel the approved request and edit and submit the copy.

In the upper-left corner, click Home > Requests to open the Manage Requests screen.
From the Manage Requests screen, select your approved travel request to open it.

If you don’t see the travel request in your request library, click the View drop-down menu and select Approved.


You’ll see a list of all of your approved travel requests. Select the travel request you need to edit.
You’re at the Expected Expenses screen. Click Copy Request.
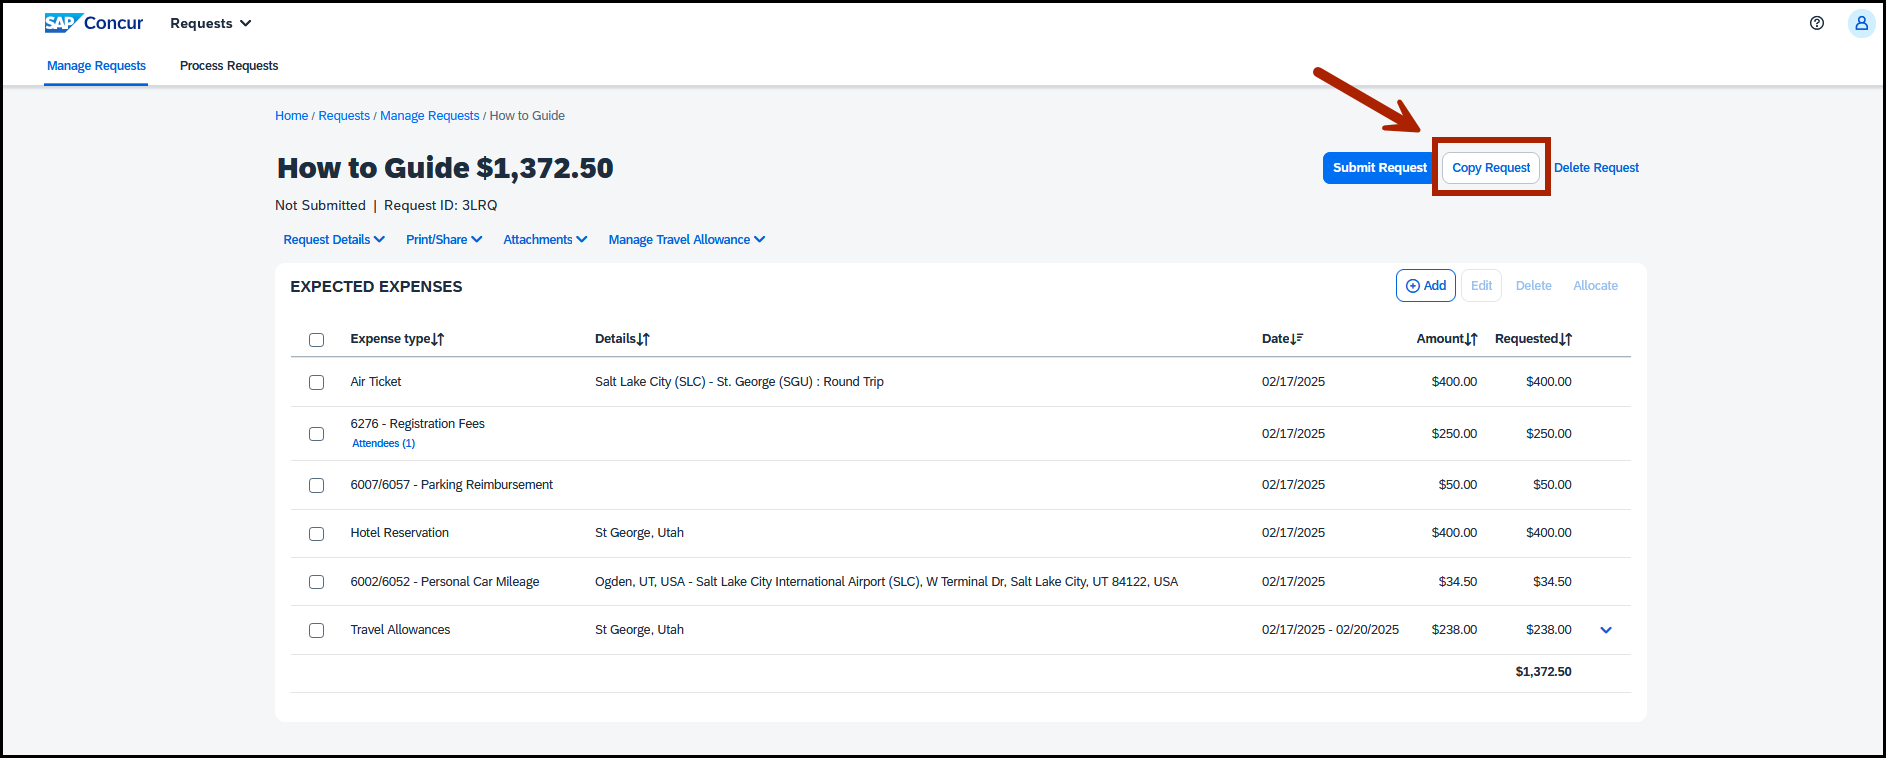

A window labeled Copy Request will appear. Leave the request name and date as is.
Check the box Expenses and click Create New Request.
The new travel request is created! Before making any changes, you need to cancel your original travel request.

To cancel your original travel request, open the request and from the Expected Expenses screen, and select Delete Request.

A window labeled Cancel Request will appear. In the Comment field, explain why you need to cancel the request. Then click OK.

Now, you can open the copied travel request and edit it!
Open the travel request
Edit the header
Edit an expense
Edit the travel allowance
You might also like...
Concur help
Learn about Concur, find more how-to guides, and get answers to common questions
Request a cash advance
Learn how to add a cash advance to your travel request
Close a travel request
Learn how to close a travel request after you've been reimbursed
Travel request policy
Read travel policy 10-4: Travel requests