Create and submit a reimbursement request
Travel and p-card
How to create a submit a reimbursement request in Concur
If you haven't created a reimbursement request before, follow this guide to learn all the steps. If you need to refresh your memory, use the quick links at the top of the page to skip to a specific section. If you don't find the answers you need on this page, submit a general help ticket.
As a reminder, travel requests are labeled "requests" in Concur.
Reimbursement requests and p-card reconciliations are labeled "reports" in Concur.
Create a reimbursement request

If you want to connect your reimbursement request to a travel request, go to the section connect a reimbursement request to a travel request.
If you want to create a reimbursement request that isn't connected to a travel request, follow this section. There are 2 ways to create your request: from the Concur home page or the manage expenses screen.
Option 1: Start your request from the Concur home page

From home page click Create, select Start a Report.
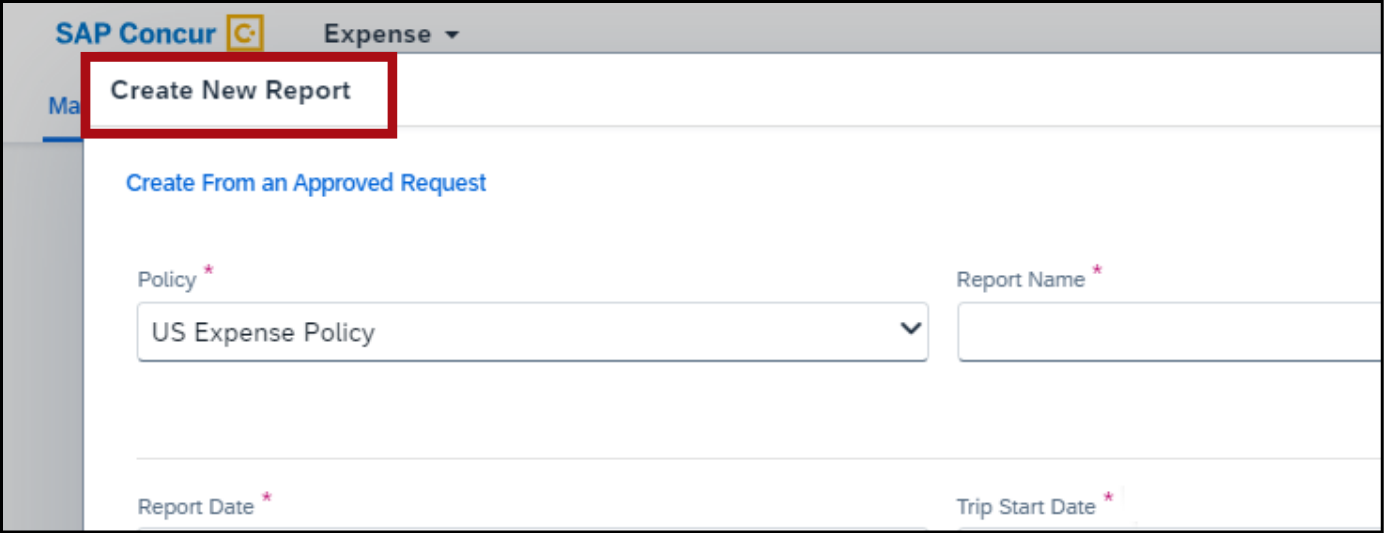
You’ll see a window labeled Create New Report.
This is the report header. Learn how to fill in the report header.
Option 2: Start your request from manage expenses screen

From the home page, click Home > Expense in the upper-left corner.
You’ll see the Manage Expenses screen. Click Create New Report in the upper-right corner.
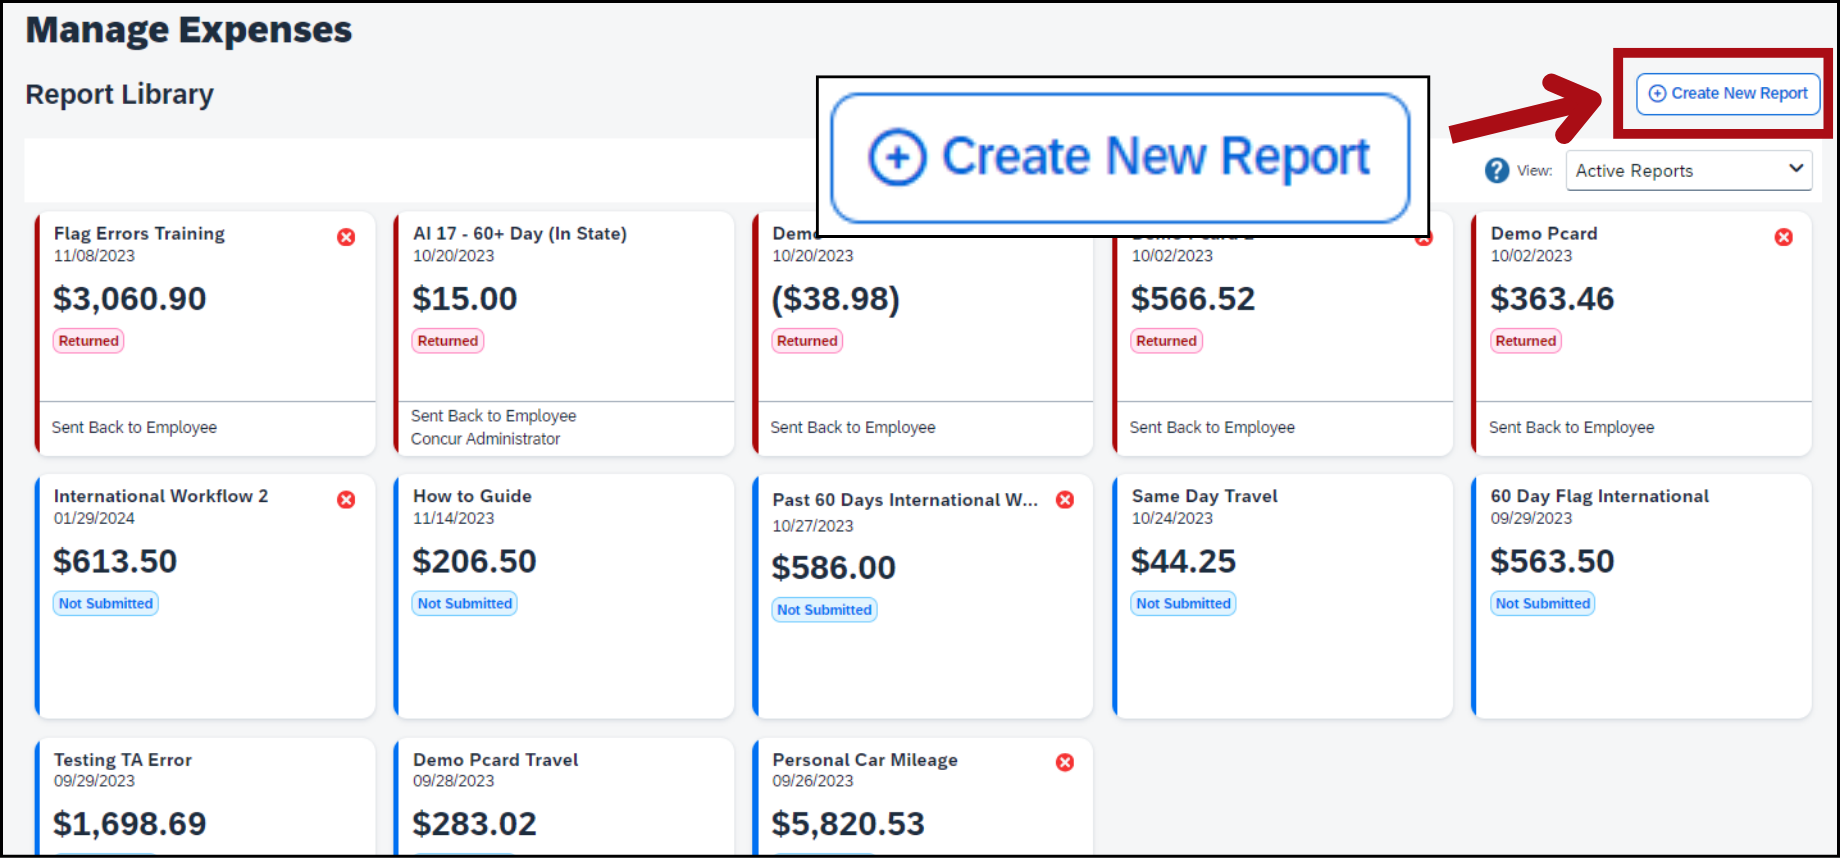
You’ll see a window labeled Create New Report.
This is the report header. Learn how to fill in the report header.
Fill in the report header
In the report header window, make sure the Policy field says US Expense Policy. Then fill in the rest of the fields.
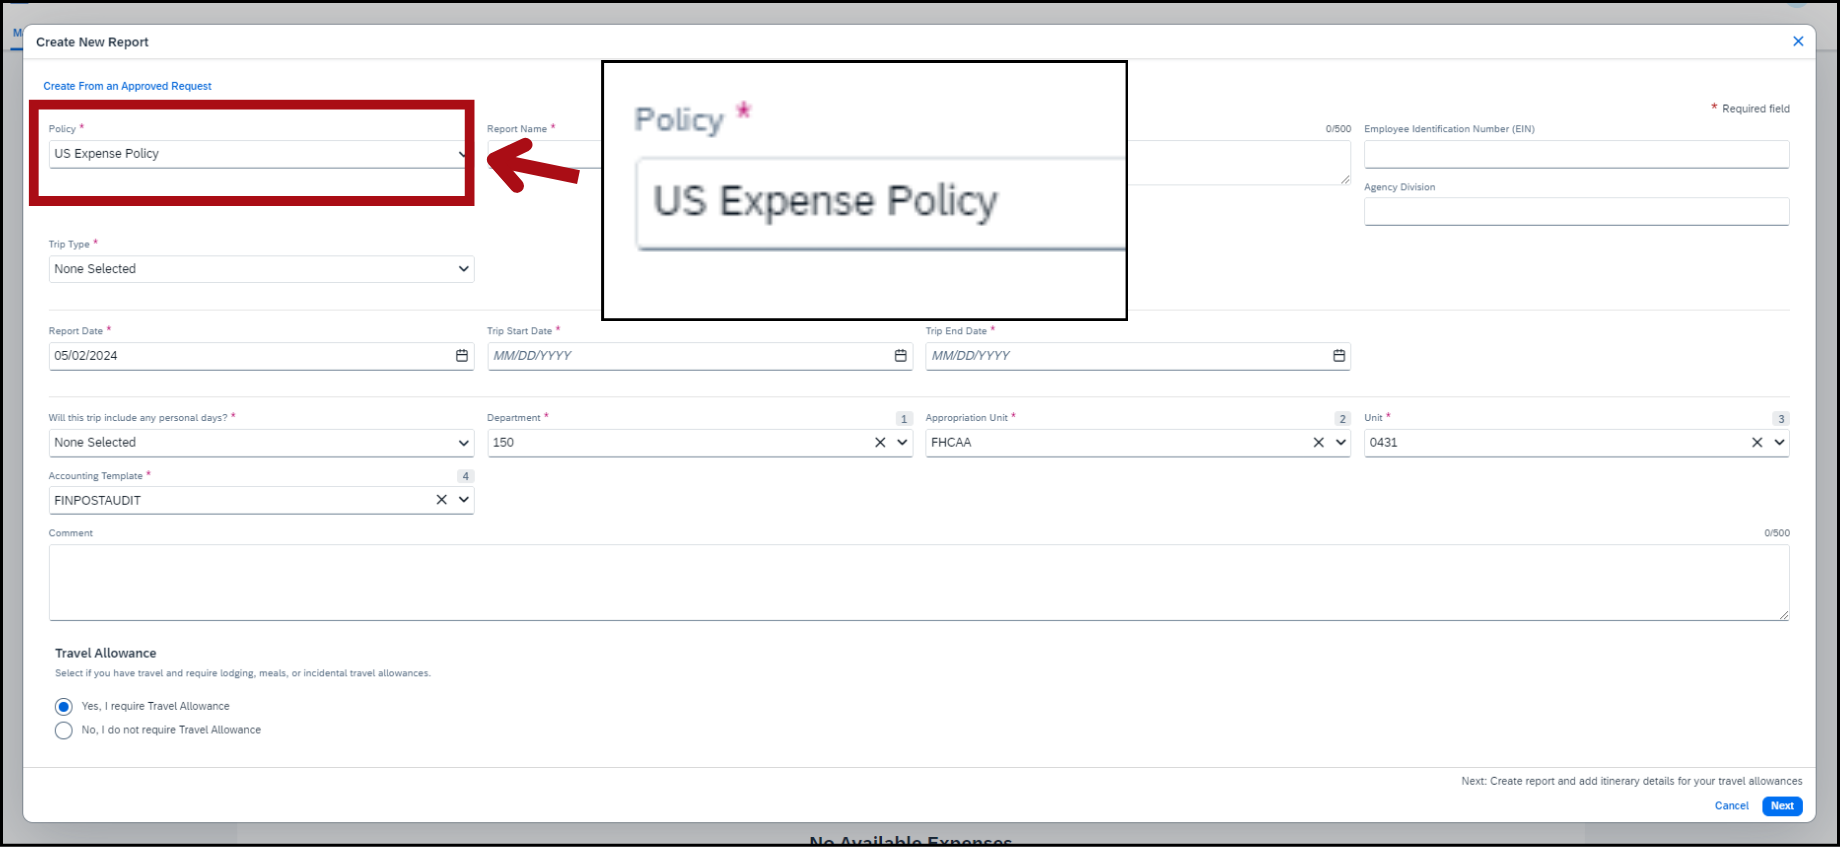
If you need to be reimbursed for meals or lodging, select Yes, I require Travel Allowance in the the bottom-left section labeled Travel Allowance.


When you’ve filled in all the fields, click Next in the bottom-right corner.
If you selected Yes, I require Travel Allowance, you’ll see the Travel Allowance window. Learn how to add the travel allowance.
Add the travel allowance
Also called per diem or GSA rates, the travel allowance is the set amount a traveler is reimbursed for lodging, meals, and incidental expenses.
You have to add the travel allowance to your reimbursement request to be reimbursed for these expenses.
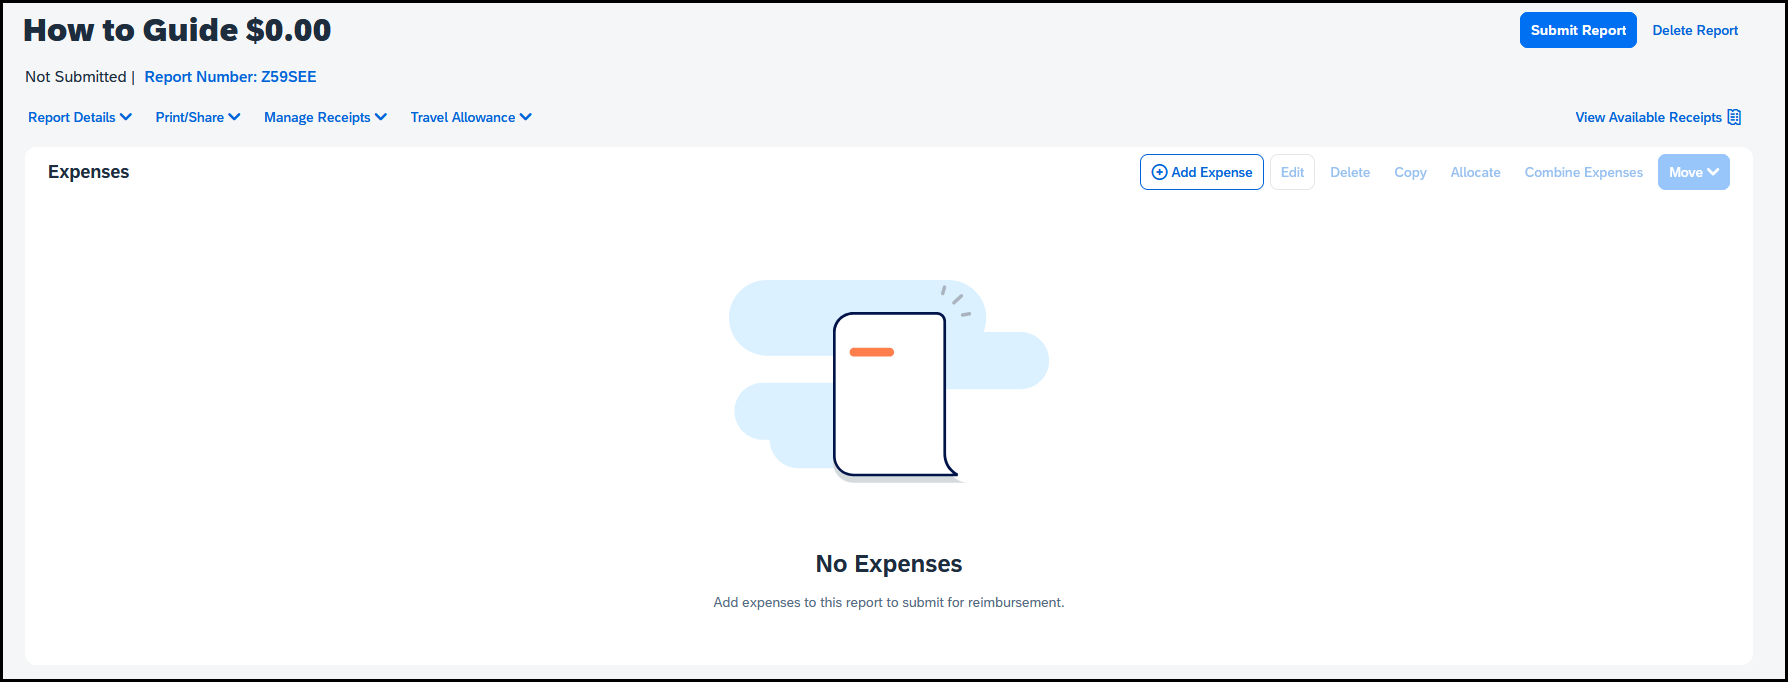
If you didn’t add the travel allowance from the report header, you need to add it from the Add Expenses screen.
Click the blue text Travel Allowance, then click the button Add Travel Allowance.

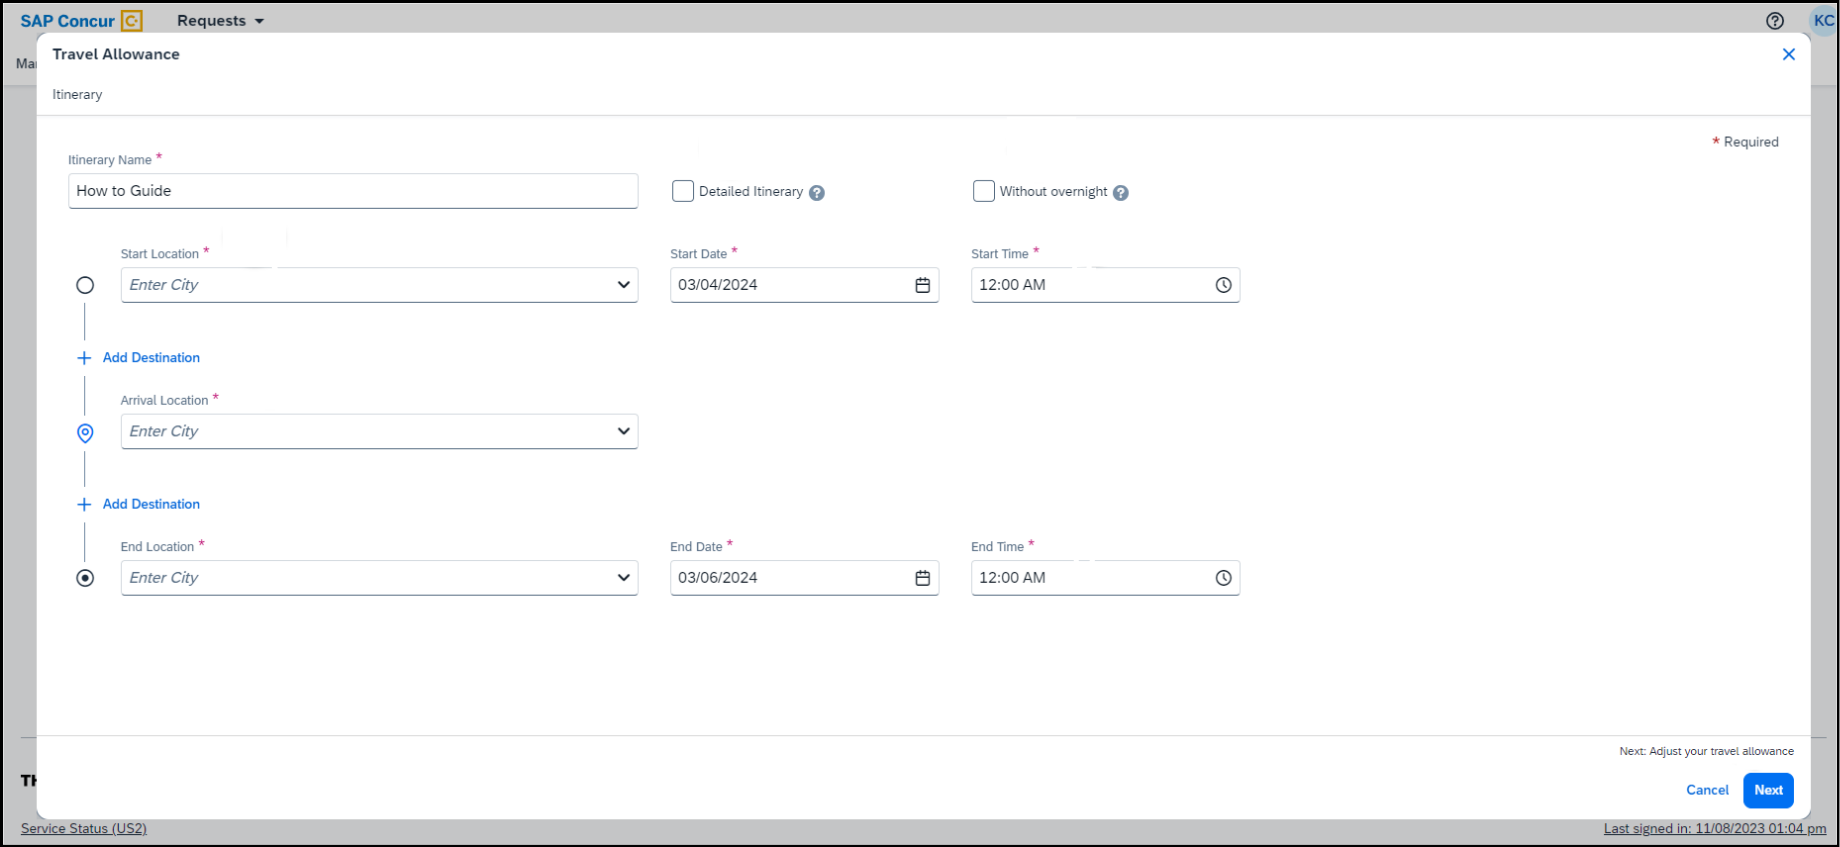
You’ll see a window labeled Travel Allowance, fill in the fields.
If your destination city doesn’t come up automatically, try adding other nearby cities. Choose the city that’s closest to your destination to make sure the correct rate is loaded.
If you have multiple overnight stays at different locations, check the box Detailed Itinerary.
If you’re not staying overnight at your destination, check the box Without overnight.
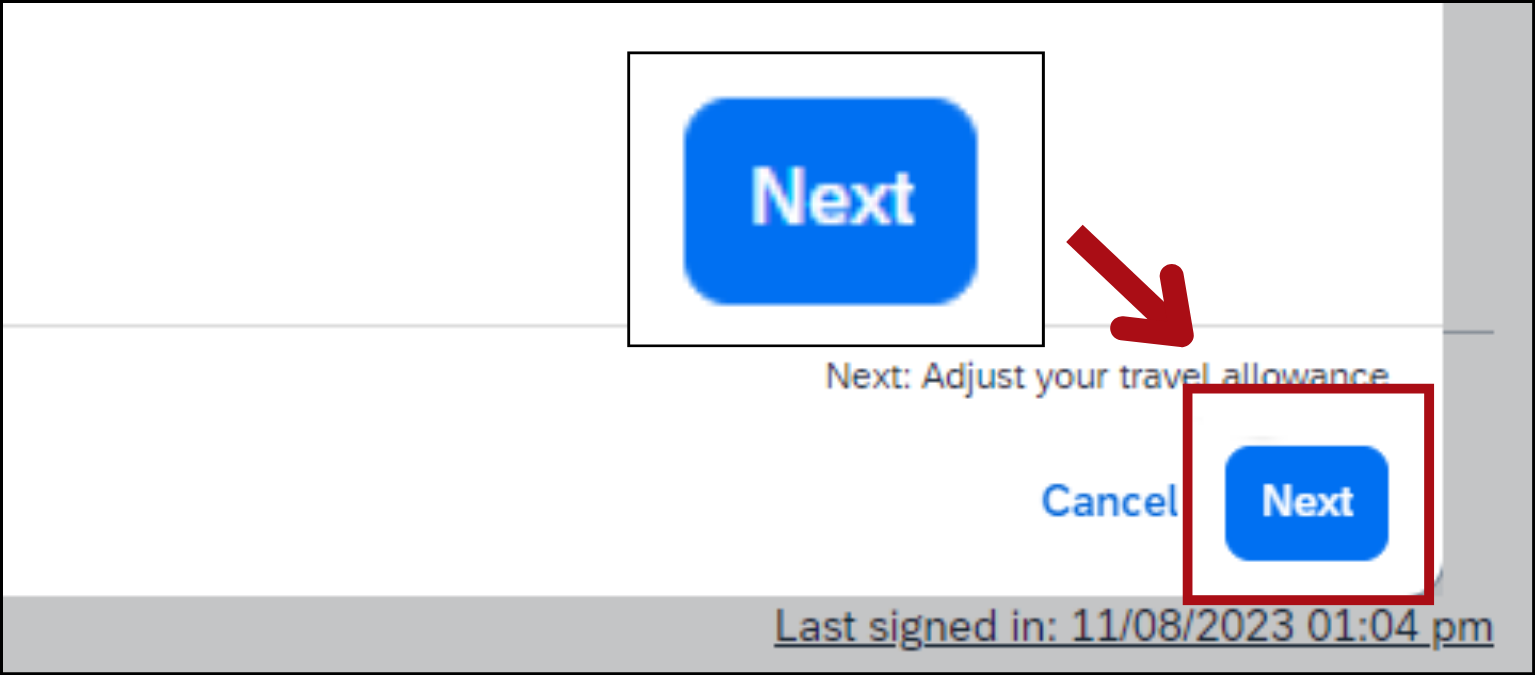
When you’ve filled in all the fields, click Next in the bottom-right corner.
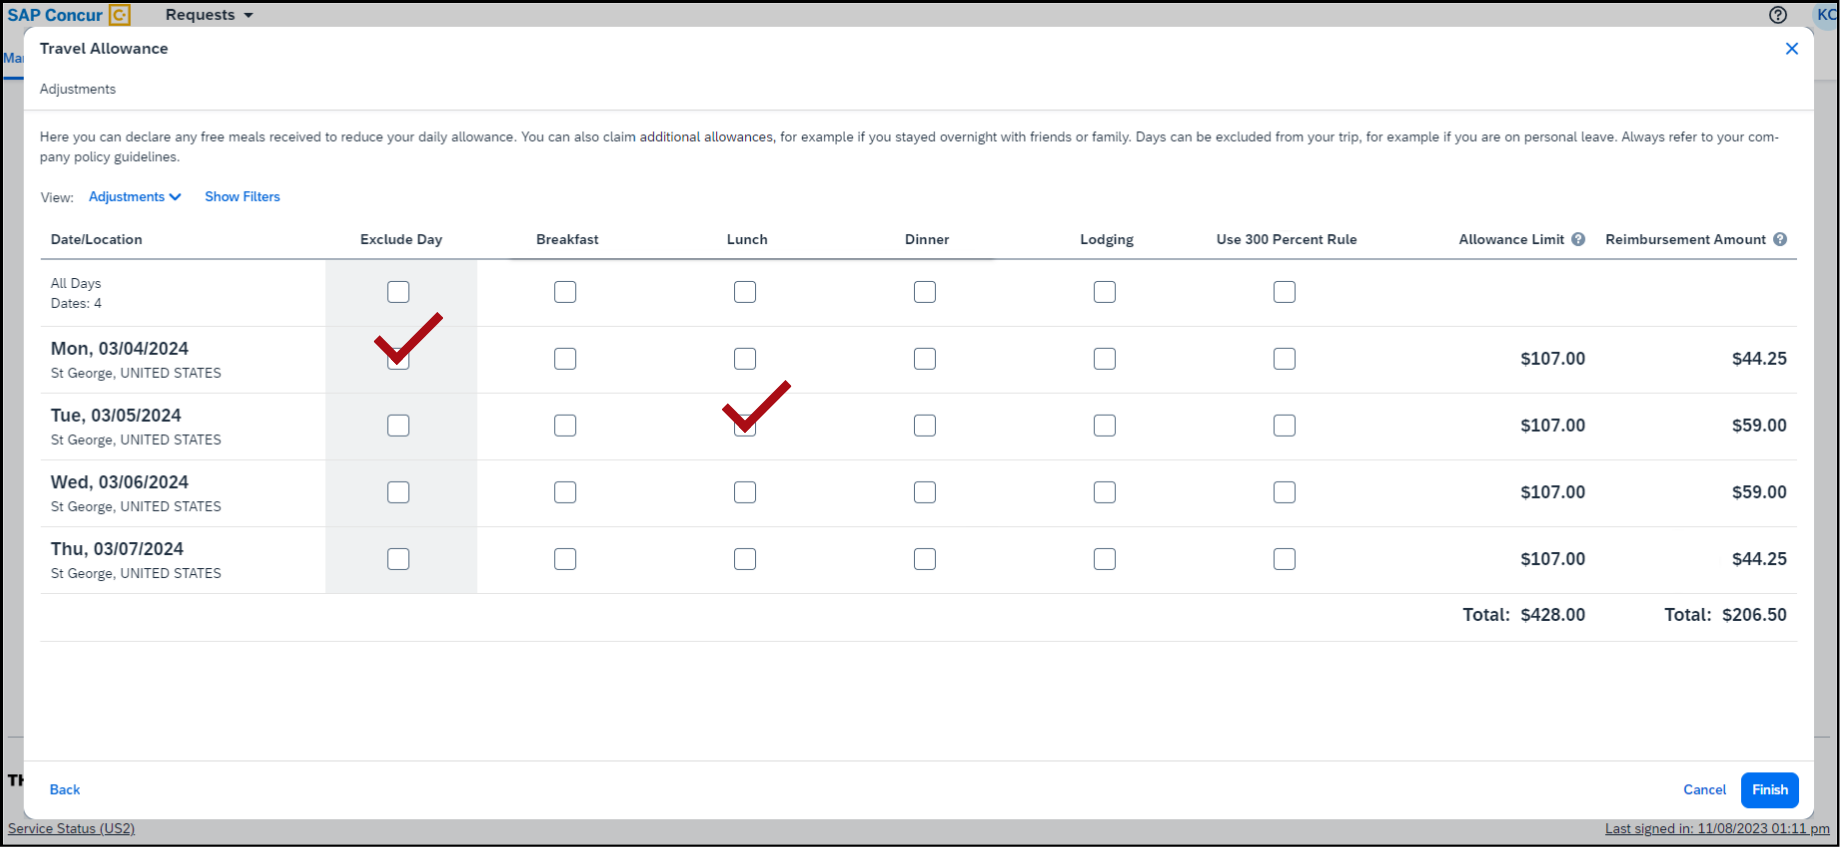
Now you'll see the adjustments screen
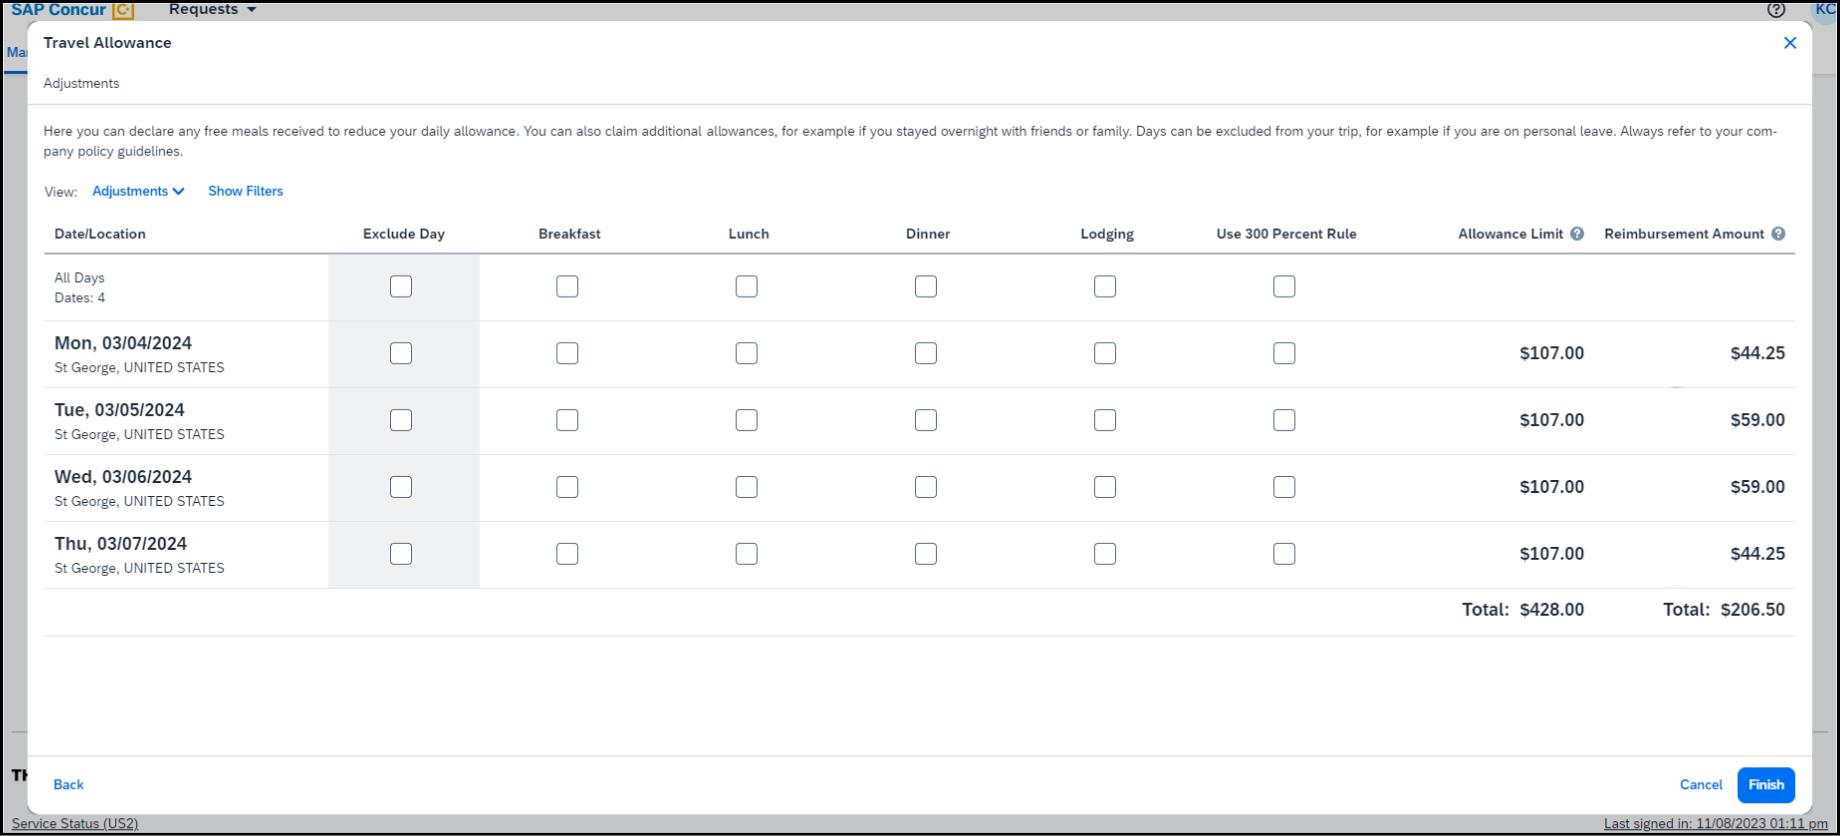
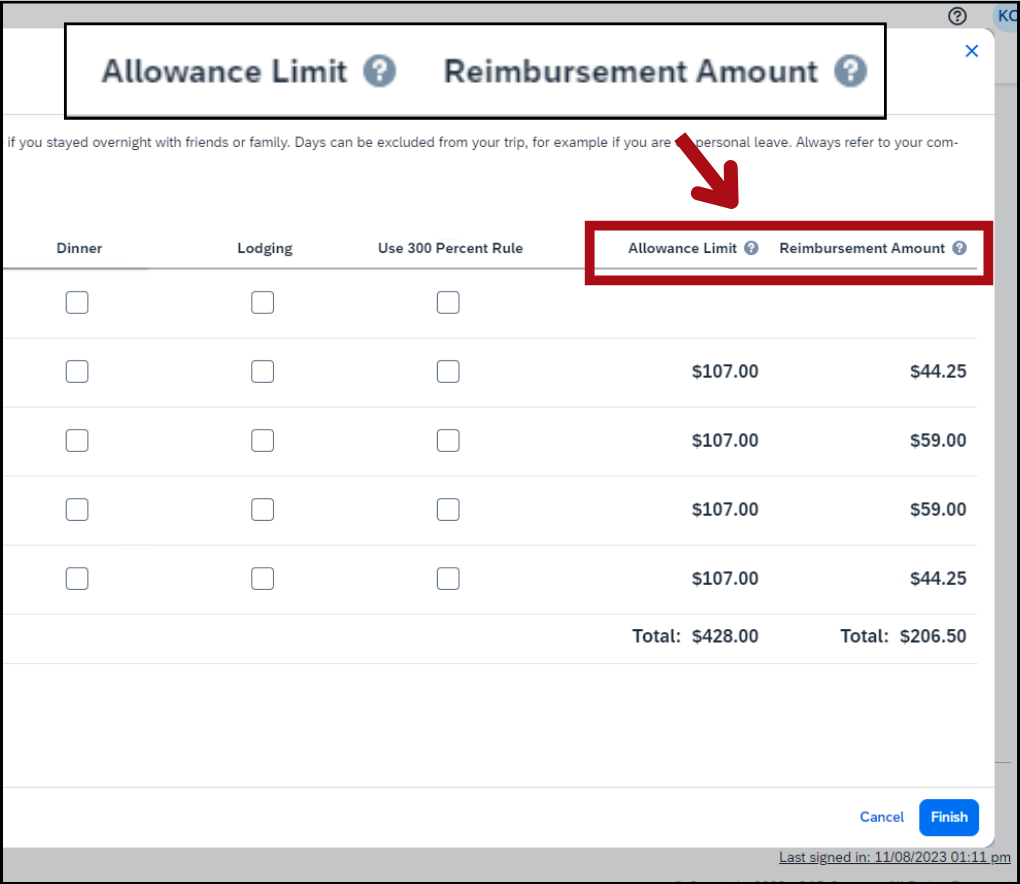
On the right side of the adjustments screen, you’ll see columns labeled Allowance Limit and Reimbursement Amount.
Allowance Limit shows the reimbursement rate for lodging.
Reimbursement Amount shows the reimbursement rate for meals and incidental expenses.
Travelers are reimbursed 75% of the reimbursement rate for meals and incidental expenses on the first and last day of travel.
If you shouldn’t be reimbursed for lodging or meals for a specific day, check the boxes to exclude those days from your reimbursement request.
For example, if Monday is a personal travel day, check the box under Exclude Day for Monday. And if lunch will be provided at your conference on Tuesday, check the box under Lunch for Tuesday.
If the cost of your hotel is more than per diem, check the box Use 300 Percent Rule.
For example, if the per diem rate for your destination is $105 per night but the lowest rate in the area is $110 per night, you would check the box Use 300 Percent Rule in your travel request and reimbursement request.
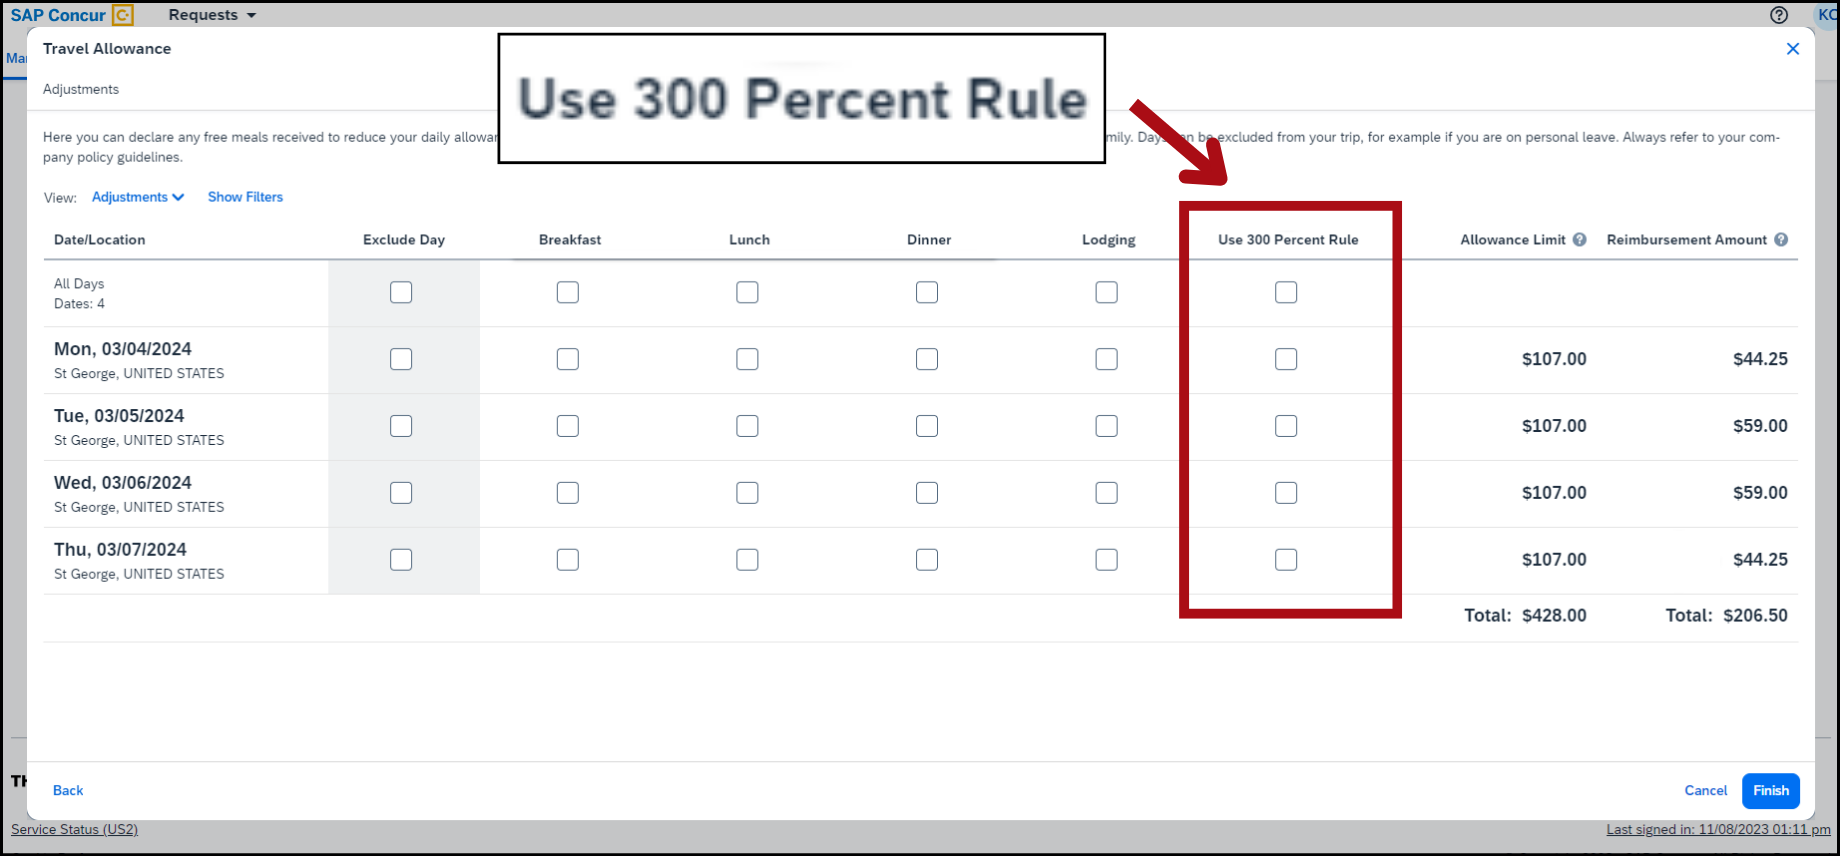
If you select any boxes under Use 300 Percent Rule, the total is automatically calculated and shows 300% of the reimbursement rate in the Allowance Limit column even though your hotel may not be that expensive.
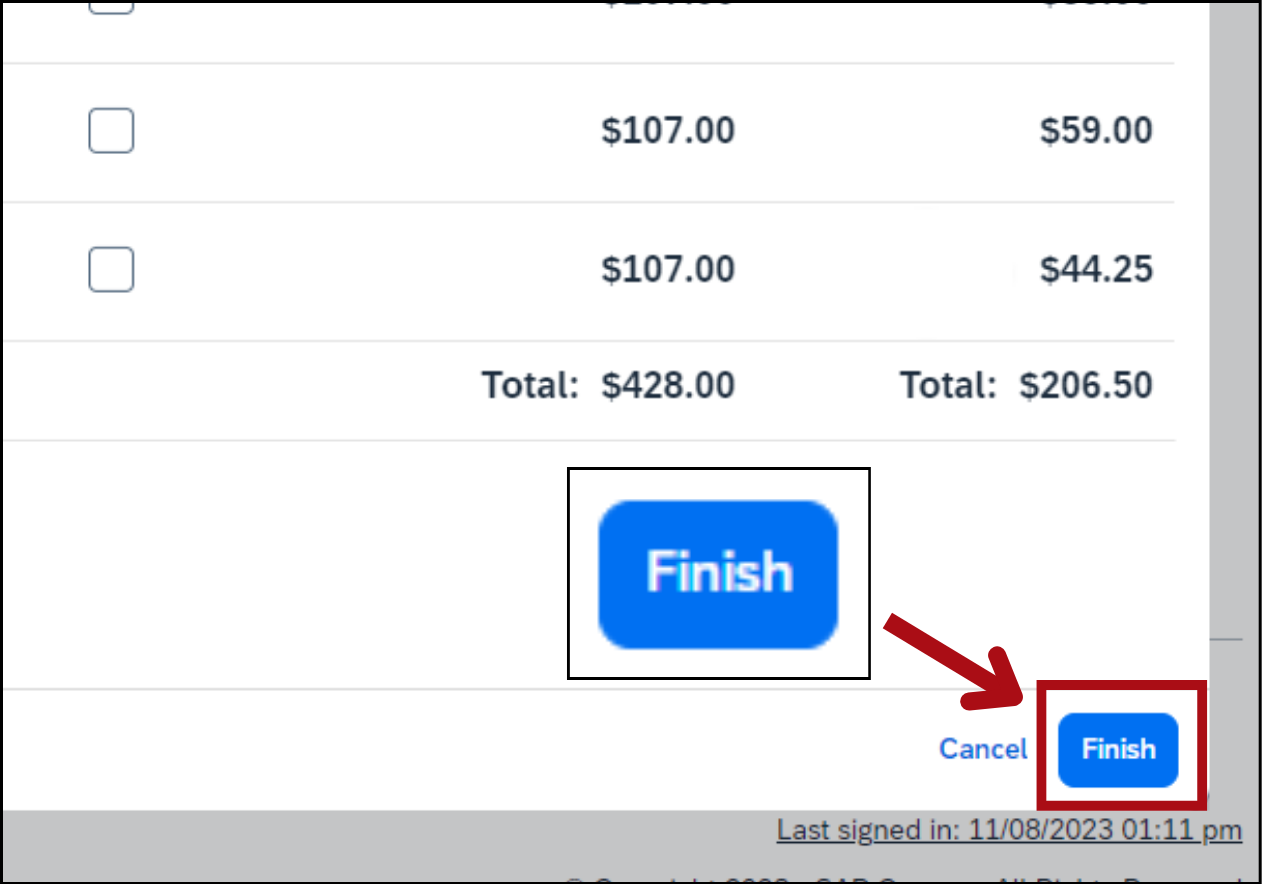
When you’re done, click Finish in the bottom-right corner.
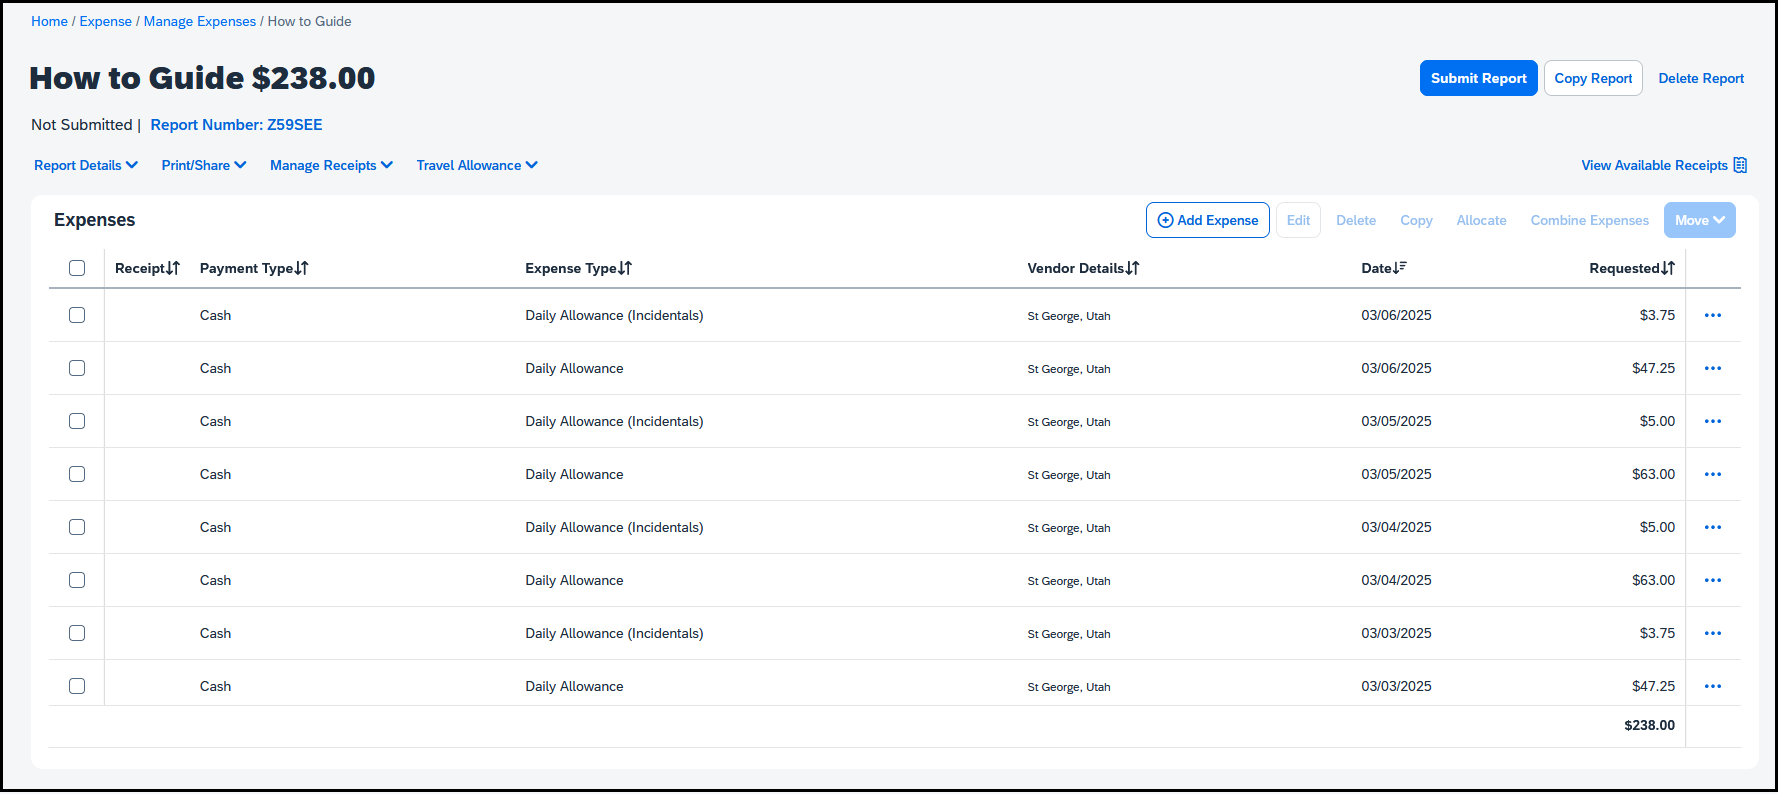
You’ll see the Add Expense screen with your meal and incidental expenses for each day have been added to the expenses list.
Incidental expenses are labeled Daily Allowance (Incidentals) and meal expenses are labeled Daily Allowance.

Connect a reimbursement request to a travel request
If you submitted a travel request for your trip, you can connect it to your reimbursement request. Information from the report header and travel allowance will be pulled over to your reimbursement request, so you won’t have to fill in those sections.
There are 2 ways to connect a travel request: you can start from your travel request or create a new reimbursement request and connect it to your travel request.
Option 1: Start from your travel request

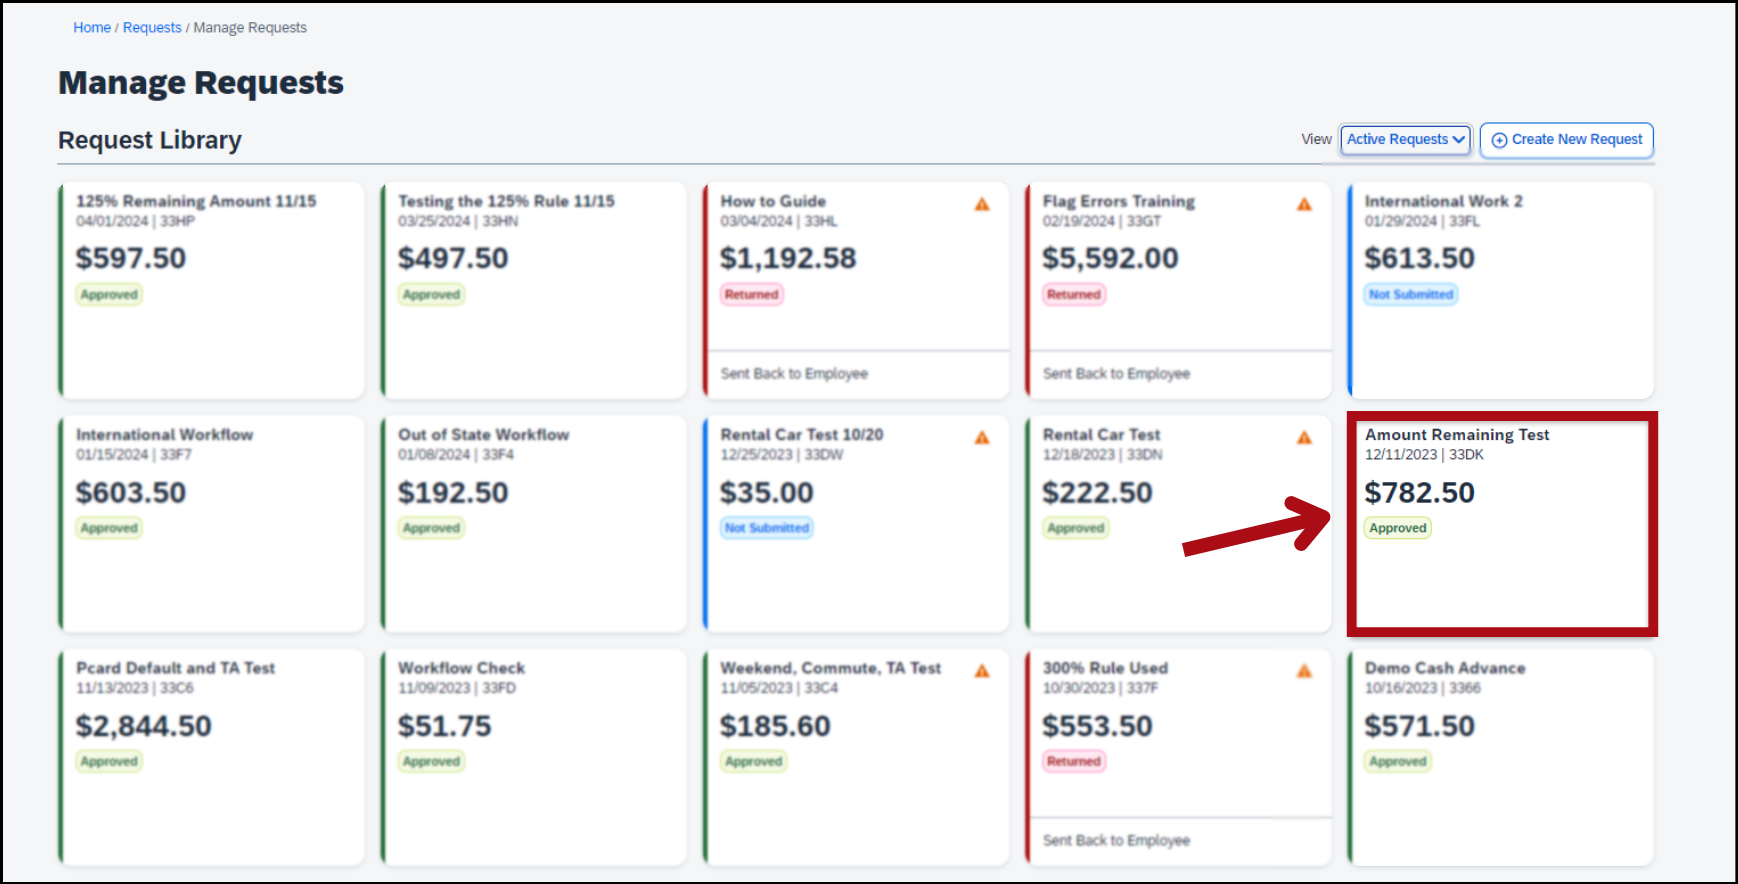
From the home page, click Home > Requests in the upper-left corner.
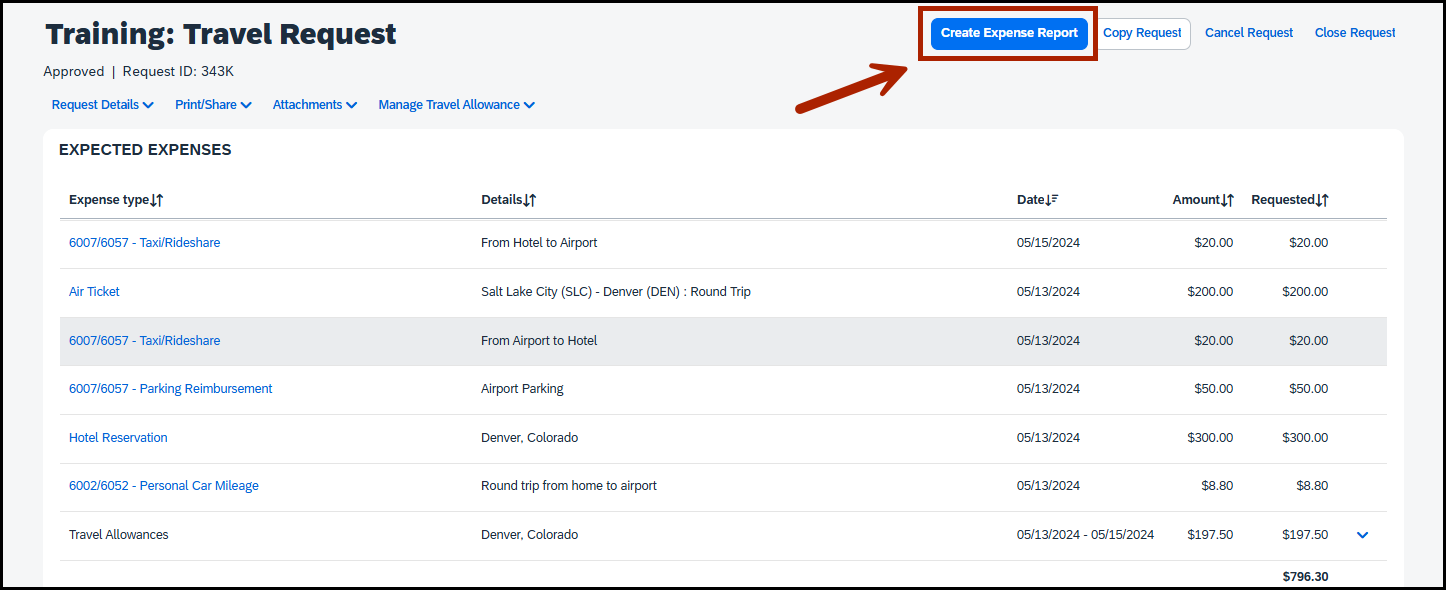
From the Manage Requests screen, select your approved travel request
From the Expected Expenses screen, click the blue button Create Expense Report in the upper-right corner.
Option 2: Create a new reimbursement request and connect it to your travel request
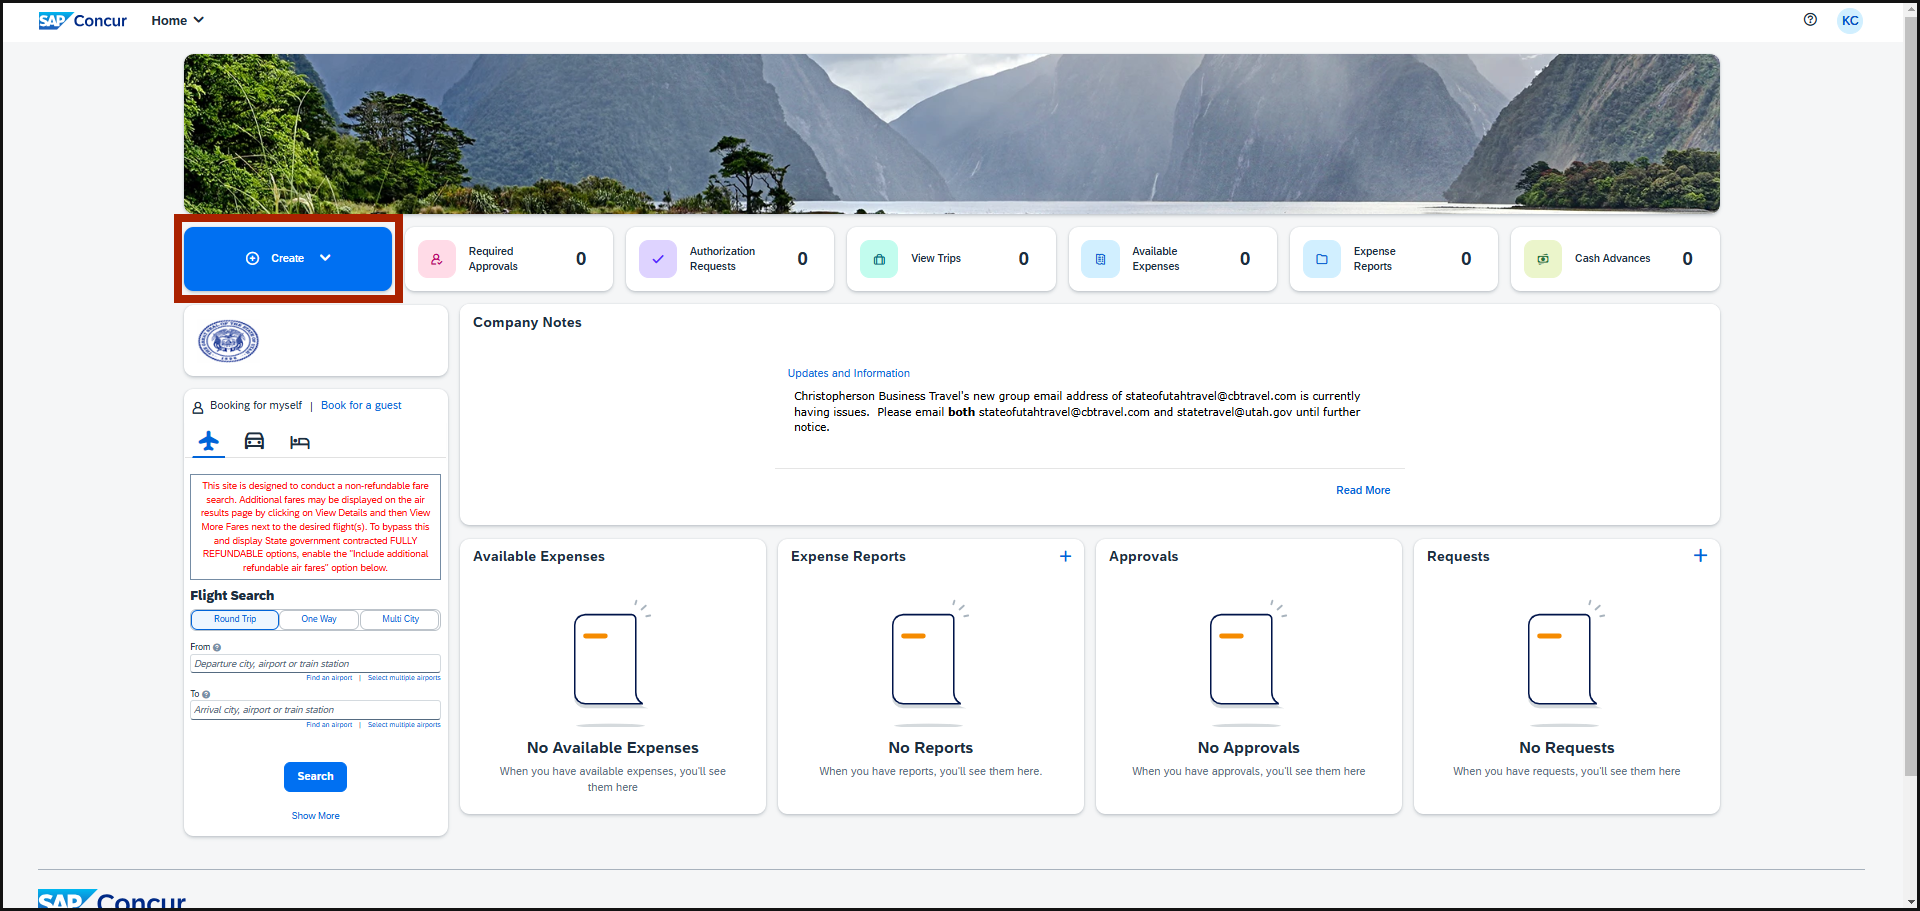
From home page click Create, select Start a Report.
In the Create New Report window, click the blue text Create From an Approved Request.
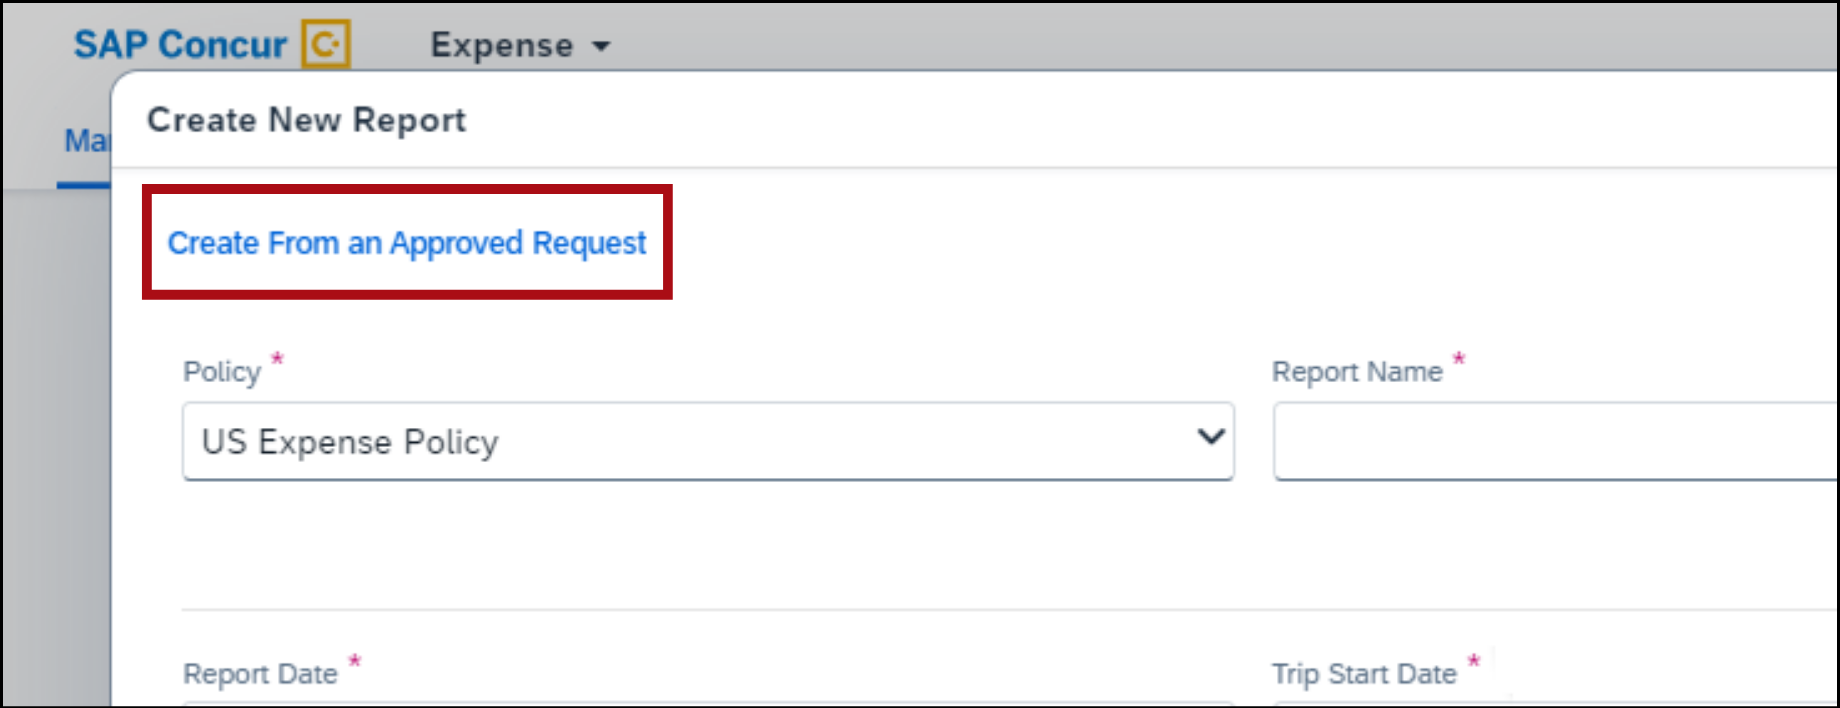
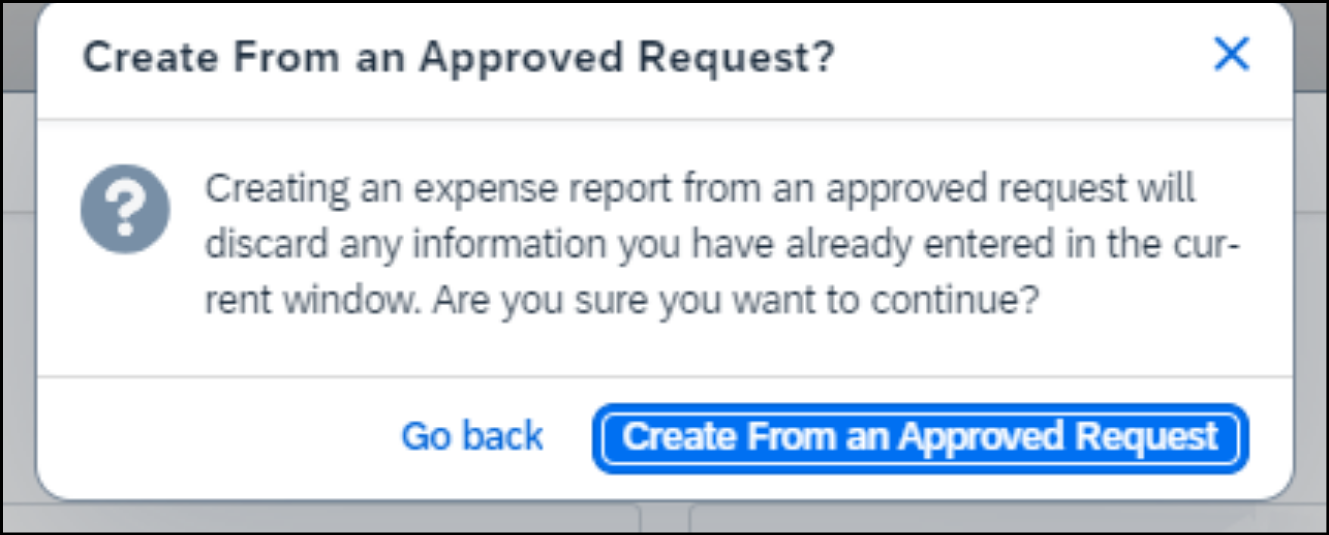
You’ll see a pop-up window labeled Create From an Approved Request.
Click Create From an Approved Request.
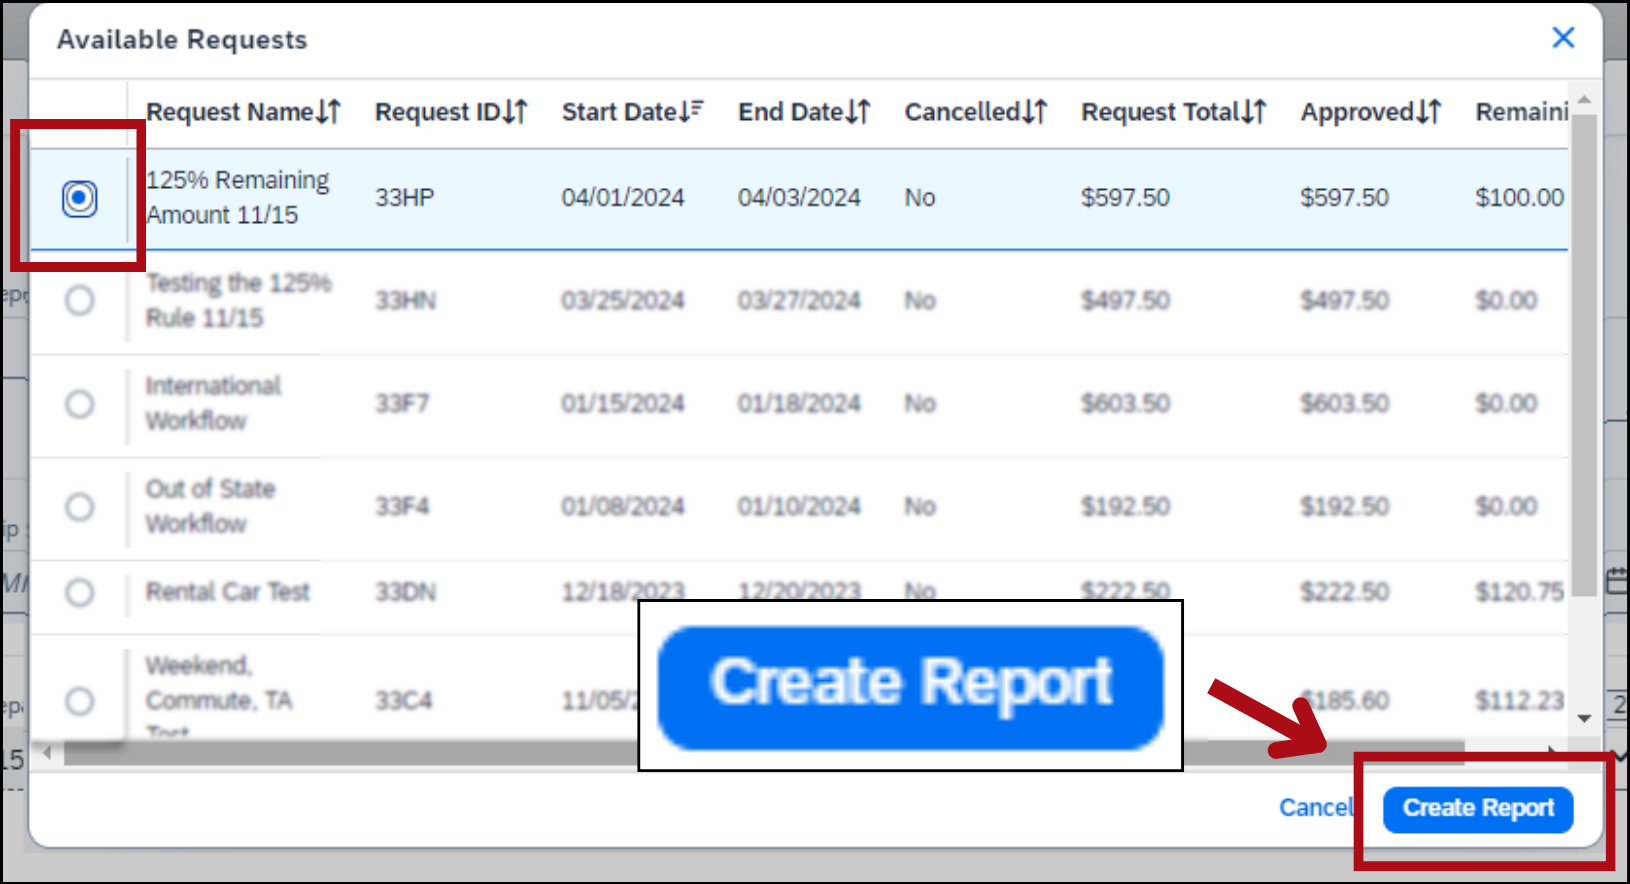
Select the travel request you want to connect and click Create Report.
How to fix the travel allowance errors
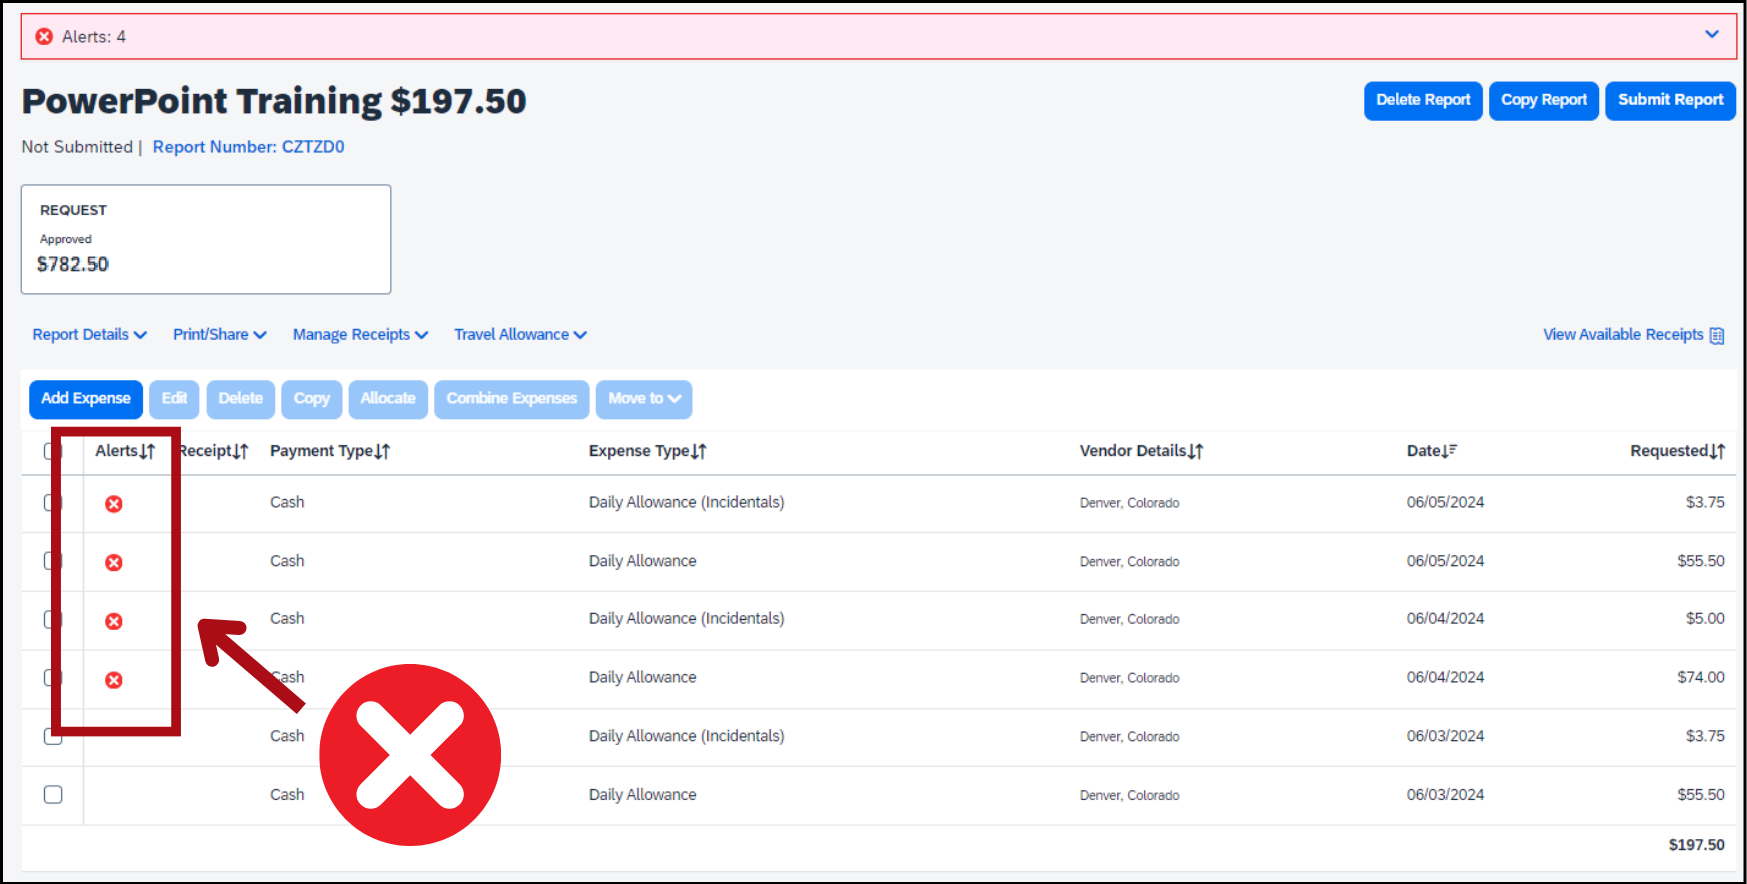
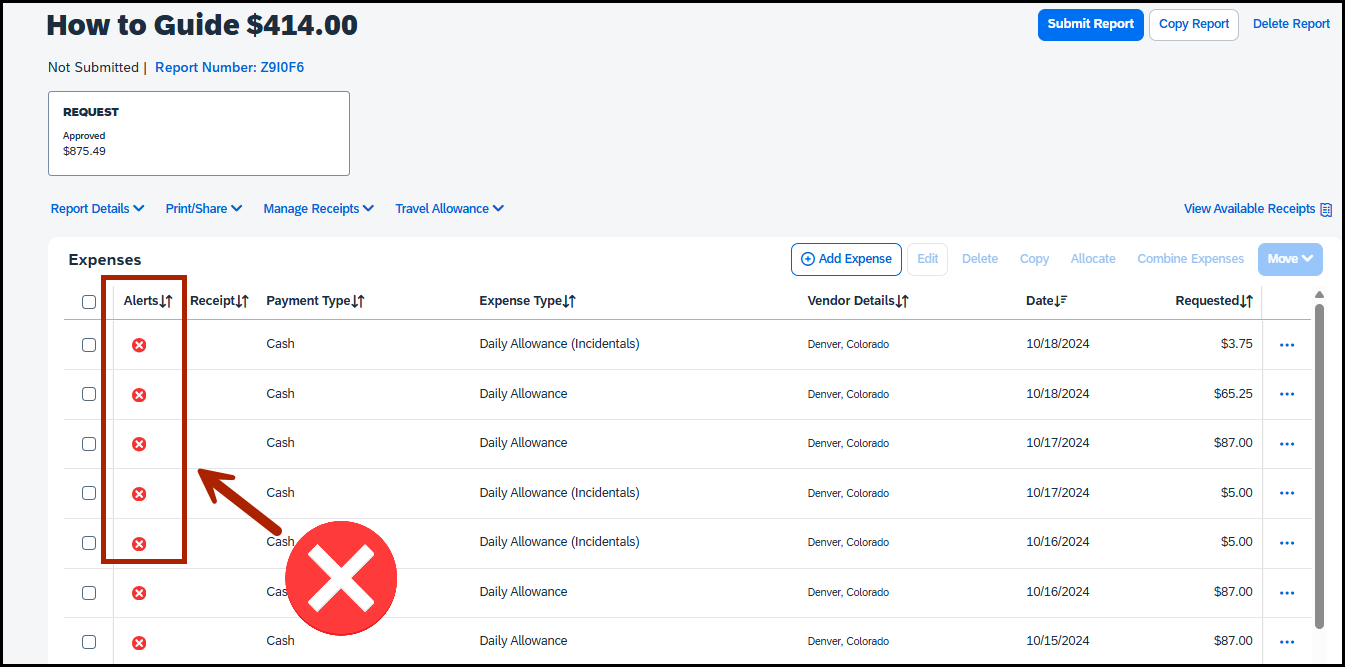
When you connect a reimbursement request to an approved travel request, errors appear on the expenses labeled Daily Allowance. These are your meal and incidental expenses.
You need to clear the errors before you can submit your reimbursement request.
Click on a line item that has a red x icon.
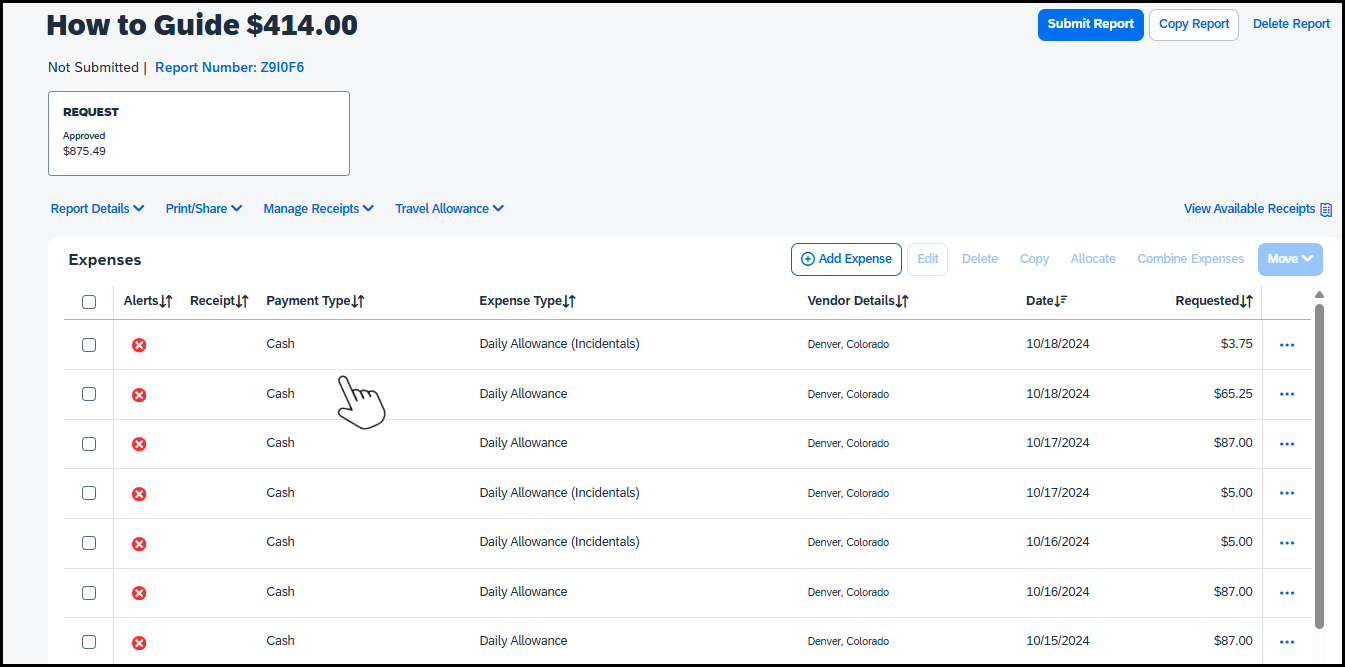
You’ll see a screen with the details of the expense. This is the data entry screen.
In the Request field, select the travel request from the drop-down menu. Then click Save Expense.
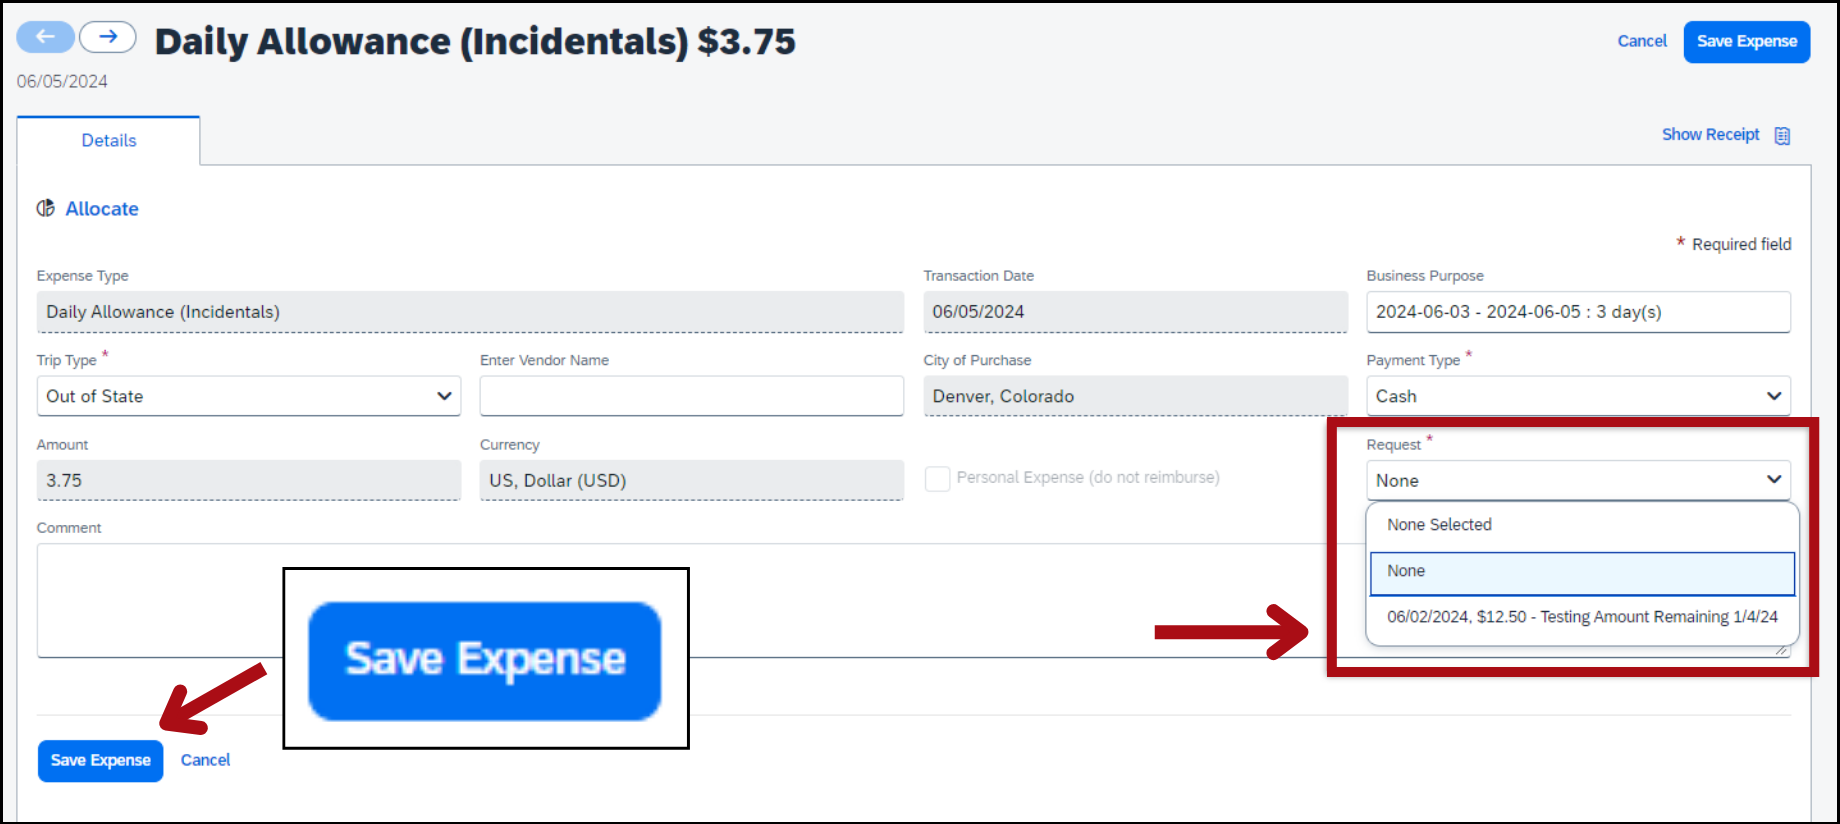
Follow the same steps for each expense with a red x icon. When you’re done, the red x icons will be gone.
Add your travel expenses
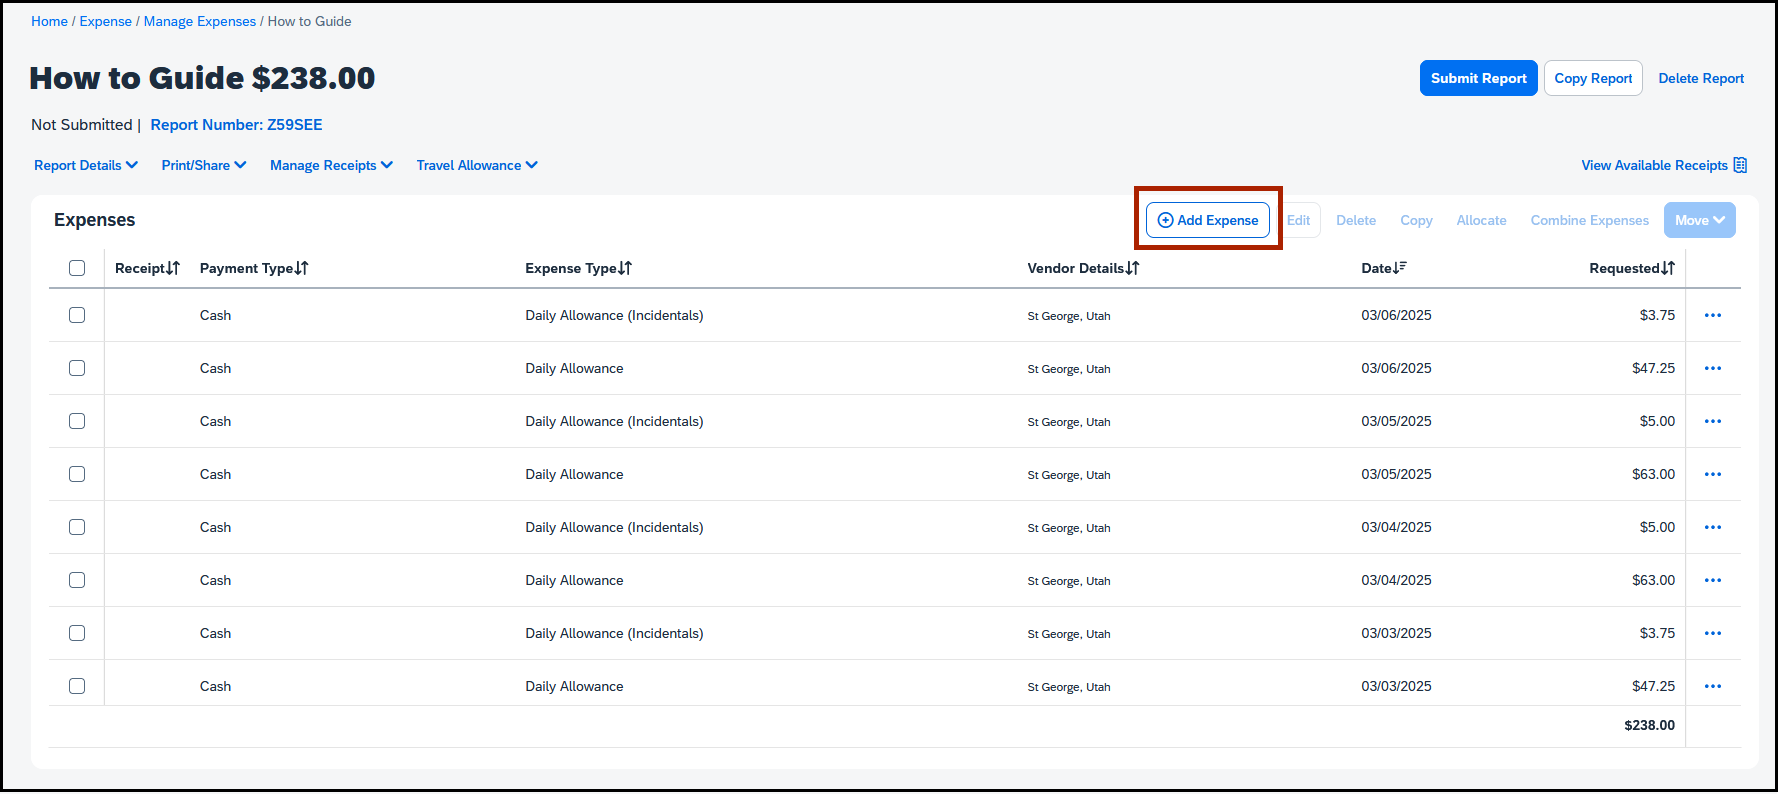
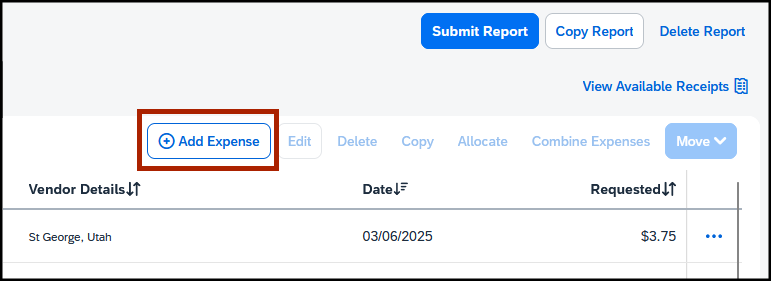
From the Add Expense screen, click the white and blue button Add Expense.
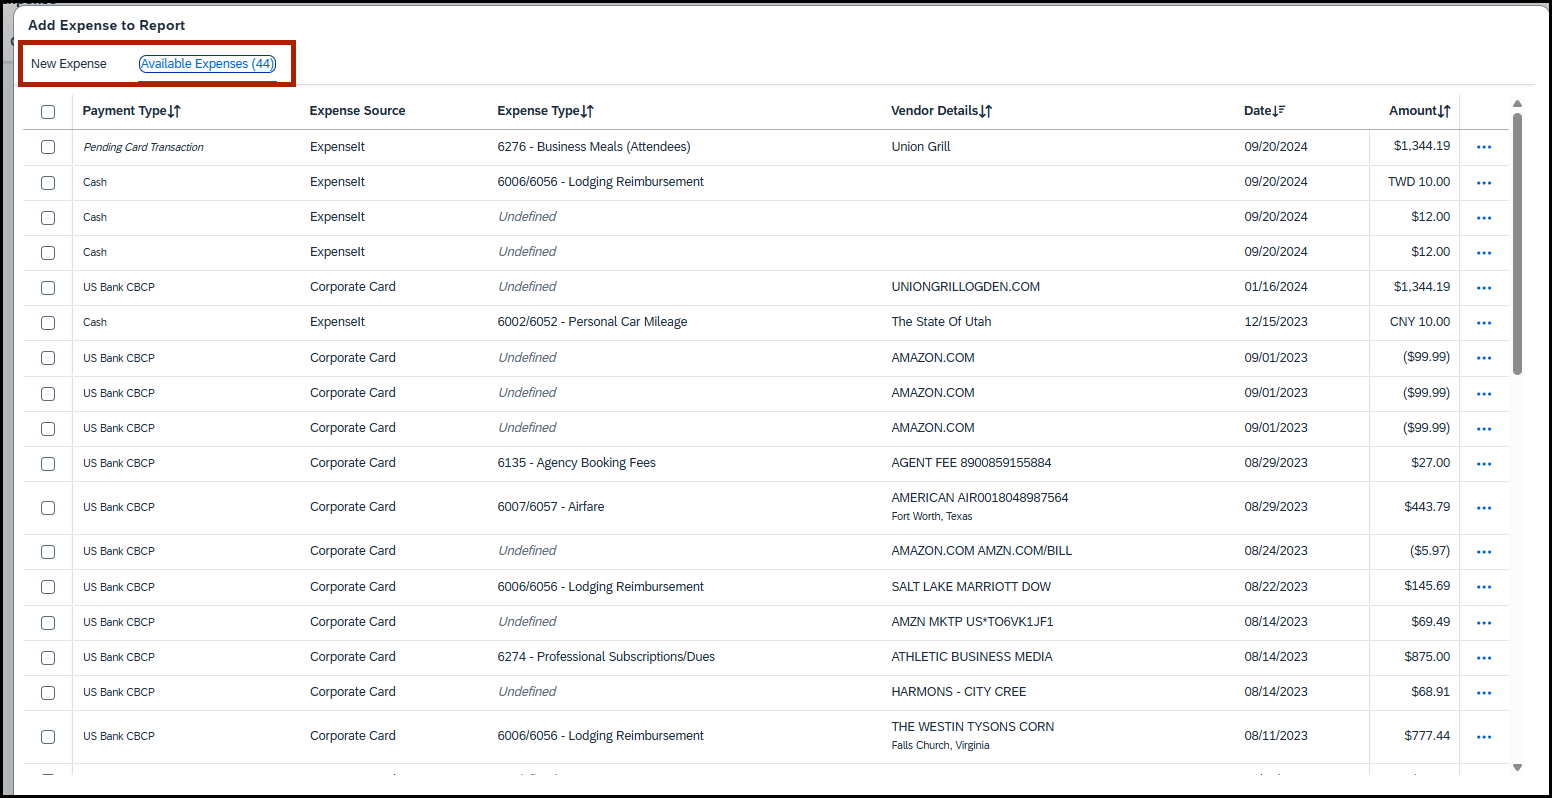
There are 2 types of expenses you can add to your reimbursement request: available expenses and new expenses.
Select the Available Expenses tab if:
- you paid for the expense with your p-card,
- the expense is airfare paid for with the lodge card, or
- you emailed your receipts to [email protected].
Select the Create New Expense tab if:
- you didn’t email your receipts to Concur, and
- you paid for the expense with your own money.
How to add an available expense
Expenses paid for with your p-card or the lodge card (airfare and agency booking fees) are considered available expenses. You won’t be reimbursed for p-card expenses oror airfare and agency booking fees, but you should still add them to your reimbursement request so your approver knows those expenses were paid for by the state.
If you emailed your receipts to [email protected], Concur automatically creates expenses for each receipt. These are also considered available expenses.
From the add expense screen, click the blue button Add Expense.
You’ll see a new window labeled Add Expense.
Click Available Expenses and select the expenses you want to add to your reimbursement request.
For this example, we’ll select just 1 expense: an UBER rideshare.
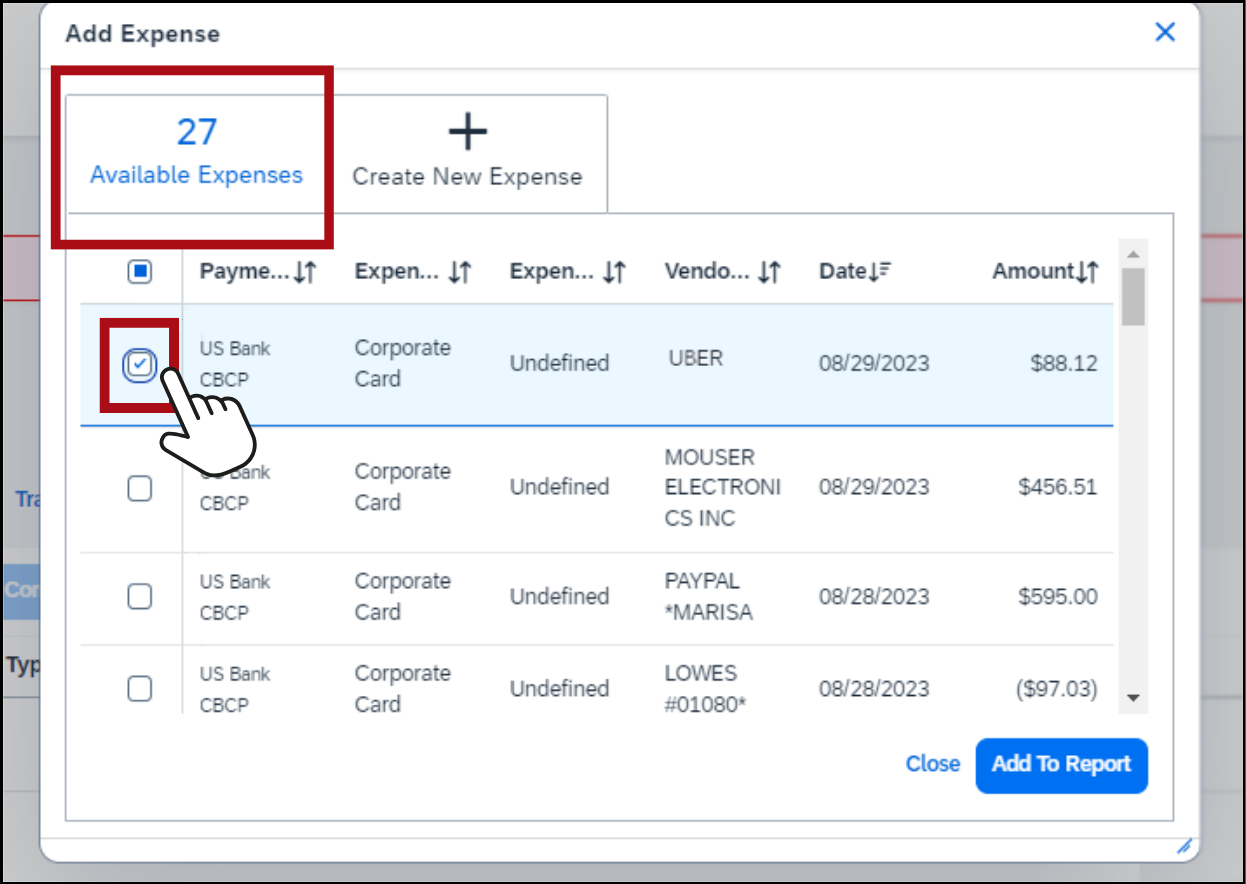
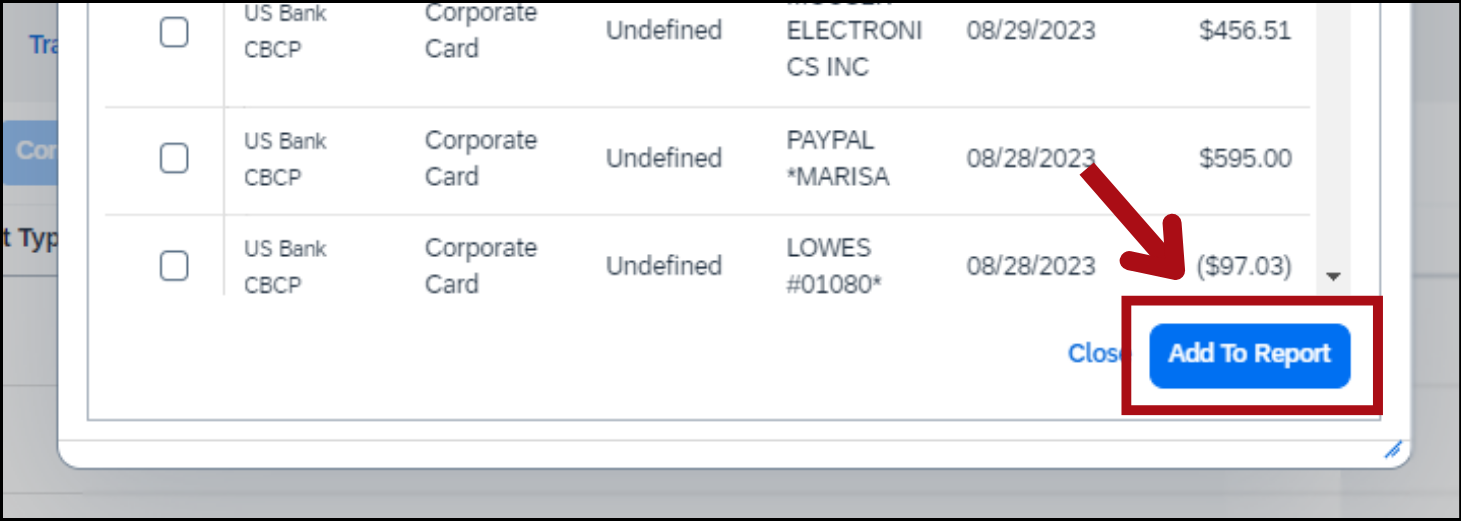
Click Add to Report.
The expense is added but it has a red x icon next to it, which means there’s an error. Click the line item with the red x to add required details to clear the red x.
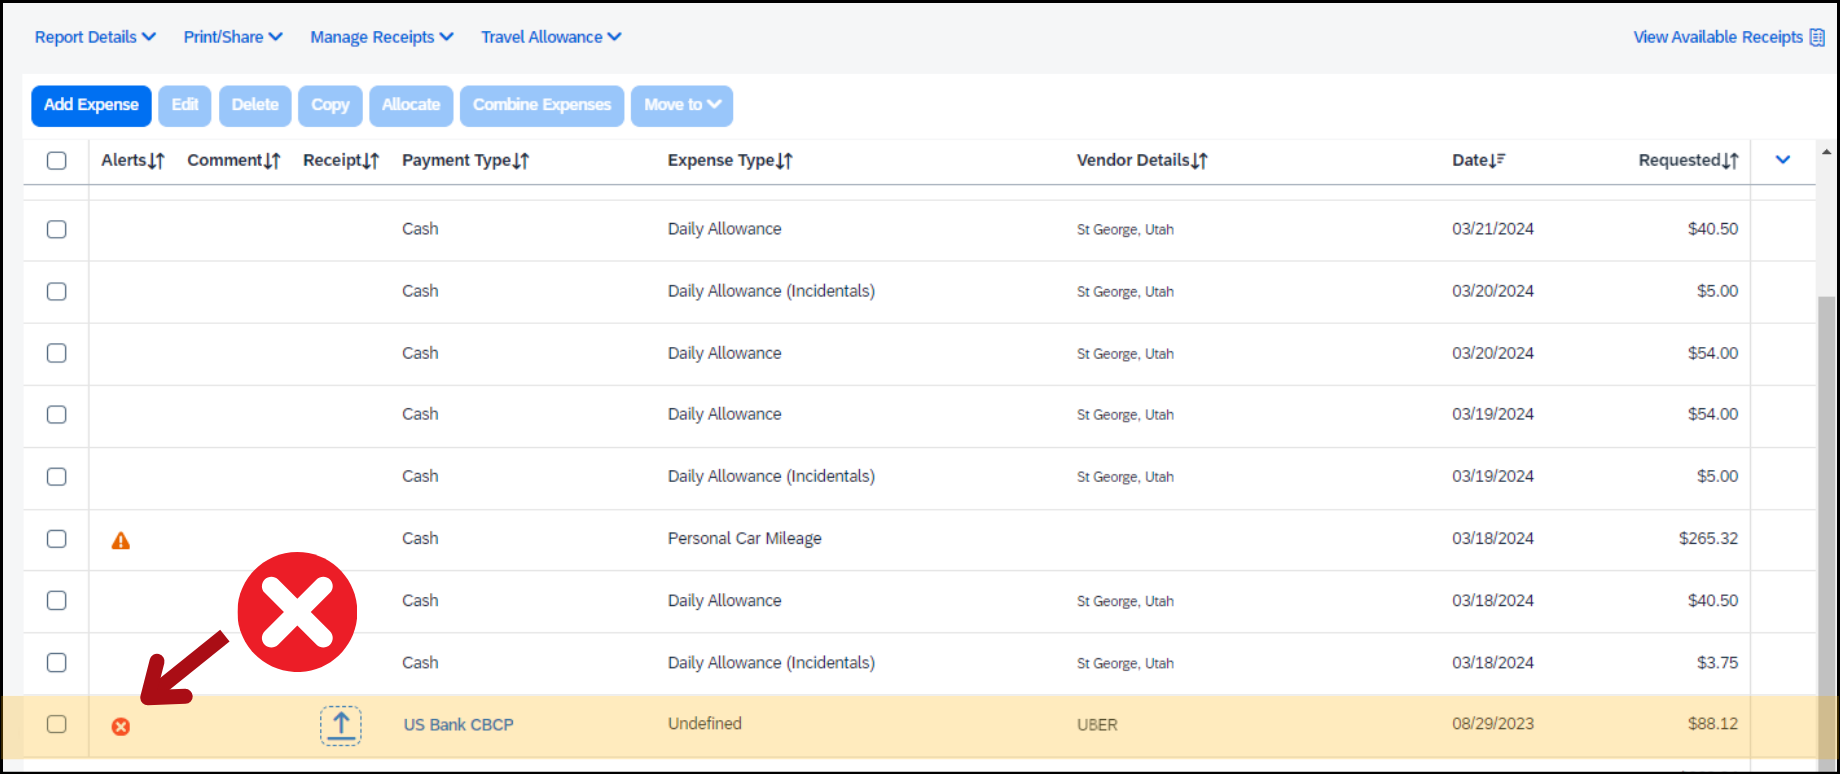
The expense is added but it has a red x icon next to it, which means there’s an error. You need to add more details to the expense to fix the error.

Make sure the information in each field is correct and fill in any fields that are blank.
In this example, we need to fill in the Expense Type and City of Purchase. The information in the other fields is correct.
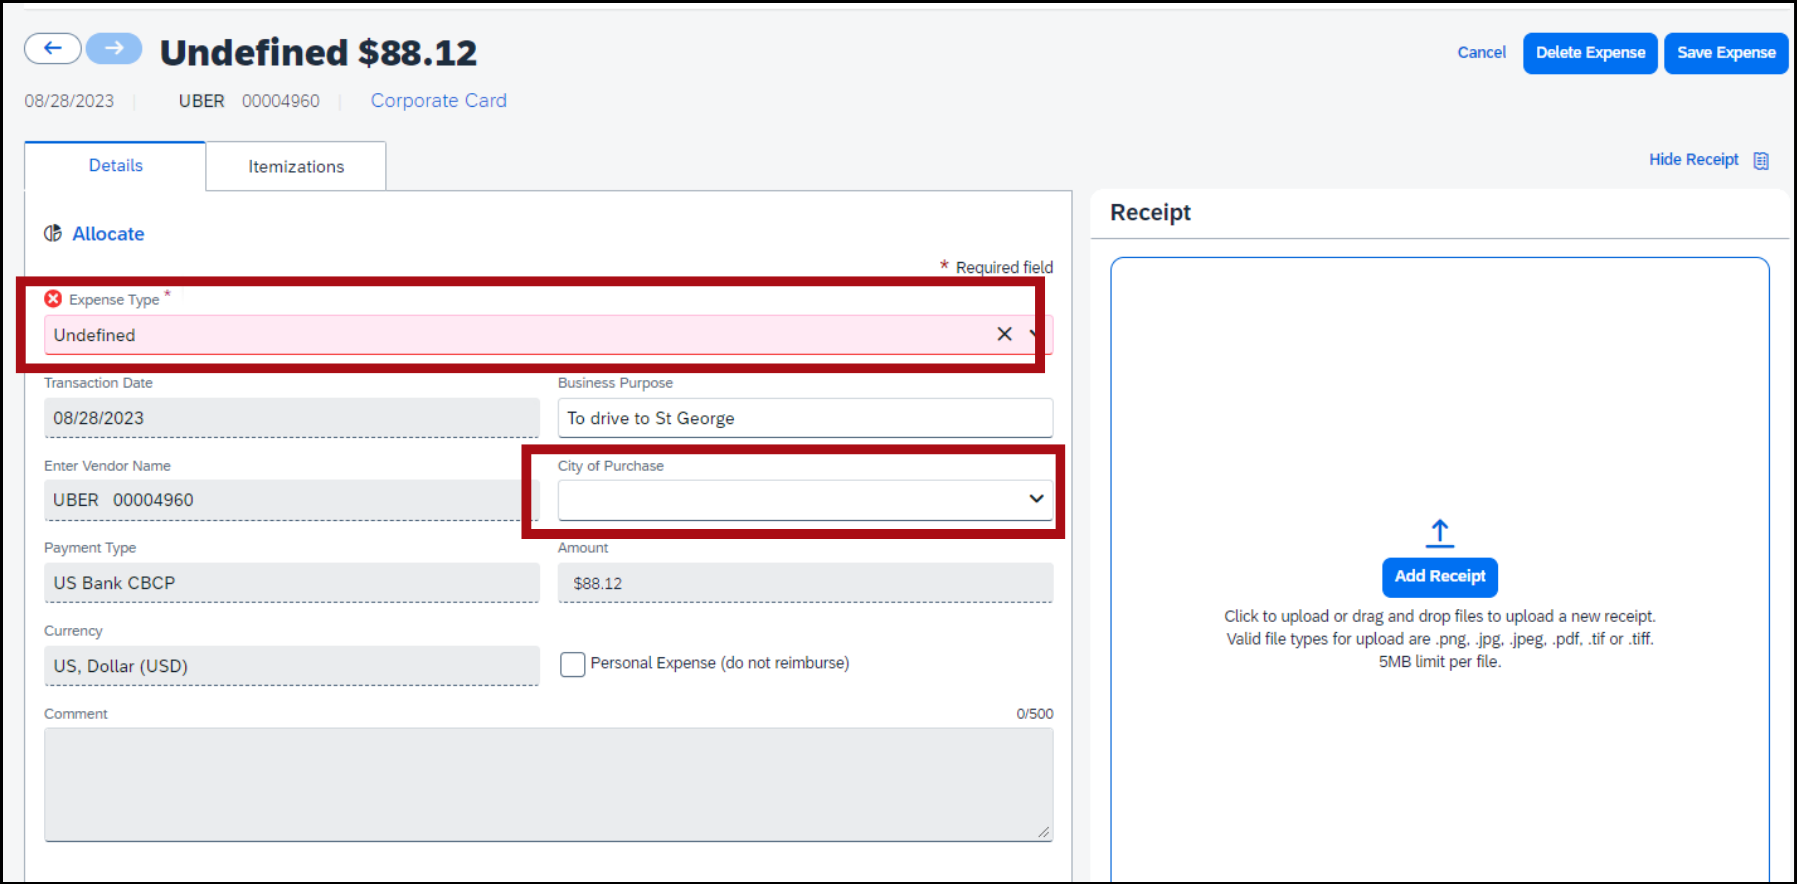
Make sure you choose the correct expense type when adding an expense to your reimbursement request. If the expense type is wrong, the expense will have the wrong object code when it’s uploaded to the state’s accounting system.
If you’re not sure what expense type to choose, ask your supervisor.
For this example we’ll choose Taxi/Rideshare because our expense is a rideshare ride from Uber.
If the receipt isn’t already attached, add the receipt. Learn how to attach a receipt.

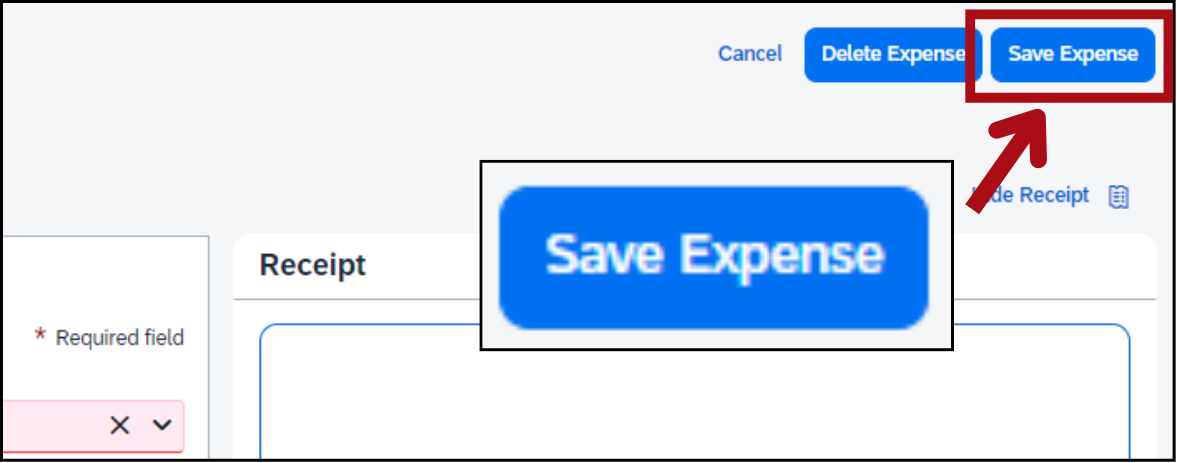
When the expense is complete, click Save Expense.
Back at the Add Expense screen, you’ll see the error is gone and the expense is now labeled correctly. The square icon shows that a receipt is attached.

The orange triangle icon means there’s an alert you can read. Alerts give helpful information about rules you need to follow. You can still submit your reimbursement request if you see an orange triangle icon. Learn more about alerts and error messages.
How to add a new expense
Expenses that were paid for with your own money are considered new expenses, but if you emailed your receipts to [email protected], you need to add an available expense instead of a new expense.
From the add expense screen, click the blue button Add Expense.
You’ll see a new window labeled Add Expense.
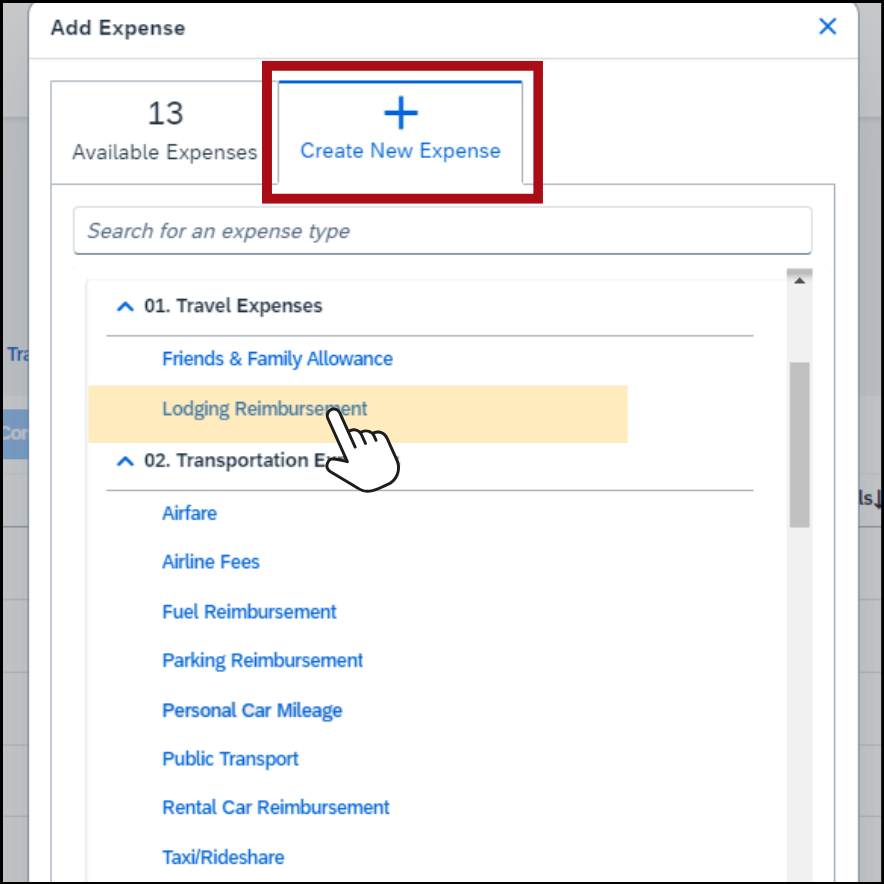
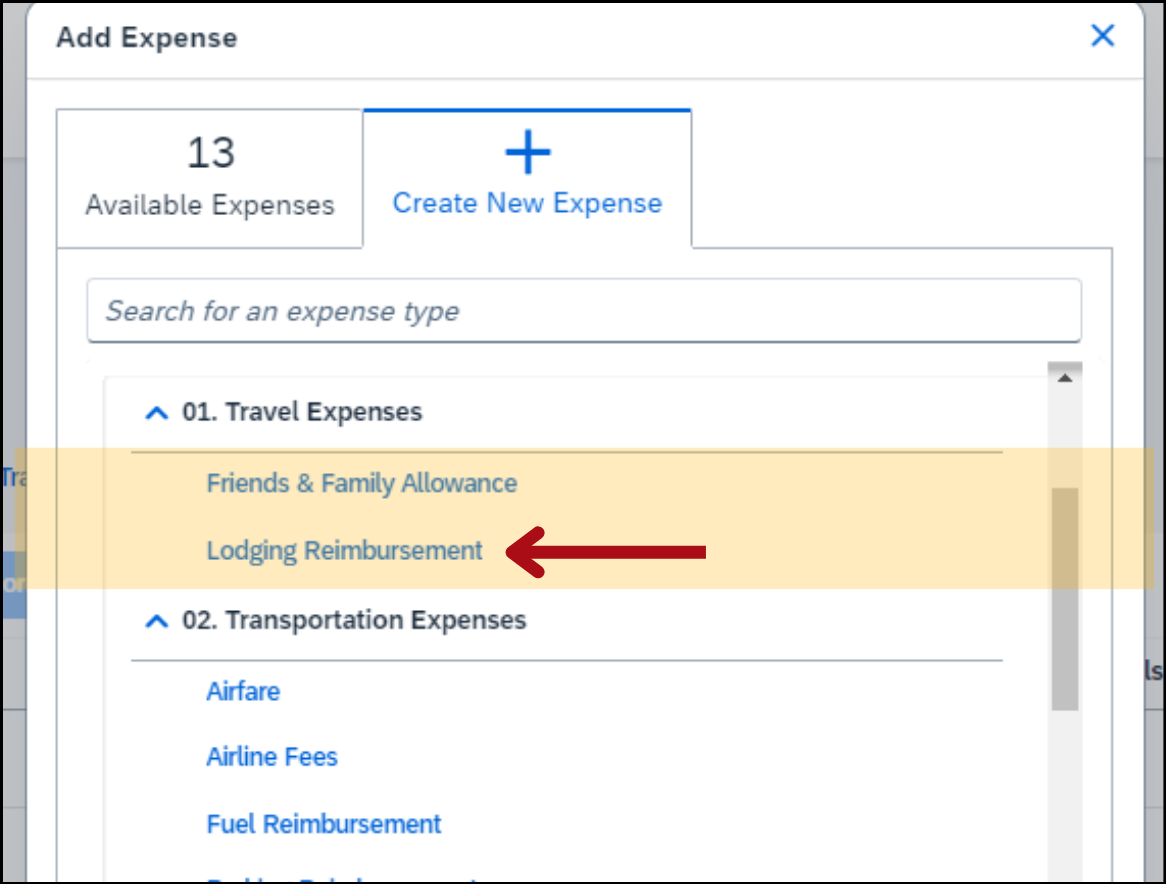
Click Create New Expense and select the type of expense you want to add to your reimbursement request.
For this example, we’ll select Lodging Reimbursement because we stayed in a hotel.
You’ll see a data entry screen where you can add details about the expense. Fill in the fields.
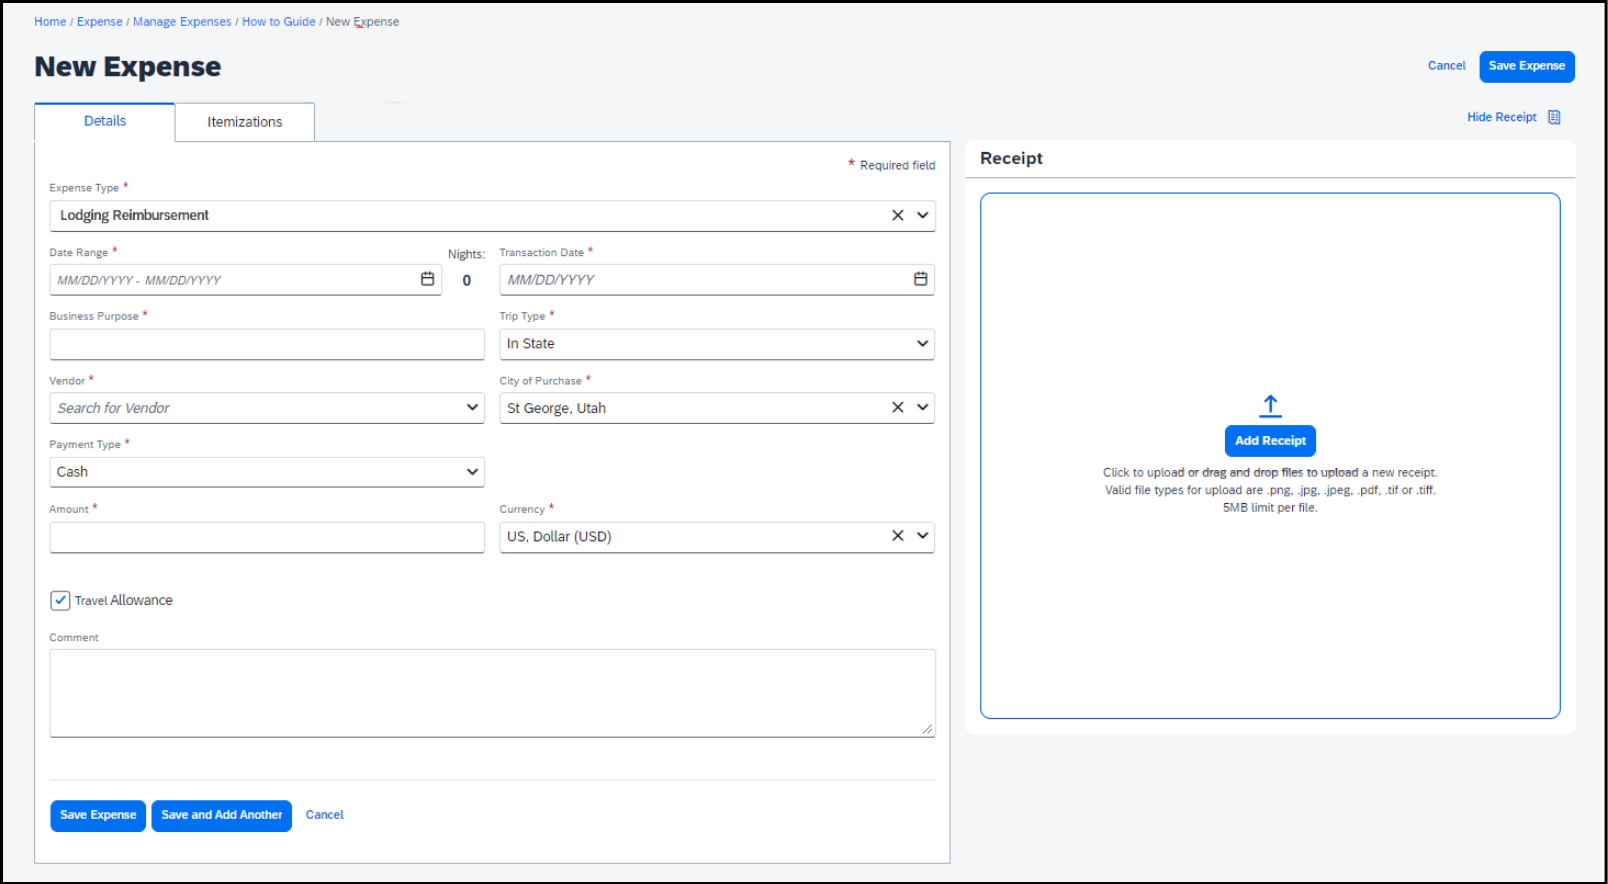
In the Vendor field, enter the name of the hotel. The box pre-populates as you type, but if your hotel doesn’t come up, then you can write it in.
In the Amount field, enter the total amount on your hotel receipt, including taxes, fees, parking, Wi-Fi, or any other expenses on your receipt.
The fields Trip Type, City of Purchase, and Currency are filled automatically based off your report header.
The field Payment Type is filled automatically depending on the expense. US Bank CBCP is for expenses paid for with a p-card or the lodge card (airfare). Cash is for expenses paid for with your own money, even if you paid with a credit card.
If the receipt isn’t already attached, add the receipt. Learn how to attach a receipt.
When the expense is complete, click Save Expense.
How to attach a receipt
You need to attach an itemized receipt or other sufficient documentation to each expense in your reimbursement request. If you don’t have sufficient documentation, you need to use the missing receipt affidavit.
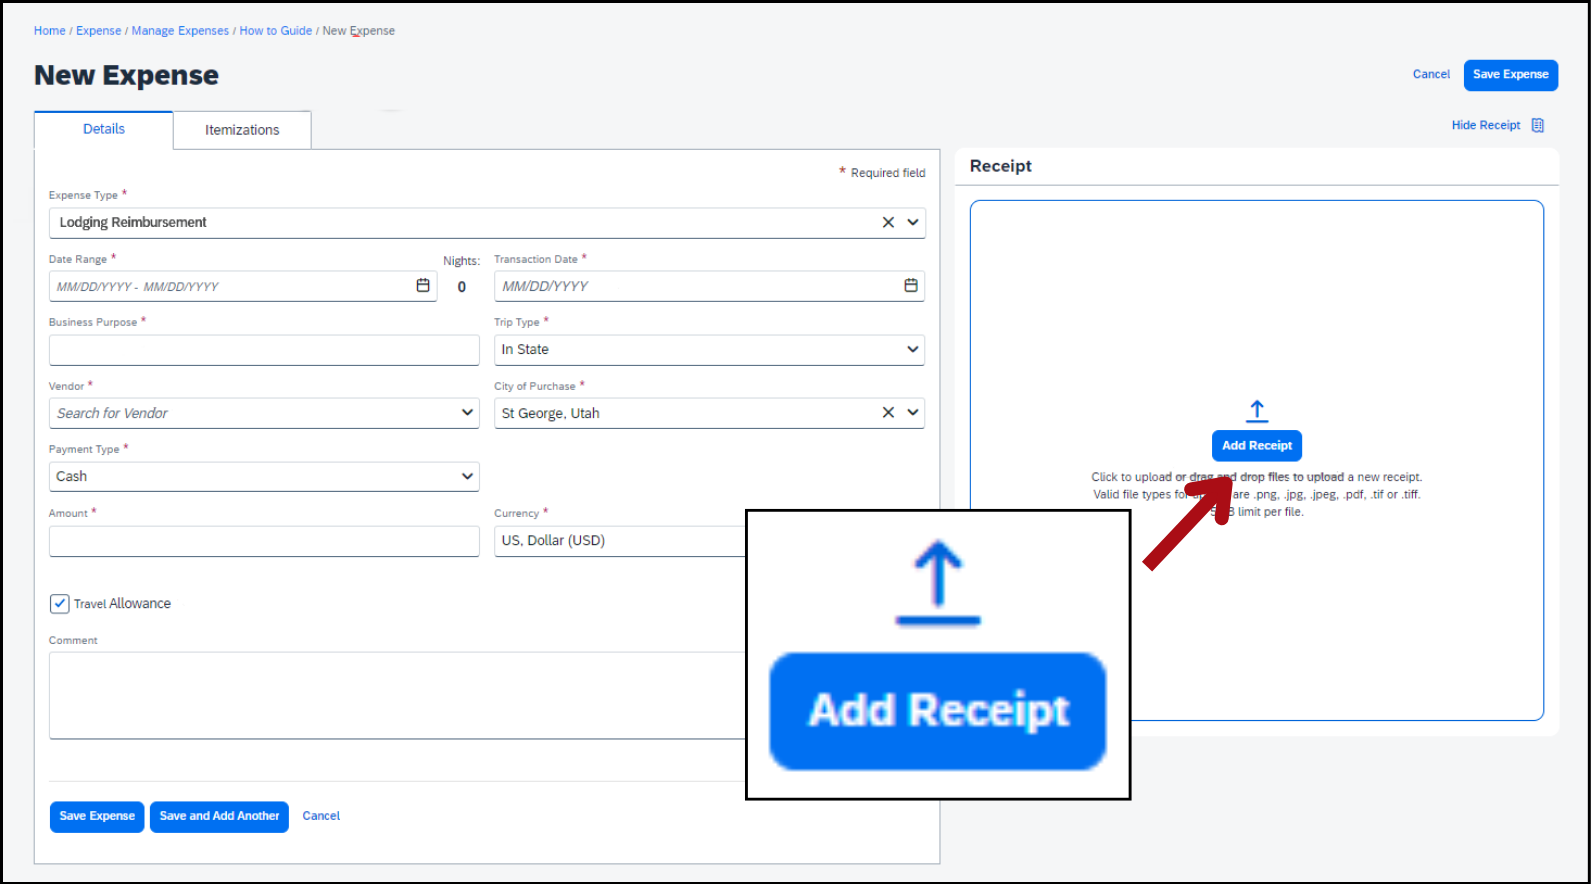
When you add an expense, you’ll see a data entry screen where you can add details about the expense.
After you fill in the fields, click the blue button Add Receipt.
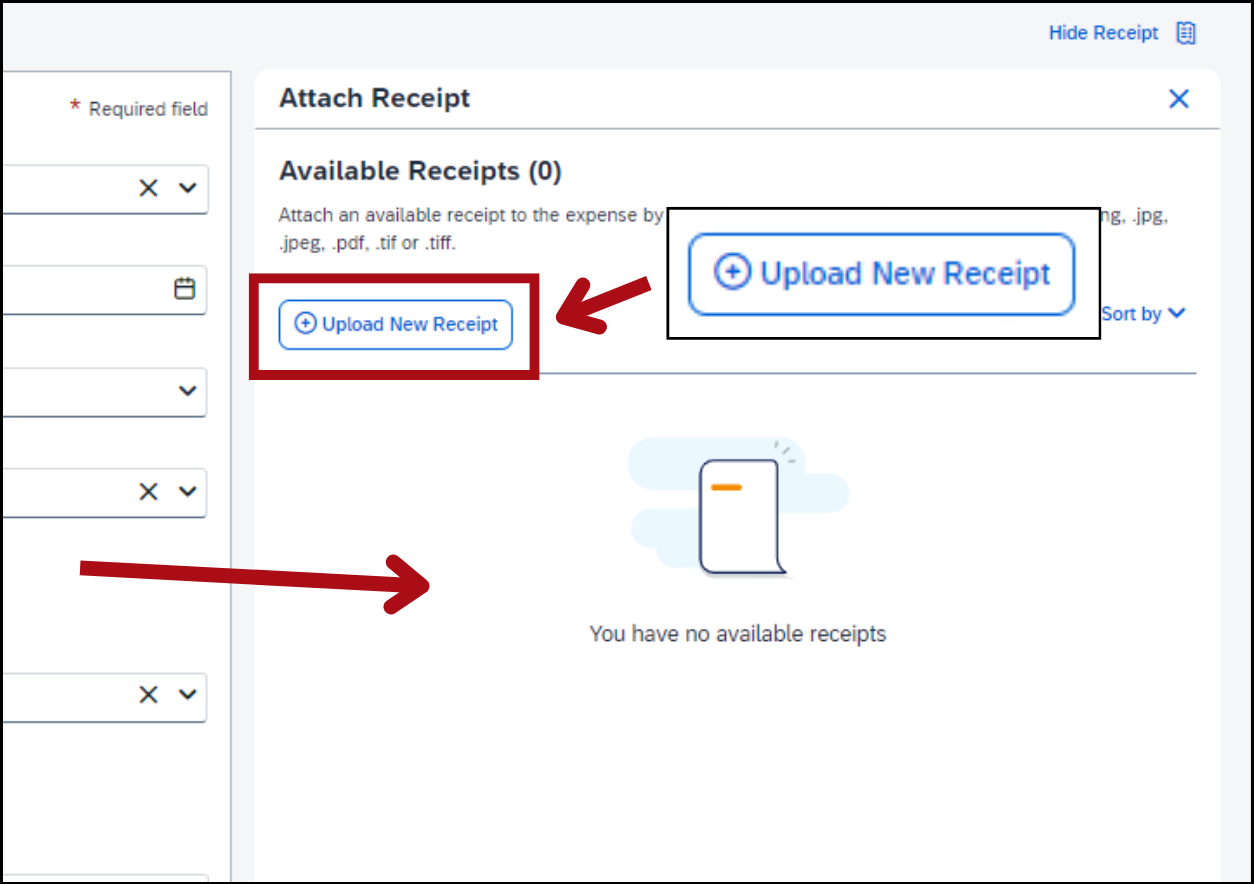
Click the button Upload New Receipt to browse your files for the image.
Or drag and drop the image into the blank space under the button.
When the receipt is attached, you’ll see it displayed in the Receipt box.
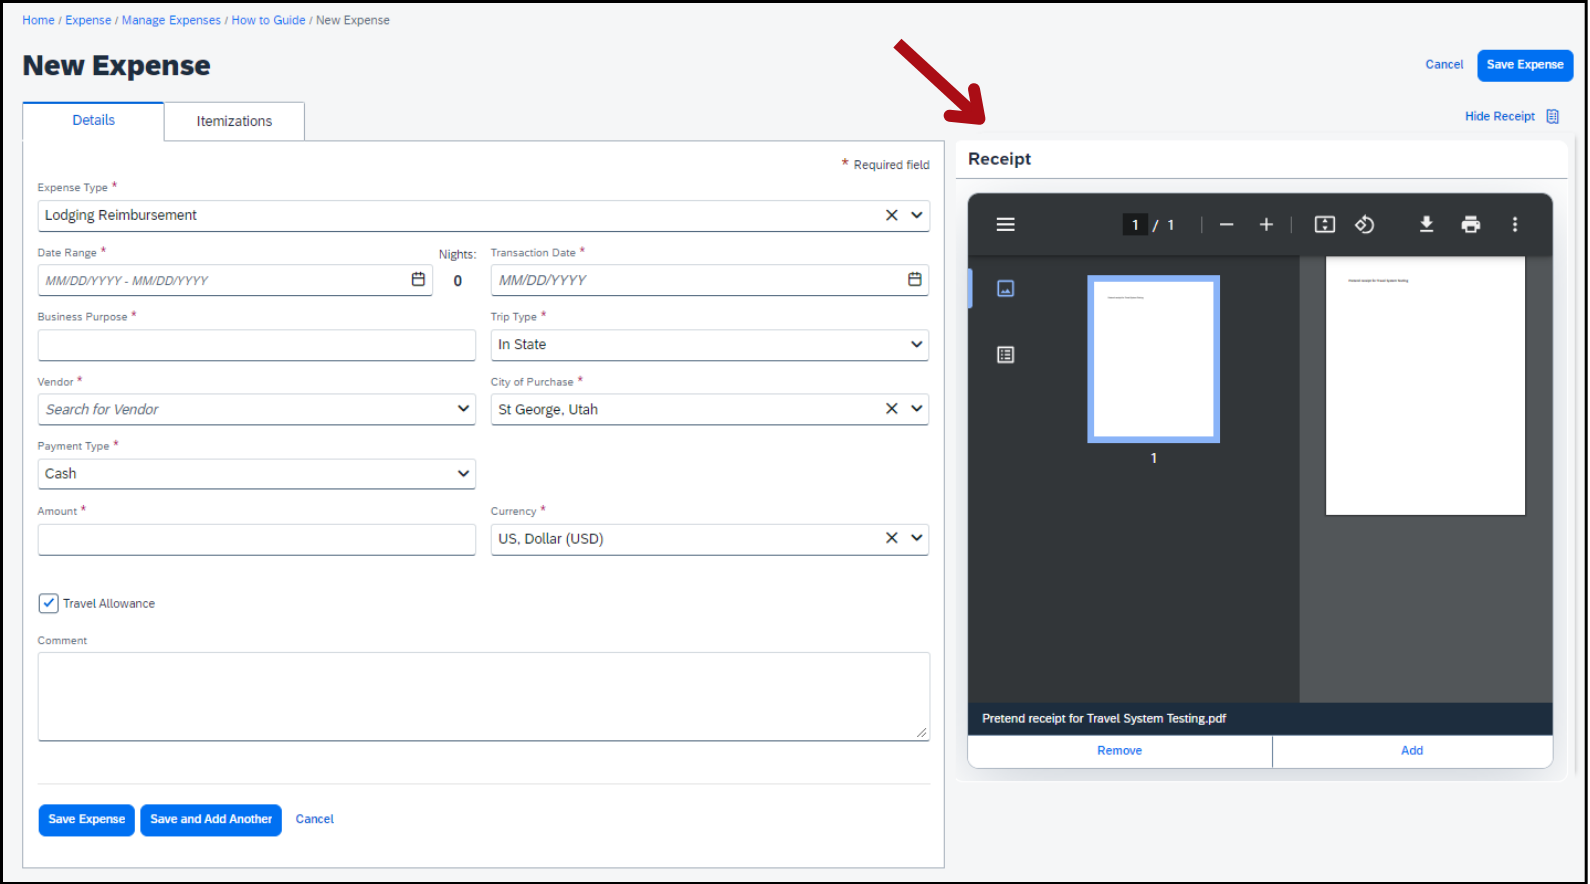
If you need to add more supporting documents, click Add.
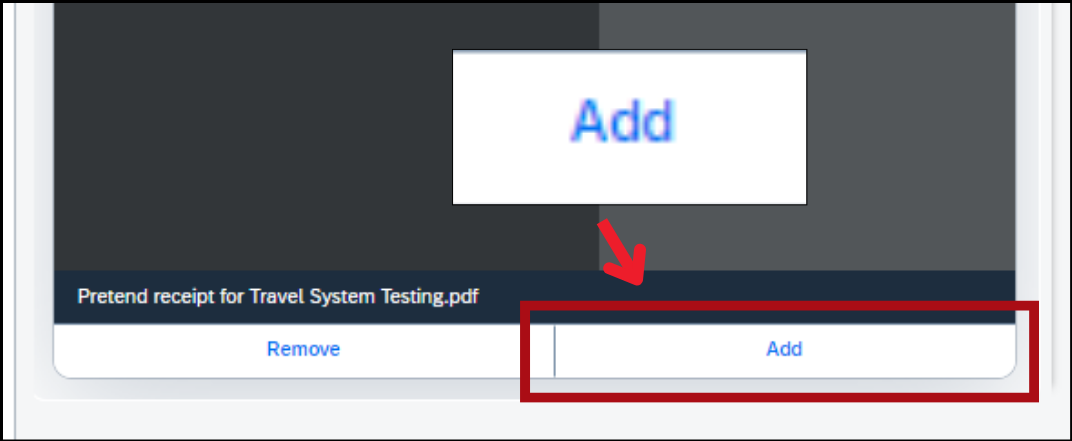
If you have multiple documents attached to an expense and try to delete one, all of the other attached receipts and documents will be deleted, and you’ll need to upload them again.
When the expense is complete, click Save Expense.
The expense has been added to your reimbursement request. The square icon shows that the receipt is attached.
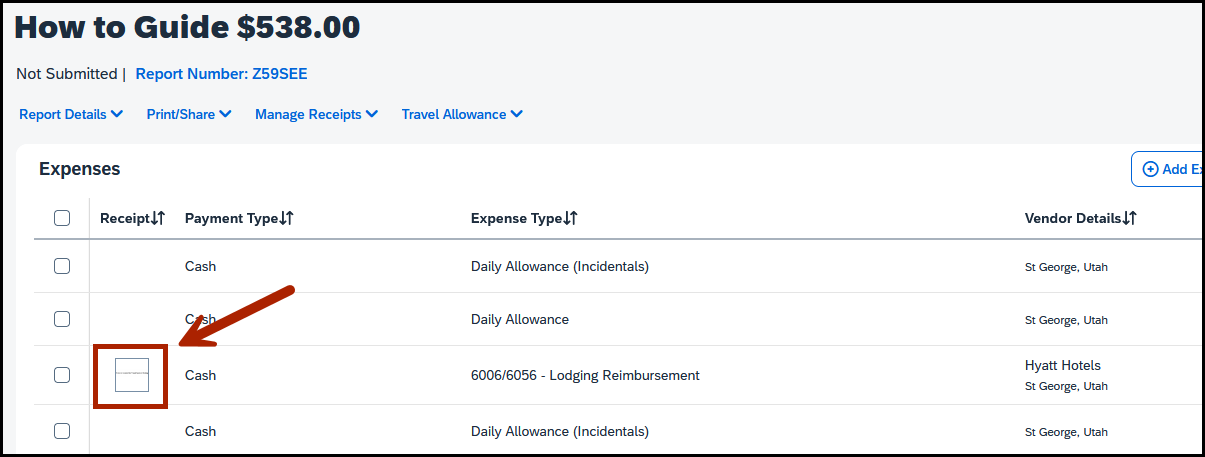
How to use the missing receipt affidavit
In the Add Expense screen, expenses that need a receipt are marked with the attach receipt icon, which is a blue square with an arrow inside.
Click the attach receipt icon.
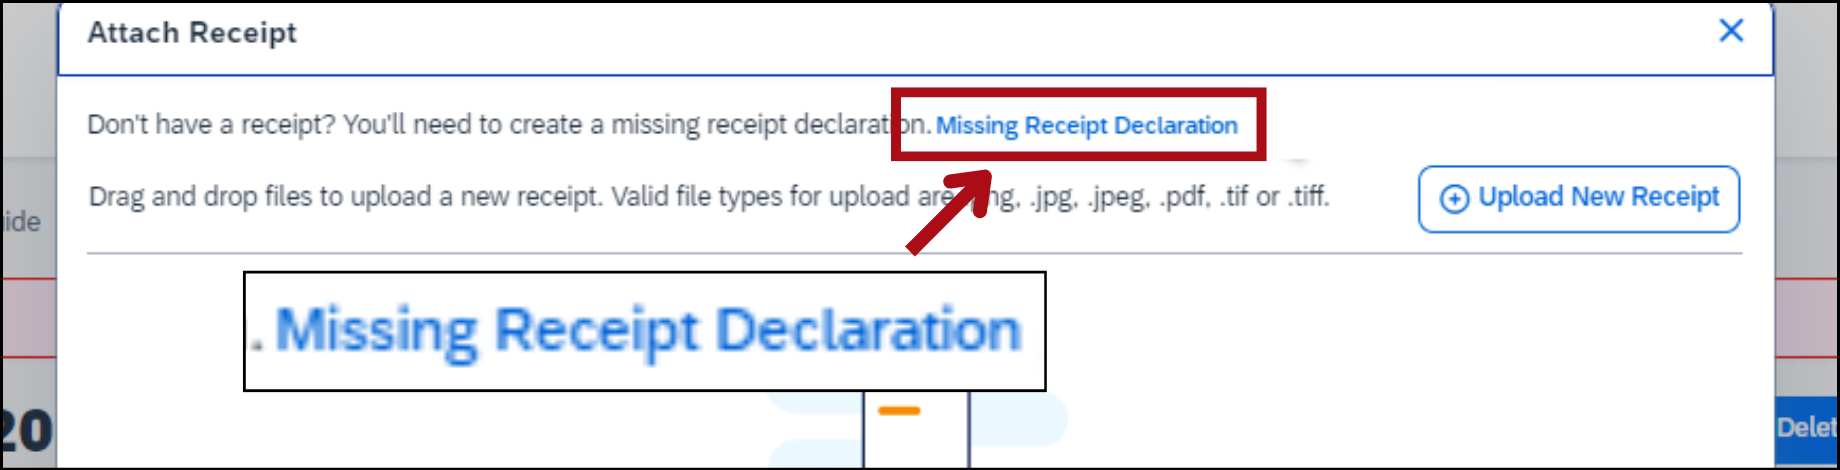
In the Attach Receipt window, click the blue text Missing Receipt Declaration.
Select the expense that you don’t have a receipt for, read the statement, and click Accept & Create.
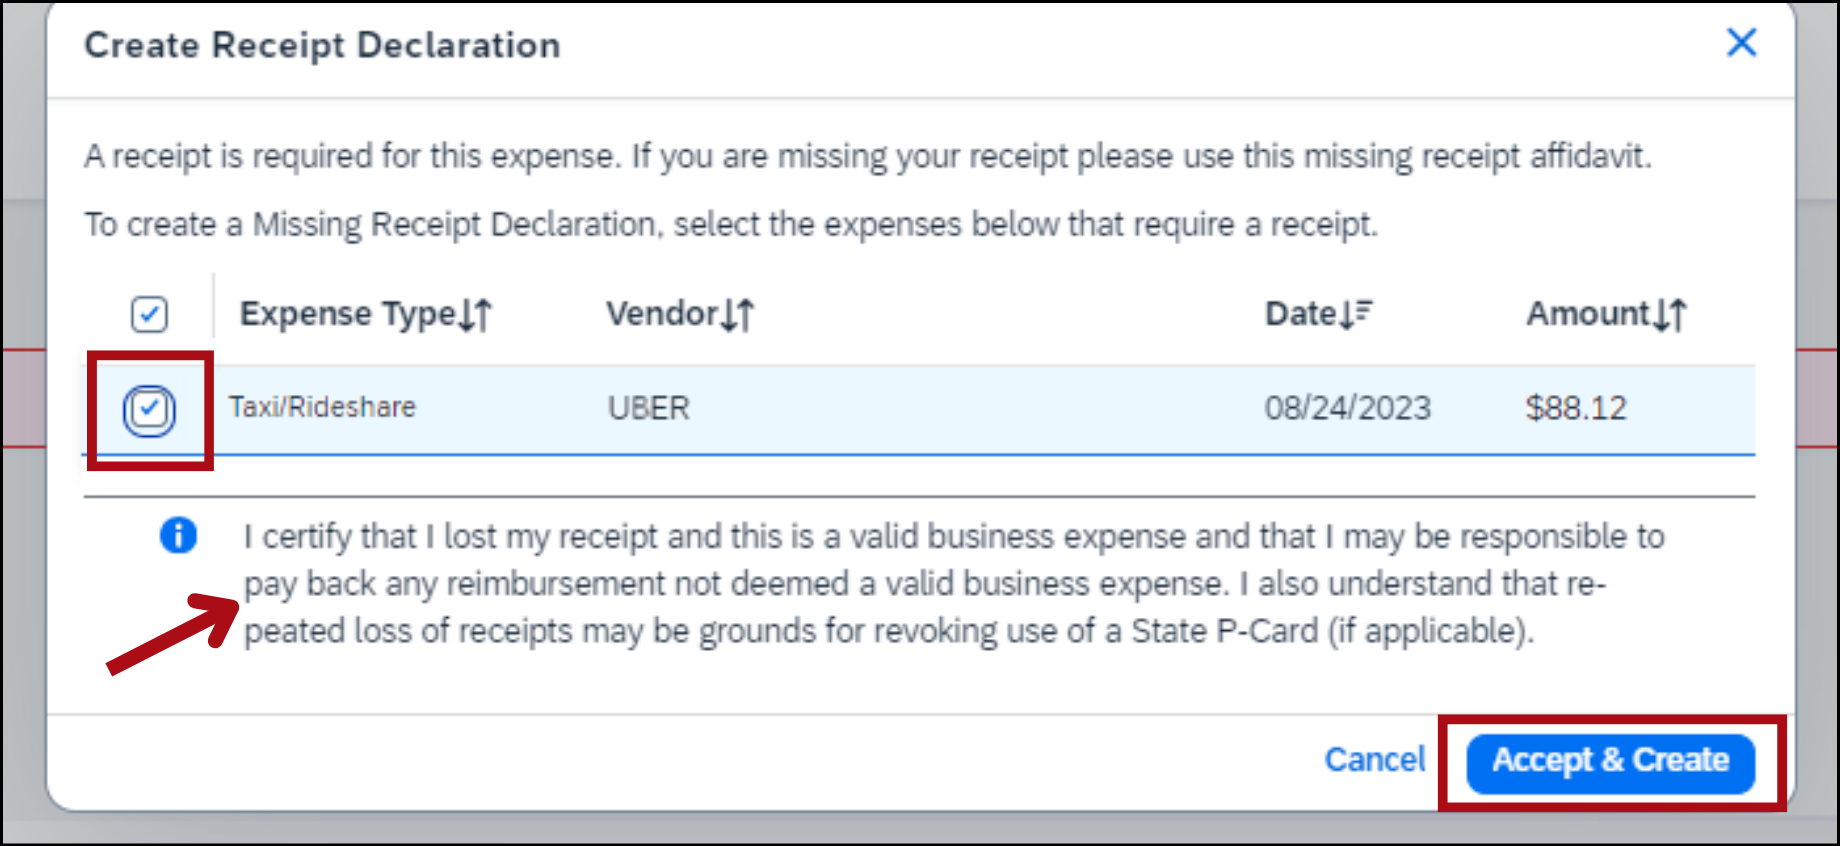
You’re back at the Add Expense screen, and the attach receipt icon has changed into the missing receipt icon, which is a black stamp.

How to itemize your lodging
If you stayed somewhere overnight, you need to add lodging to your reimbursement request. There are 2 options: Lodging Reimbursement and Friends and Family Allowance. When you add either type of expense to your request, you need to use the itemizations tab.
Lodging Reimbursement: you stayed in a hotel, at a vacation rental site (Airbnb or VRBO), or at a campground.
Friends and Family Allowance: you stayed with friends or family.

From the add expense screen, click the white and blue button Add Expense.
Select the right lodging expense.
In this example, we’ll select Lodging Reimbursement because we stayed in a hotel.
You’ll see a data entry screen where you can add details about the expense.
After you enter the details and attach the receipt, click the Itemizations tab.
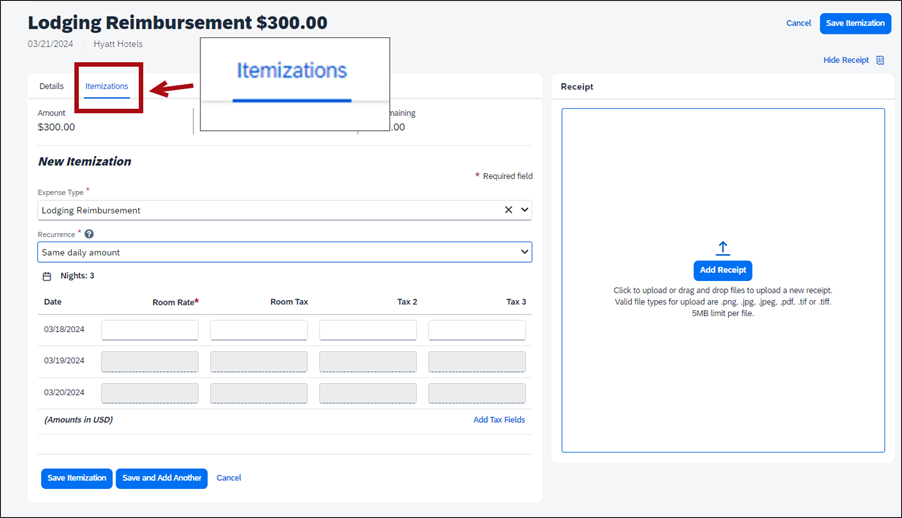
In the Recurrence field, Select Not recurring if parking was a lump sum on one day. Select Same daily amount if your room rate was the same each night. Select Different daily amount if your room rate was different on some nights.
For this example, we’ll choose Different Daily Amount.

In the Room Rate field, enter the nightly rate of the room.
In the Room Tax fields, enter the amount of taxes and service fees. For example, you could enter the taxes in the Room Tax box and the service fee in the Tax 2 box.

Separating the room rate from the taxes and fees is optional. Instead of putting the tax and fees in the Tax boxes, you could add them to the room rate. Ask your supervisor if there’s a specific way your agency wants you to fill in these fields.
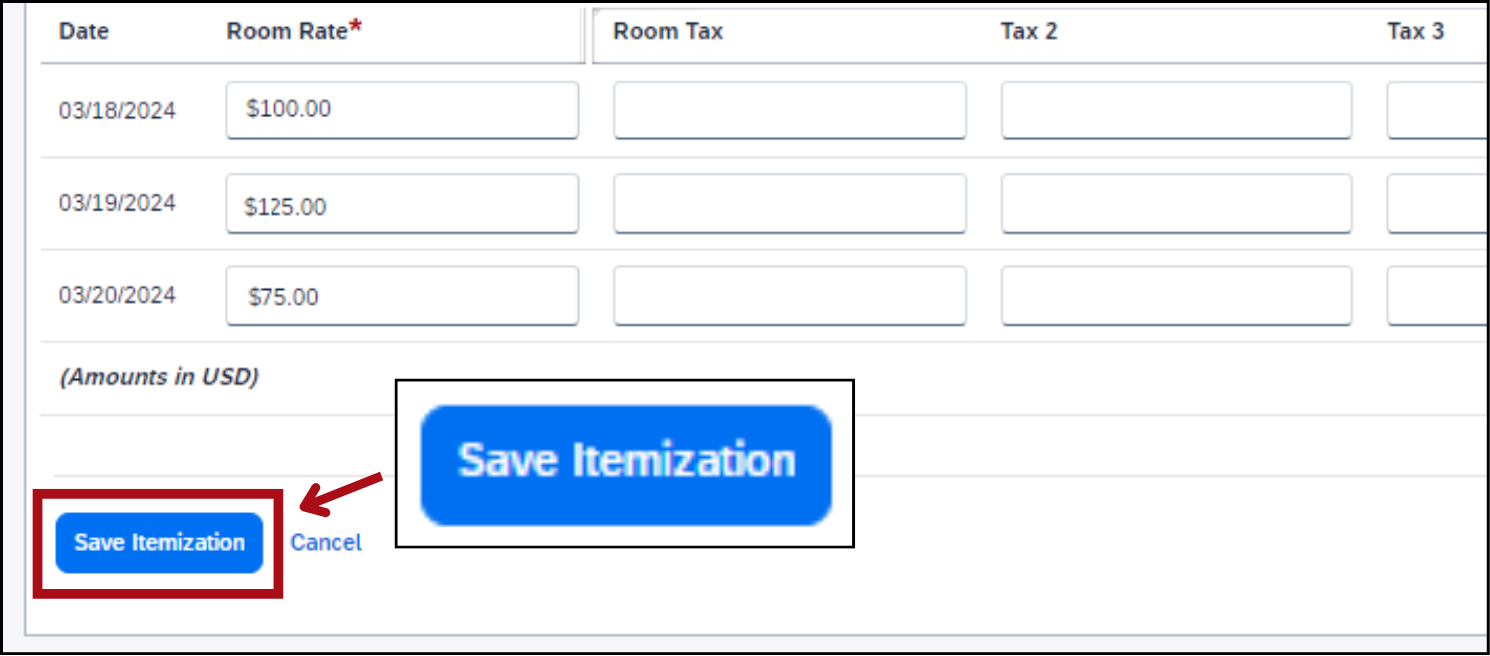
When you’re done, click Save Itemization in the bottom-left corner.
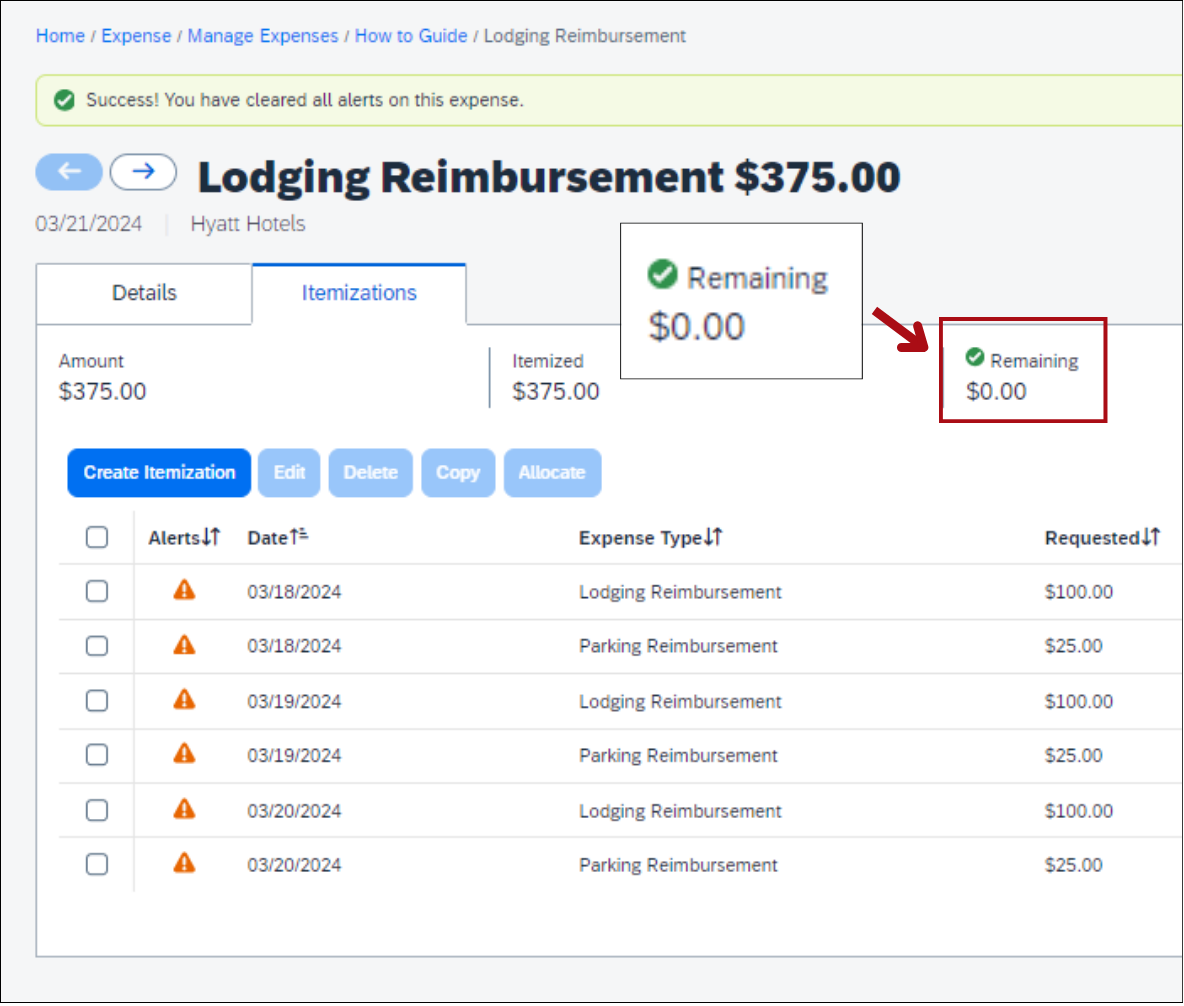
Now the Itemizations tab shows each night as a separate line item.
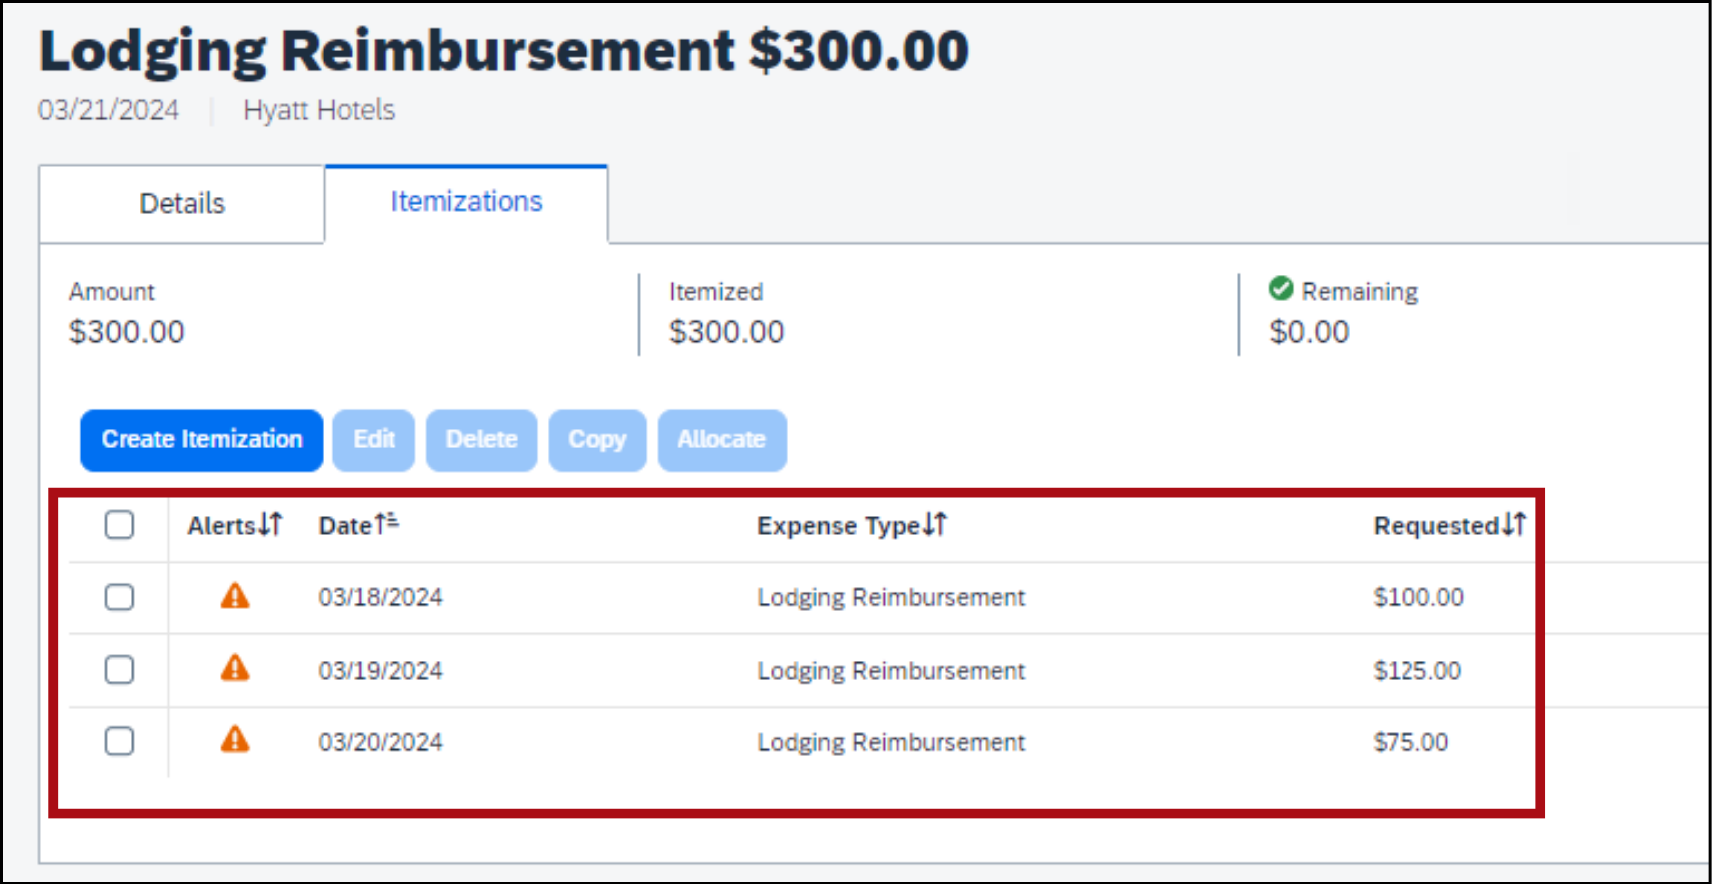
If everything is itemized correctly, you’ll see a green check mark with a remaining balance of $0.00.
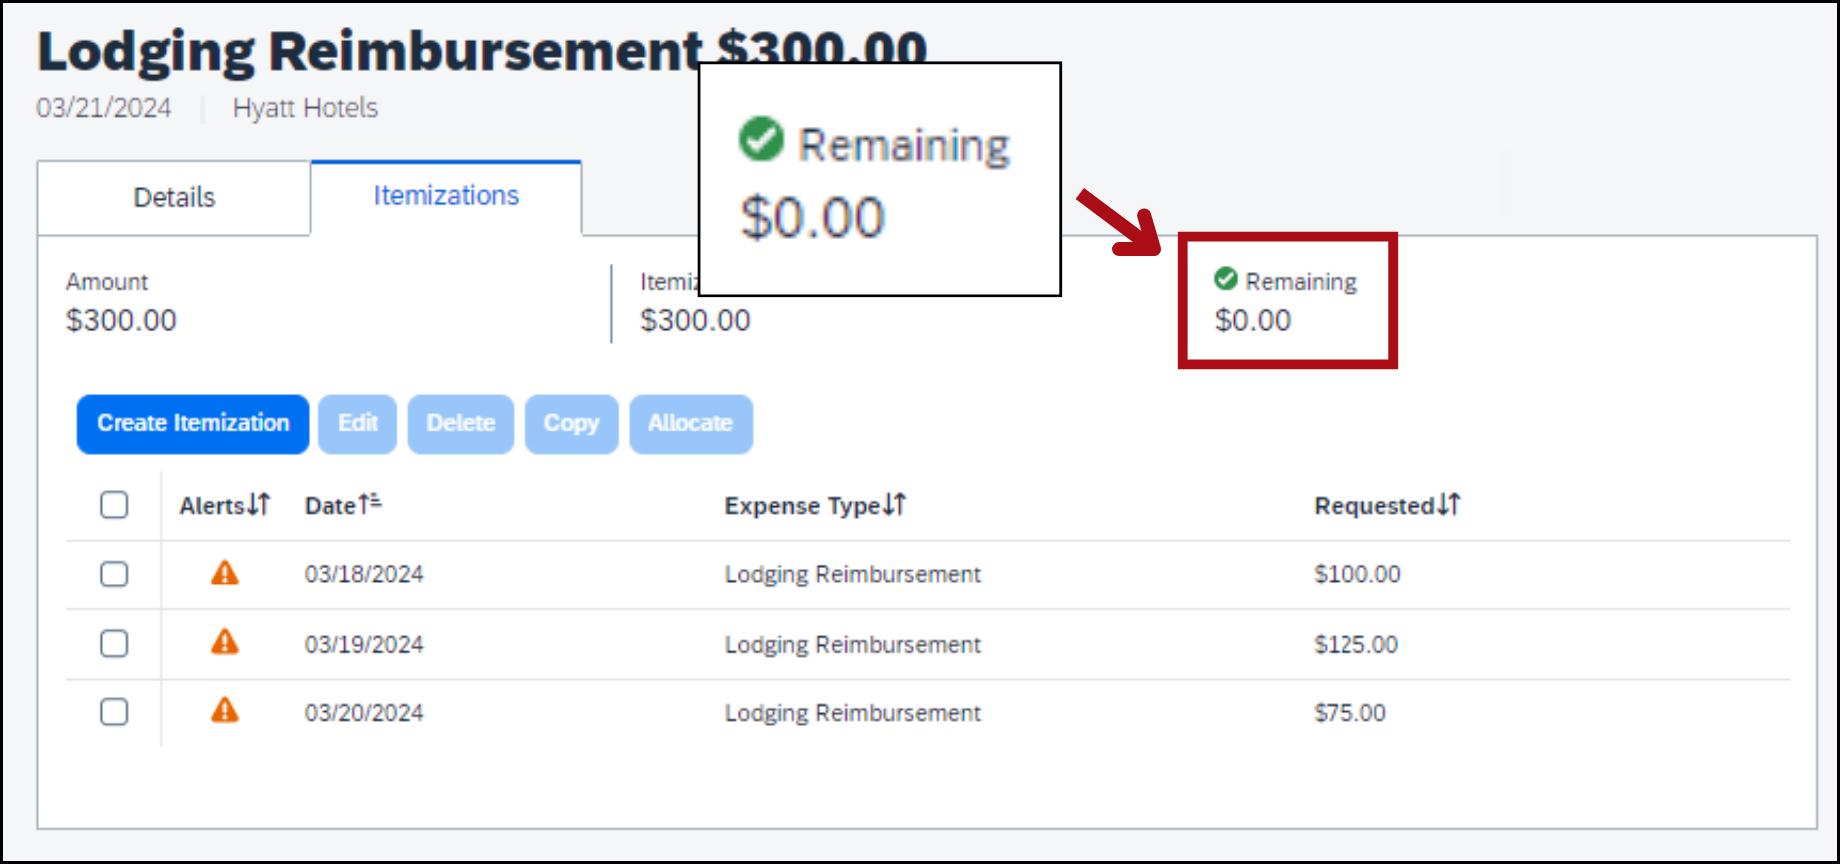
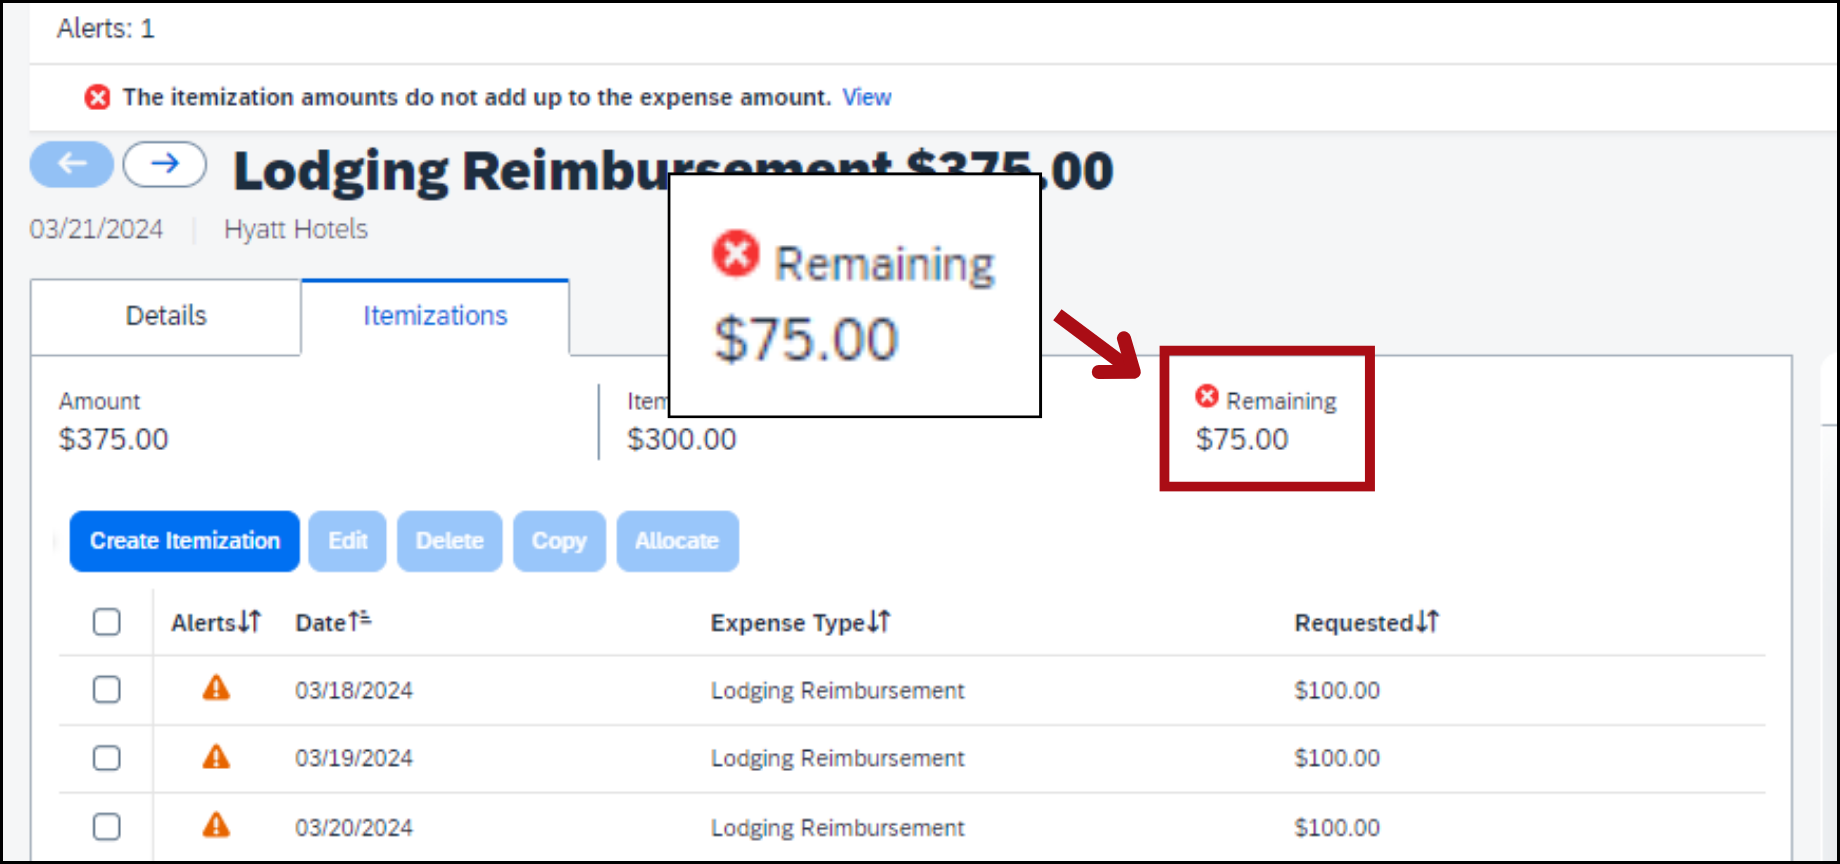
If the itemized amounts don’t equal the total amount of the expense, you’ll see a red x with the remaining balance.
In this example, our hotel invoice also included a parking fee of $75.00, so we need to itemize the parking fee. Continue to the next section to learn how to add another itemization.
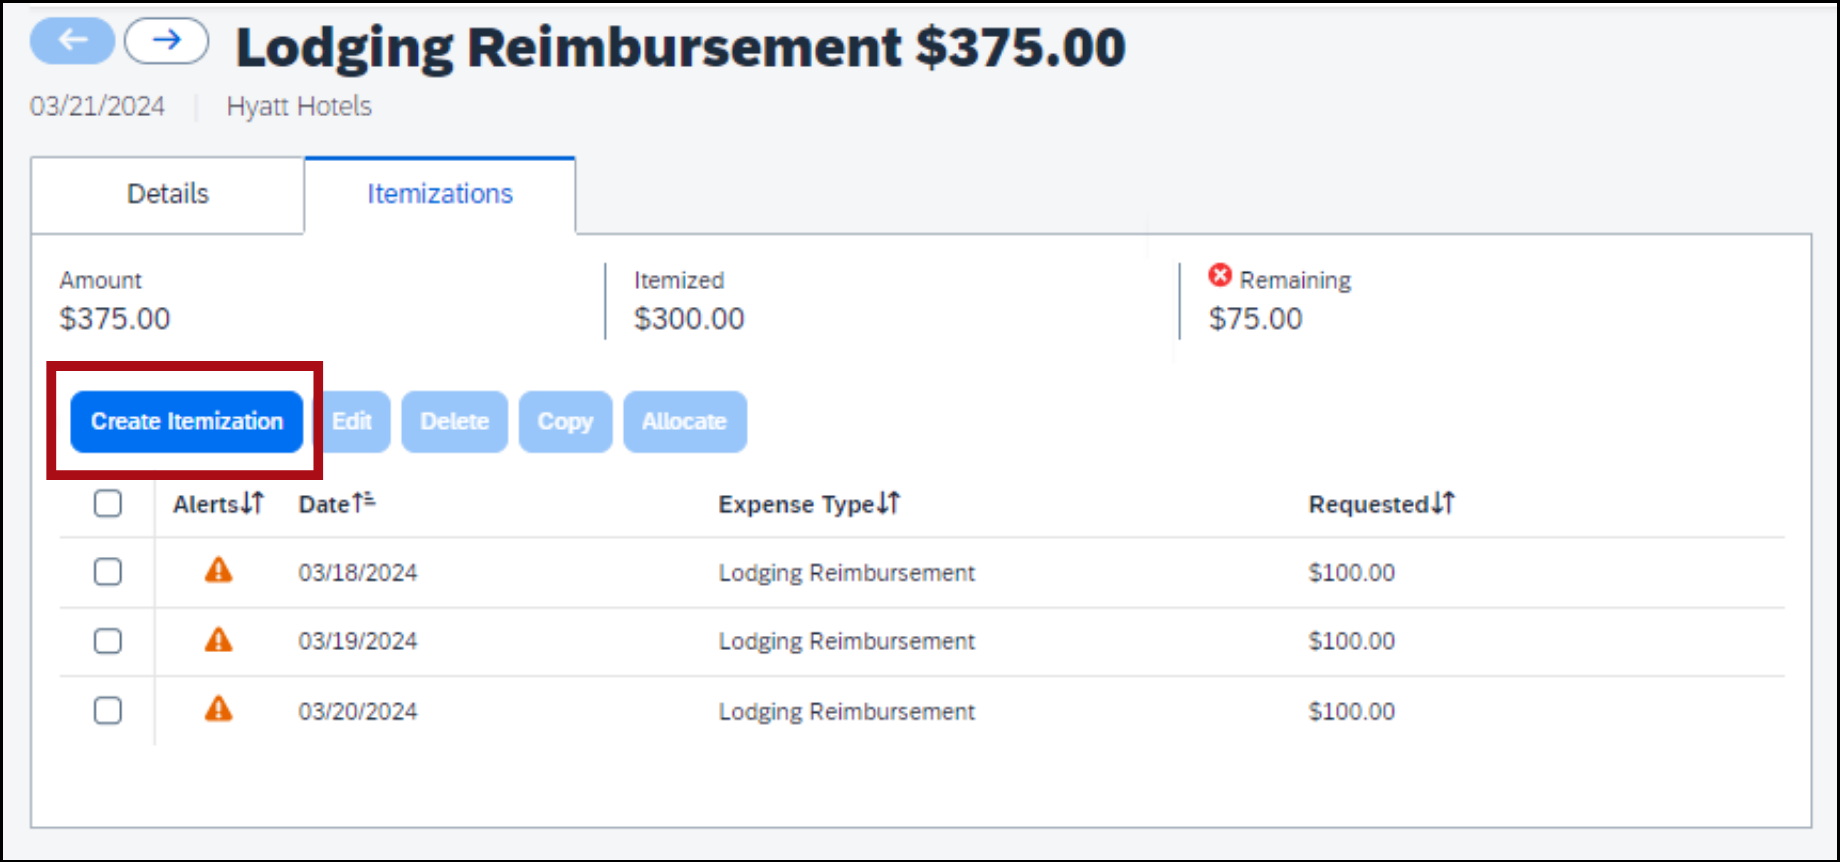
How to add another itemization
Click the blue button Create Itemization.
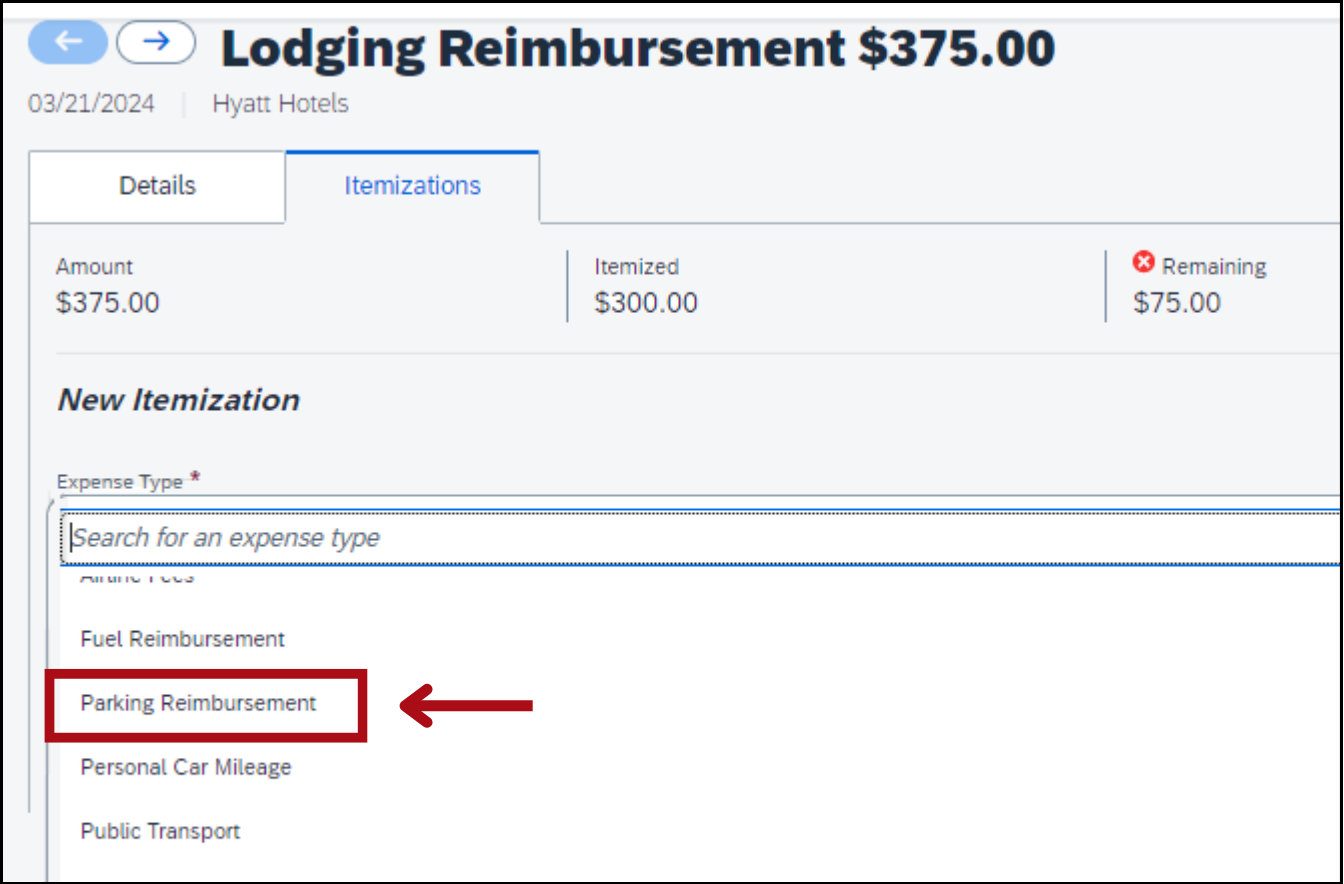
Select the right expense from the drop-down menu.
In this example, we’ll select Parking Reimbursement.
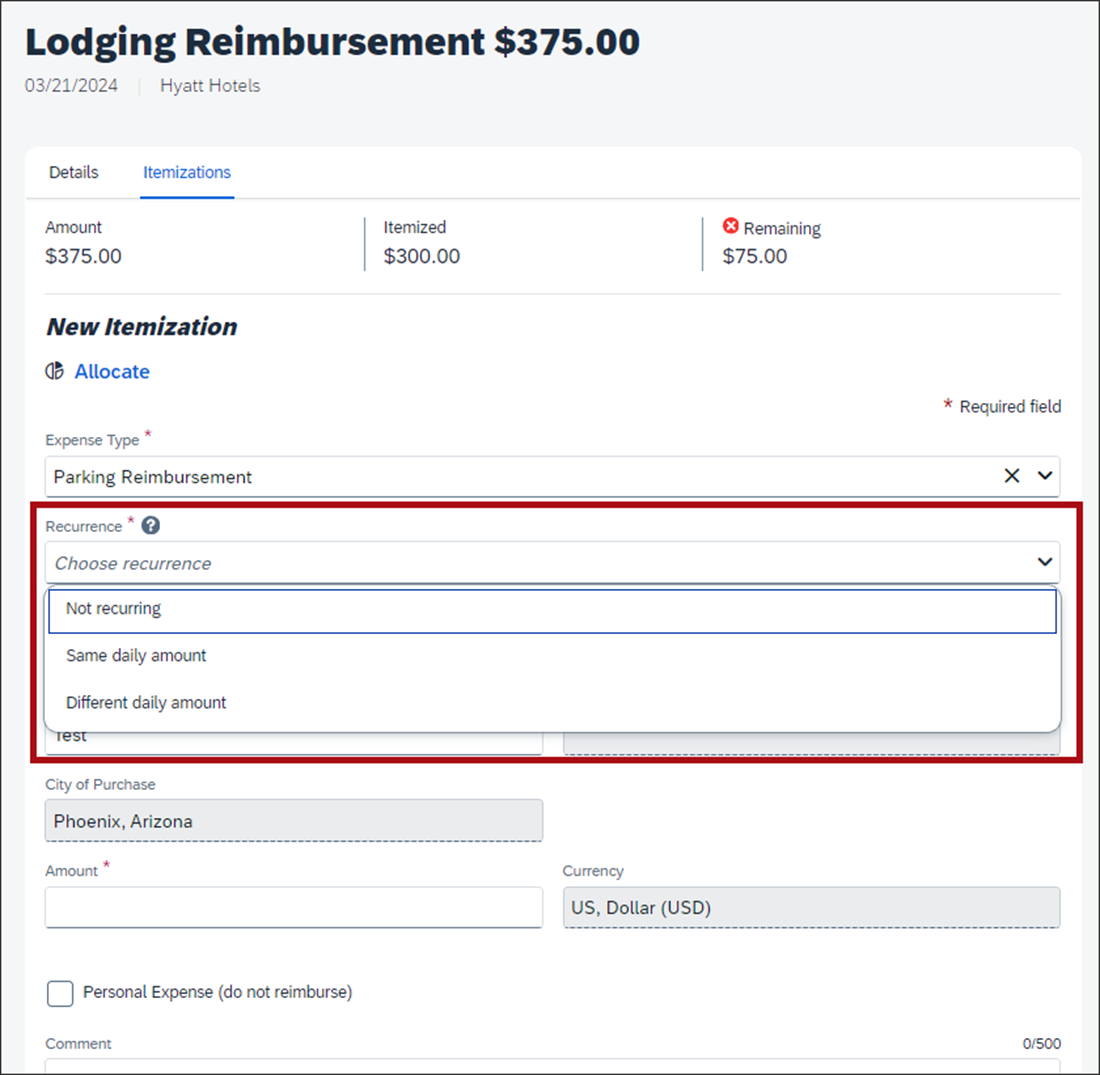
Under the section New Itemization, fill in the fields.
In the Recurrence field, select Not recurring if parking was a lump sum on one day.
Select Same daily amount if parking cost the same each day.
Select Different daily amount if parking was different some days.
When you’re done, click Save Itemization.
In the Itemizations tab, you’ll see a green checkmark and a balance of $0.00. Your itemizations are complete!
If this expense is complete, click Save Expense.
Alerts and errors
Alerts and errors appear at the top of your reimbursement request.

Alerts
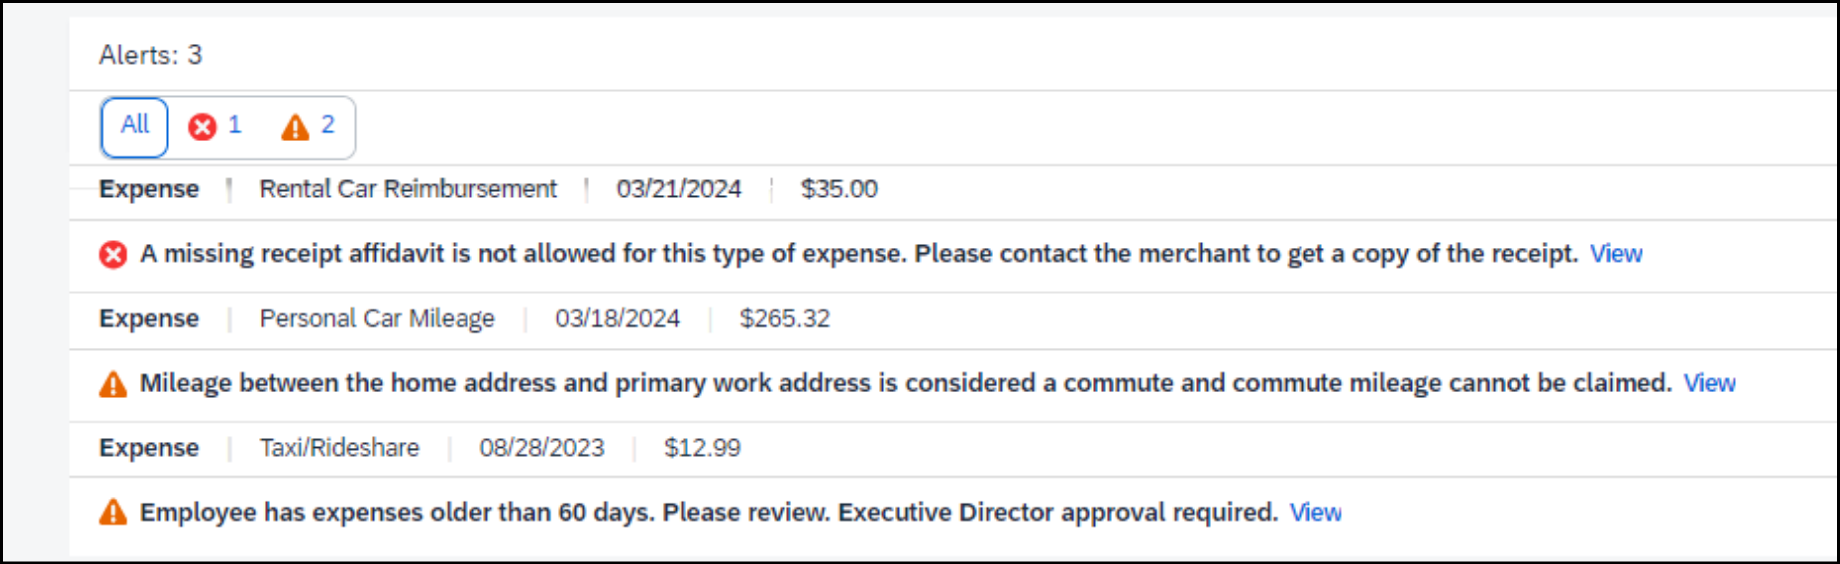
Alerts are represented with the orange triangle icon. Alerts give helpful information about policy and appear even if you’ve followed policy. Alerts don’t go away.
For example, if you add a personal mileage expense, you’ll see an alert that says, “Mileage between the home address and primary work address is considered a commute and commute mileage cannot be claimed.” This alert is just a reminder that you can’t be reimbursed for commute mileage.
You can submit your reimbursement request if you see an alert.

Errors
Errors are represented with the red circle icon. An error icon means there‘s a problem with your reimbursement request that needs to be fixed before you can submit it. Once you fix the problem, the error message will disappear.
You can’t submit your reimbursement request if you see an error.
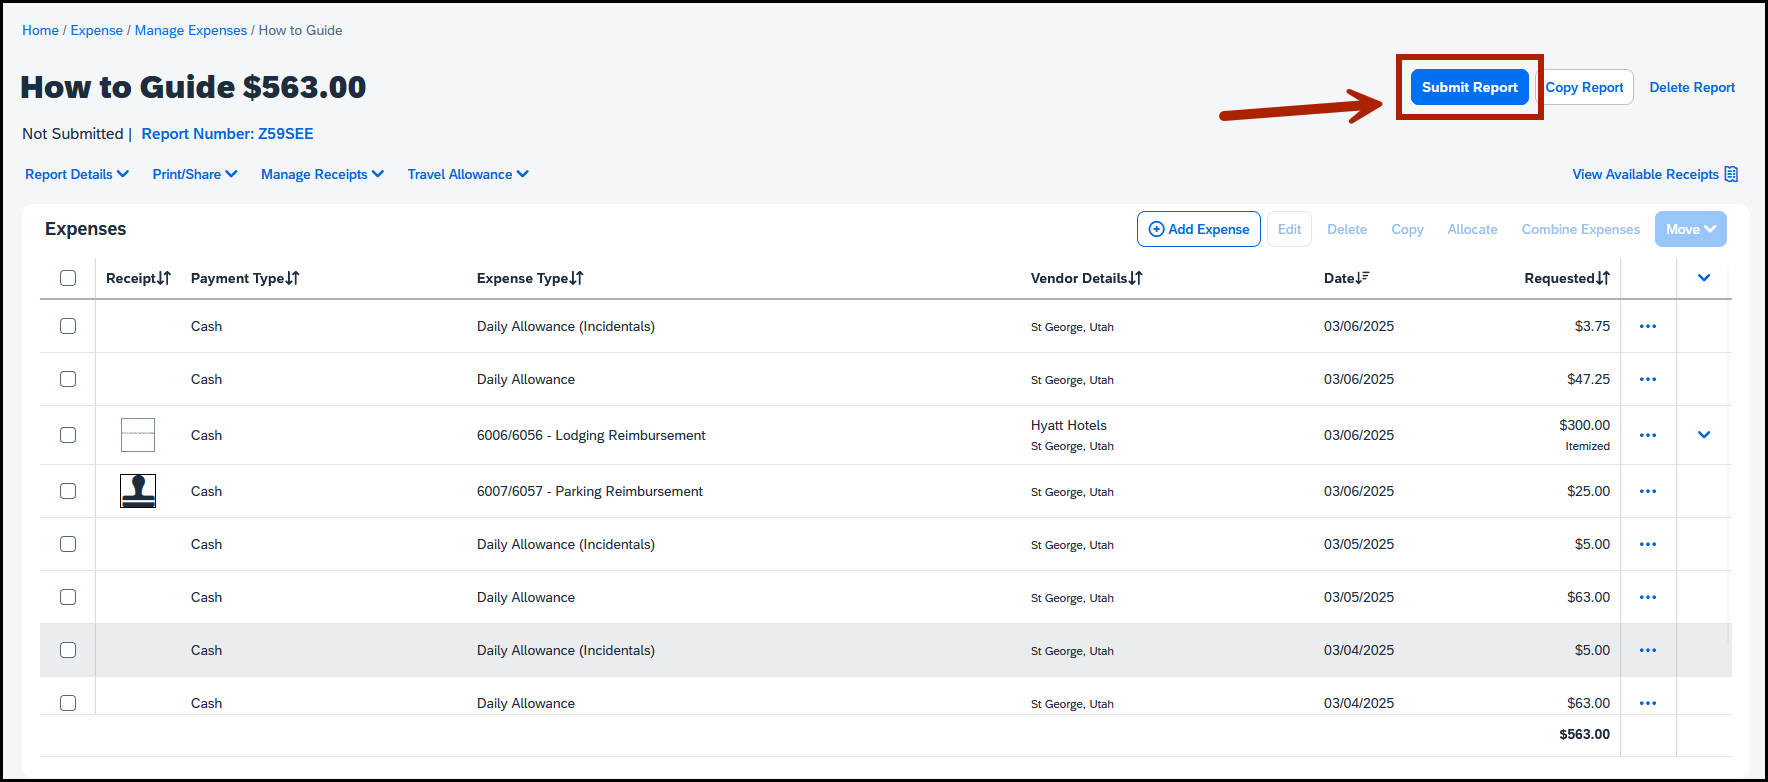
Submit the reimbursement request
From the Add Expense screen, click the blue button Submit Report in the upper right.
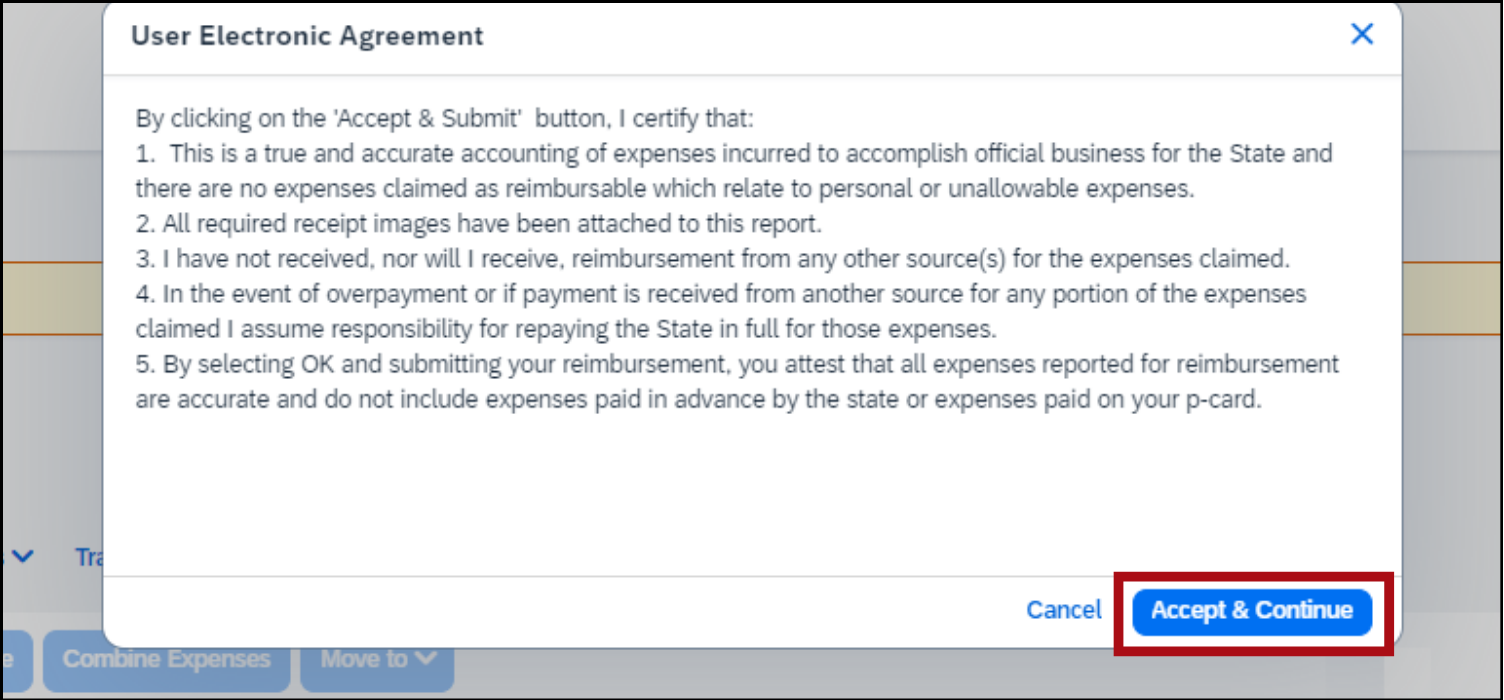
You’ll see a pop-up window labeled User Electronic Agreement. Read it and click Accept & Continue.
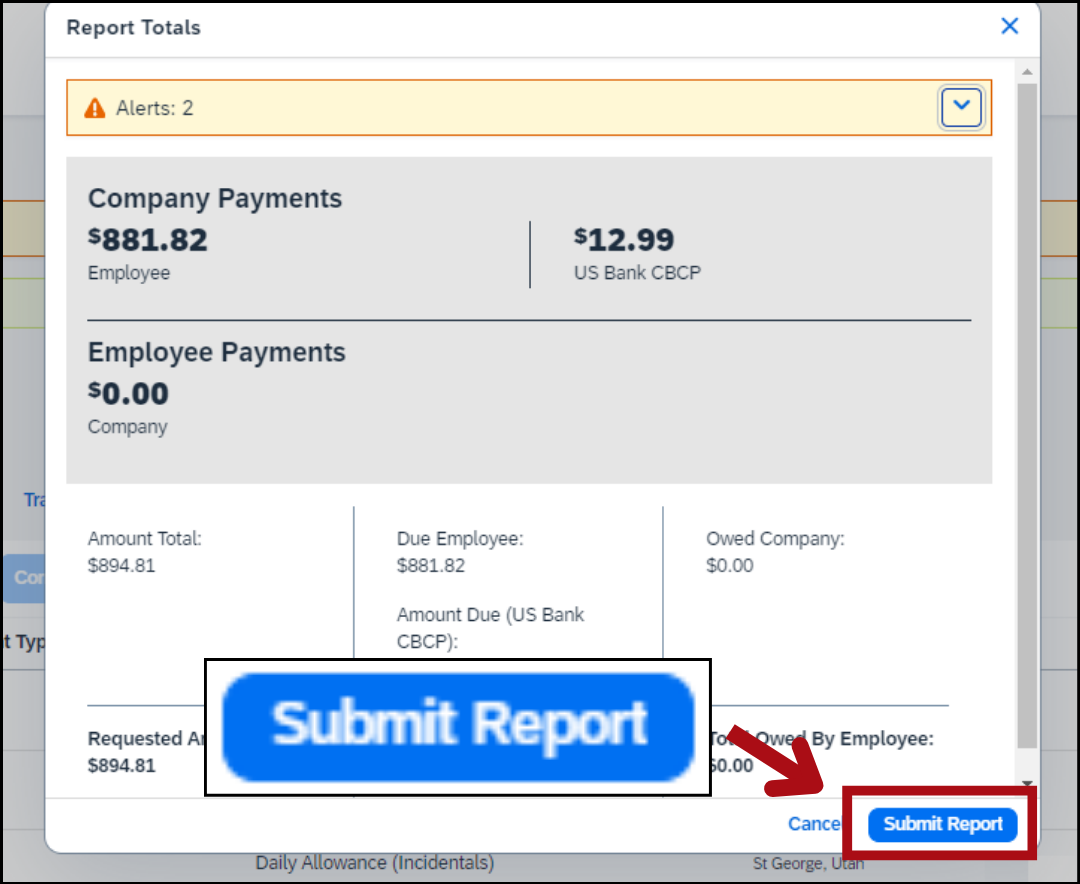
You’ll see another pop-up window labeled Report Totals.
Check that the information is correct and click Submit Report.
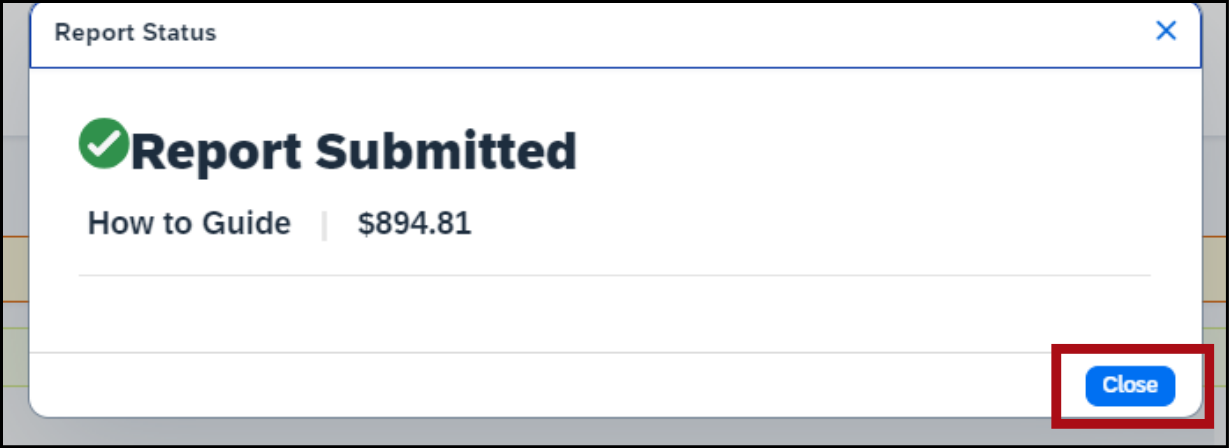
Your reimbursement request is submitted!
Click Close.
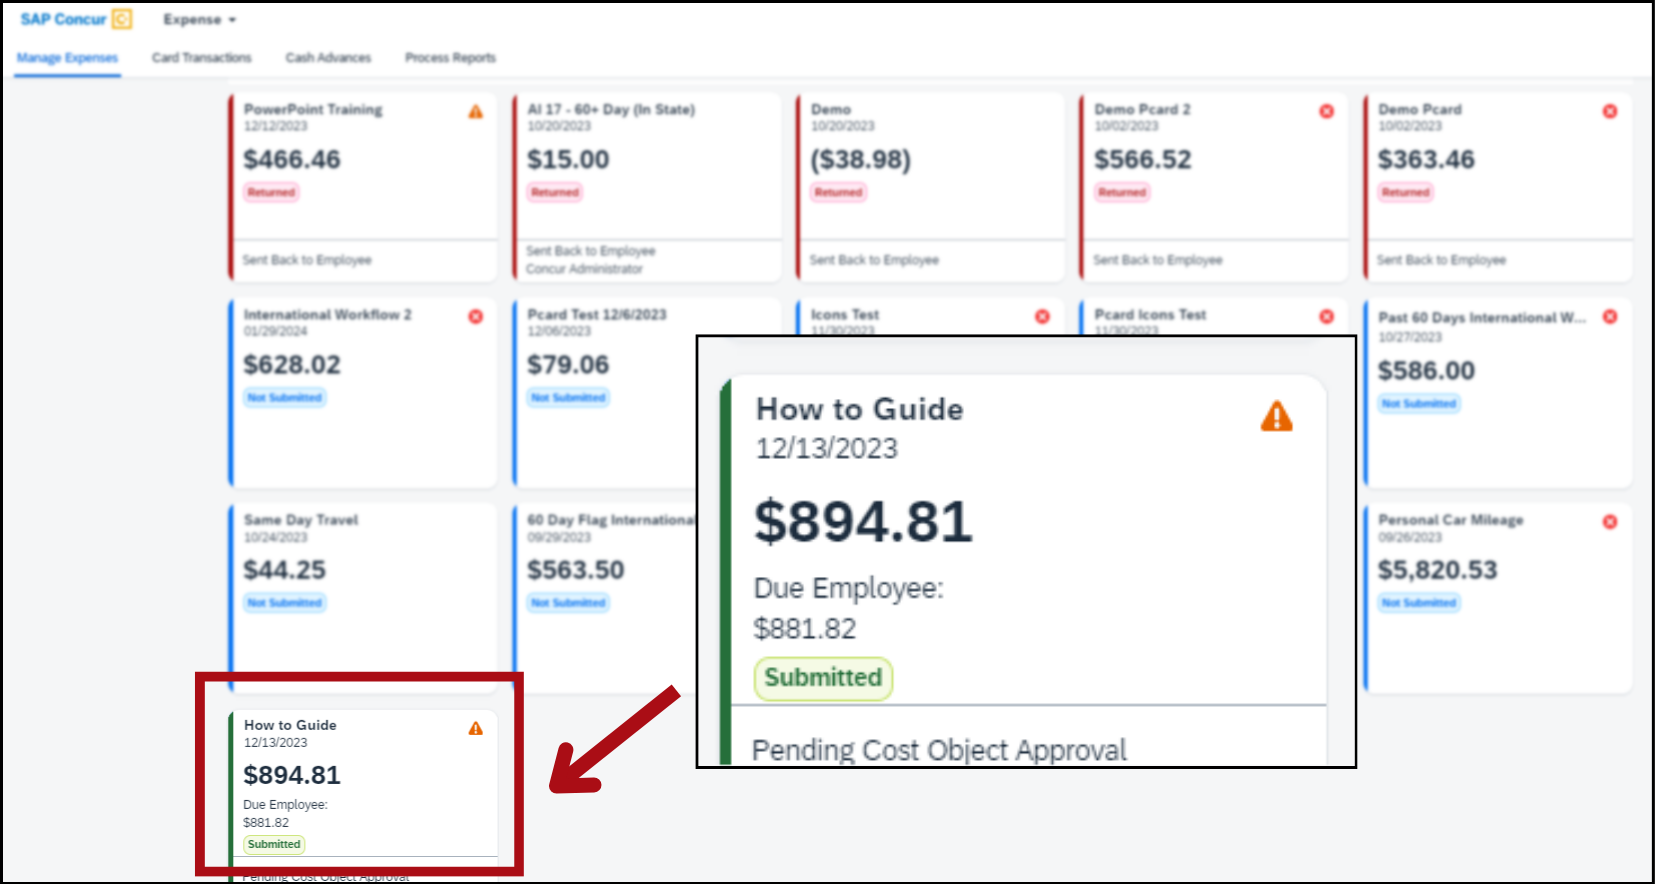
Your reimbursement request now appears in the Manage Expenses screen. It shows that it has been submitted and is pending cost object approval, which means it’s been sent to the budget officer for approval.
You might also like...
Concur help
Learn about Concur, find more how-to guides, and get answers to common questions
P-card help
Learn about p-card reconciliation and get answers to common questions
Edit a request
Learn how to make changes to a travel request, reimbursement request, or p-card reconciliation
Reimbursement request policy
Read travel policy 10-6: Reimbursement requests